Sei Bella Solids Quilt
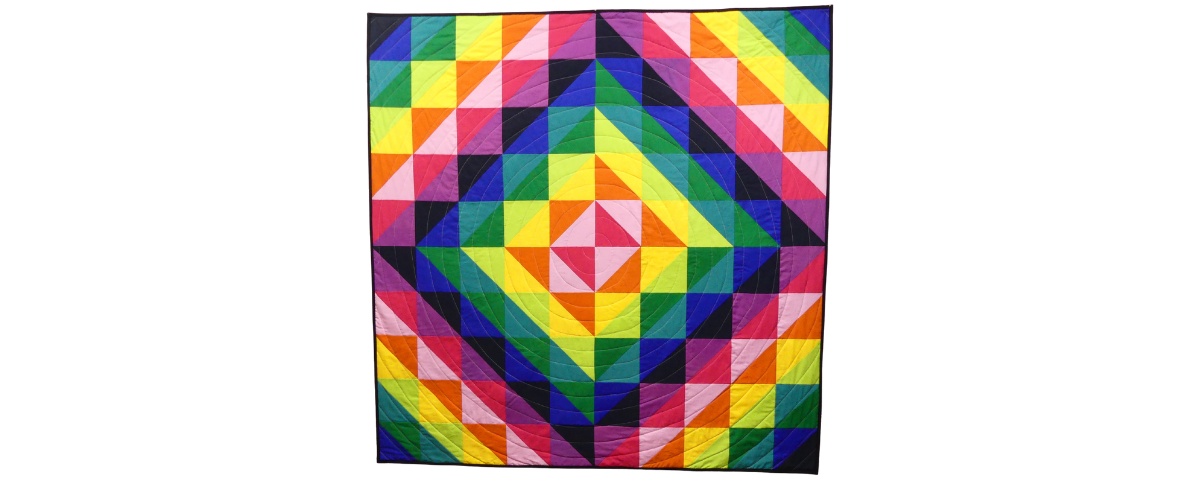
This solids quilt is easy to make in a variety of sizes and can be finished in a weekend, using 10 Moda Bella Solid colours. You can pick your favourites!
If you want to make a bigger quilt finishing at 80″ square, follow the italicized instructions in brackets (like this).
Finished Size: 60″ square (but includes instructions for making 80″)
Difficulty: Ambitious Beginner
Time to make: One week
Seam allowances are ¼” throughout.
Here’s what you’ll need for this Sei Bella Solids Quilt tutorial:
- Sewing machine
- Cutting tools: rotary cutter, mat and ruler
- 10x 1/2m (3/4m) Moda Bella Solids. The colours used here are:
Colour 1 – Navy
Colour 2 – Lapis
Colour 3 – Cyclamen
Colour 4 – Lagoon
Colour 5 – Leprechaun
Colour 6 – Summer House Lime
Colour 7 – Sunflower
Colour 8 – Clementine
Colour 9 – Amelia Pink
Colour 10 – Azalea - 1/2m (3/4m) binding fabric – we used Black Bella Solid
- 4m (2 1/2m extra wide) backing fabric
- General sewing notions: iron, marking pen, pins, scissors, thread, etc.
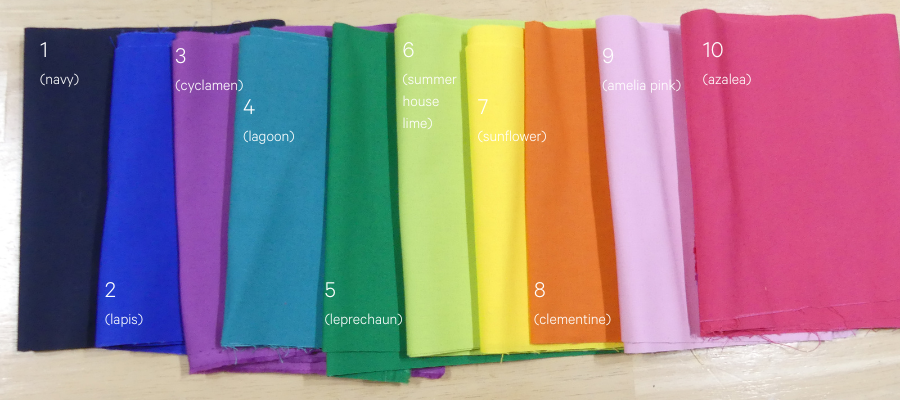
From each of the 10 colours, cut 10 7″ (9″) squares – for a total of 100 squares. Cut two (three) strips across the width of fabric first, then sub-cut into squares.
Make two piles of five squares of each colour, for a total of 20 piles.
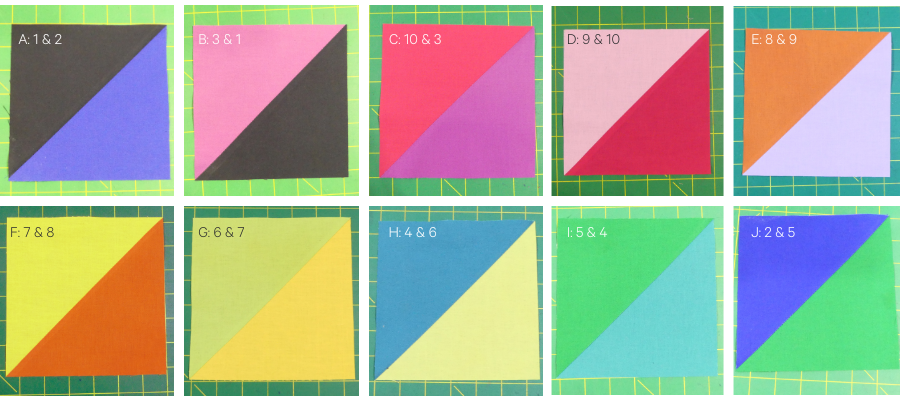
Pair up the piles to prepare for making half-square triangles (HSTs) out of the colours as follows:
HST A: 1 (Navy) and 2 (Lapis)
HST B: 3 (Cyclamen) and 1
HST C: 10 (Azalea) and 3
HST D: 9 (Amelia Pink) and 10
HST E: 8 (Clementine) and 9
HST F: 7 (Sunflower) and 8
HST G: 6 (Summer House Lime) and 7
HST H: 4 (Lagoon) and 6
HST I: 5 (Leprechaun) and 4
HST J: 2 and 5
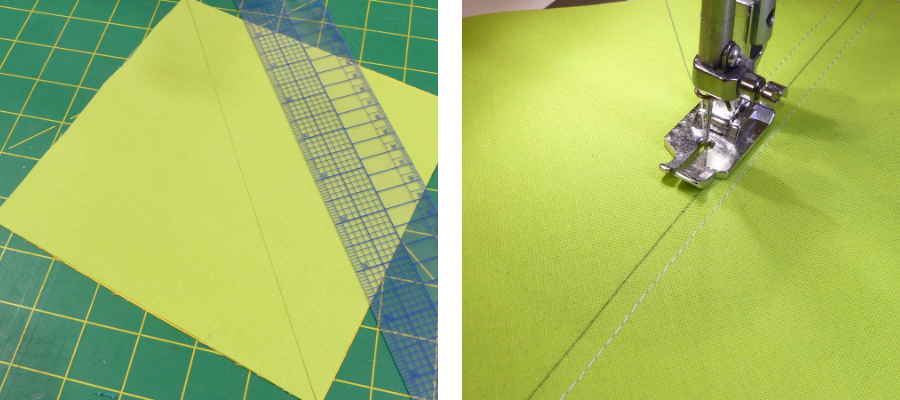
Pair fabric squares right sides together and then draw a diagonal line from corner to corner on the reverse of the lightest colour square.
Sew at ¼” on either side of the line and cut apart. Repeat for all 50 pairs to make 100 HSTs.
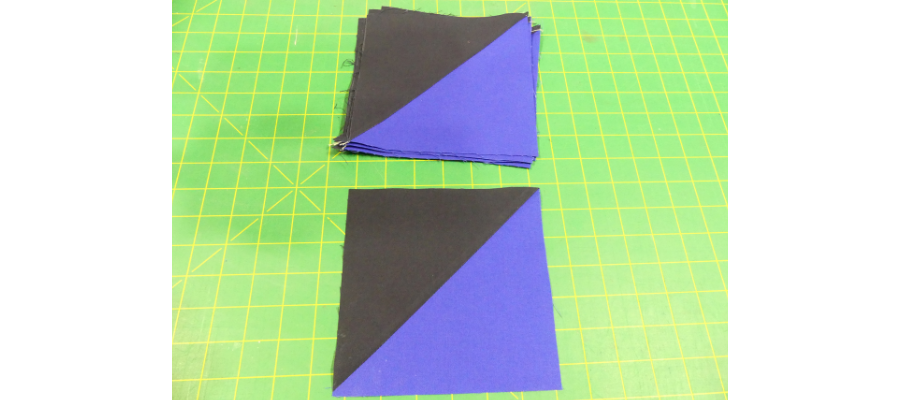
Trim each HST down to 6 ½” square, making sure the seam runs corner to corner. Trimming will make it easier to match the seams when you sew them together and keep the points sharp.
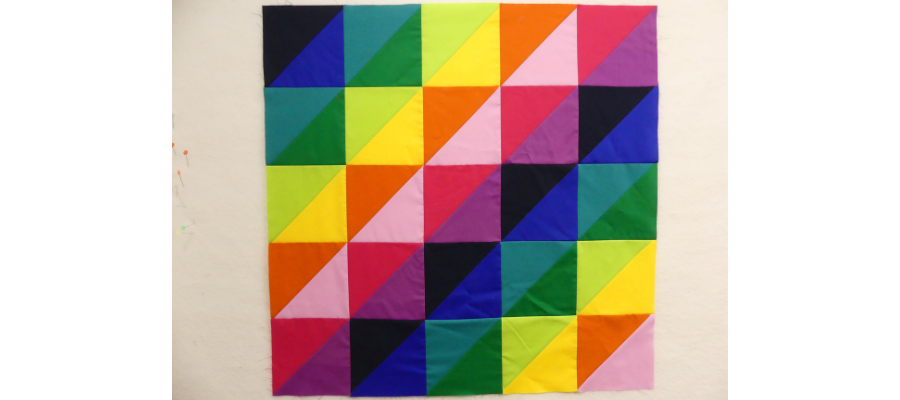
Arrange a 5 x 5 grid of HSTs, using the image as a reference. You will need five of each of the following: HST A, C, E, G, and I. The seams run from bottom left to top right. HST A is arranged so that colour 1 is on the top. HST C is arranged so that colour 10 is on the top. HST E is
arranged so that colour 8 is on the top. HST I is arranged so that colour 5 is on the top. HST G is arranged so that colour 6 is on the top.
The rows are then sewn in the following order:
A, I, G, E, C
I, G, E, C, A
G, E, C, A, I
E, C, A, I, G
C, A, I, G, E
Press the seams in alternate directions on each row. This will help match the seams as you sew the rows together.
Press well and make two blocks.
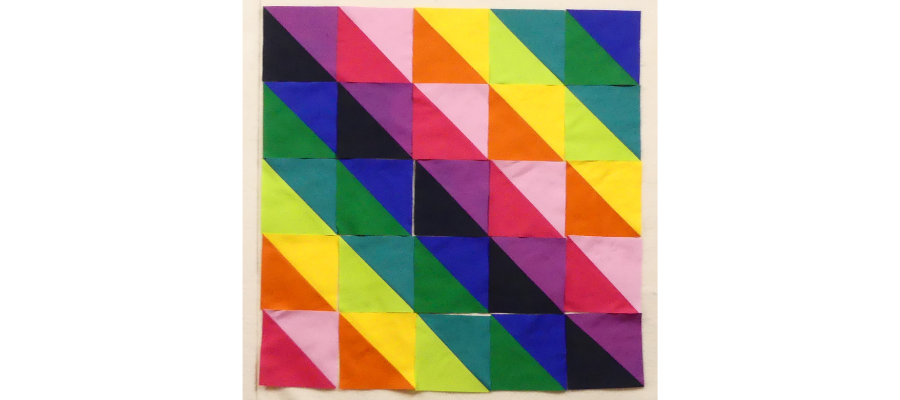
For the second block, you will need five each of: HST B, D, F, H and J. The seams run from top left to bottom right. HST B is arranged so that colour 3 is on the top. HST D is arranged so that colour 9 is on the top. HST F is arranged so that colour 7 is on the top. HST J is arranged so that colour 5 is on the top. HST J is arranged so that colour 2 is on the top.
Sew the rows in the following order:
B, D, F, H, J
J, B, D, F, H
H, J, B, D, F
F, H, J, B, D
D, F, H, J, B
Press the seams in alternate directions on each row. This will help match the seams as you sew the rows together.
Press well and make two blocks.
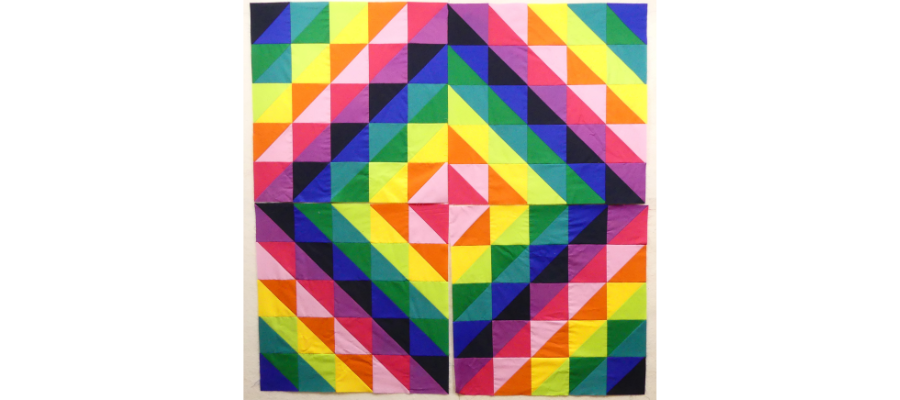
Assemble the four blocks so that the colour 9 and 10 triangles meet in the centre, opposite the matching colour. Sew the two top blocks together, followed by the two bottom ones, pressing the seams in alternate directions. Then sew the two rows together to complete the top.
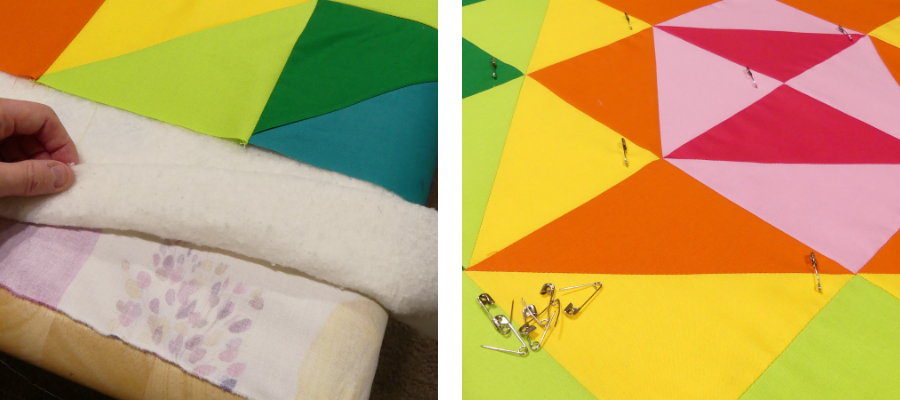
Layer your backing fabric, batting and quilt top so they’re nice and smooth. Pin or spray-baste the layers together.
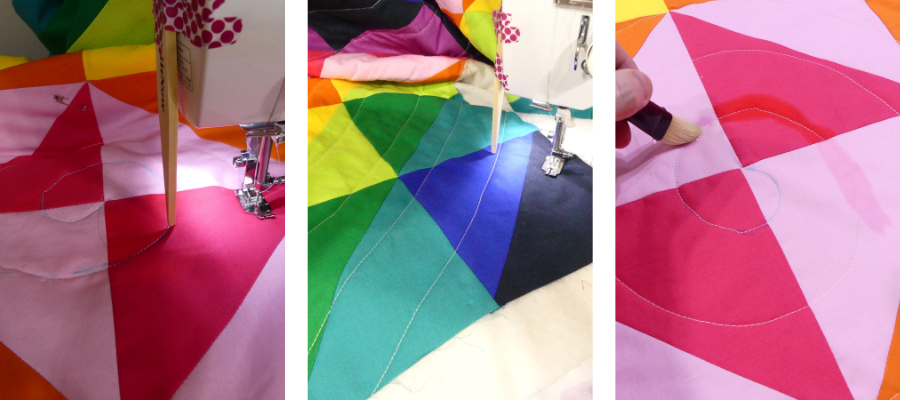
Quilt however you like. For this quilt, we started to mark a spiral in the centre, then followed the circle evenly all the way out to the edges of the quilt. Once at the edges, we echo-quilted to finish the whole top, then removed the markings in the centre.
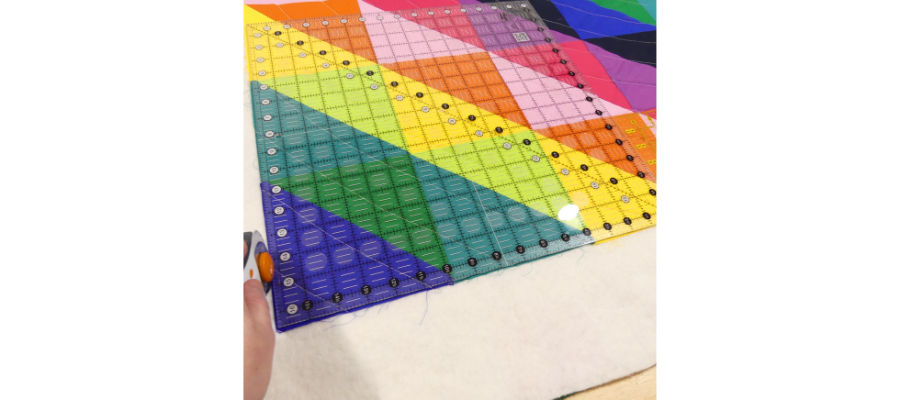
After quilting, use a large ruler to ensure the corners are right angles, and trim the excess backing and batting away.
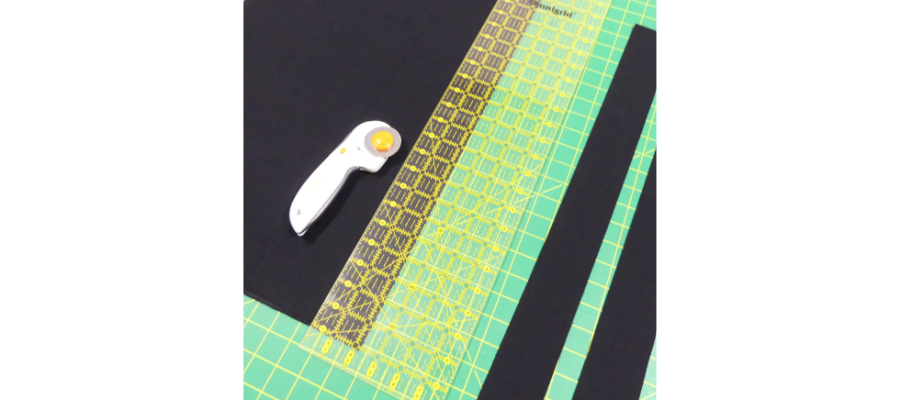
Cut six (nine) 2 ¼”-wide strips across the width of the binding fabric.
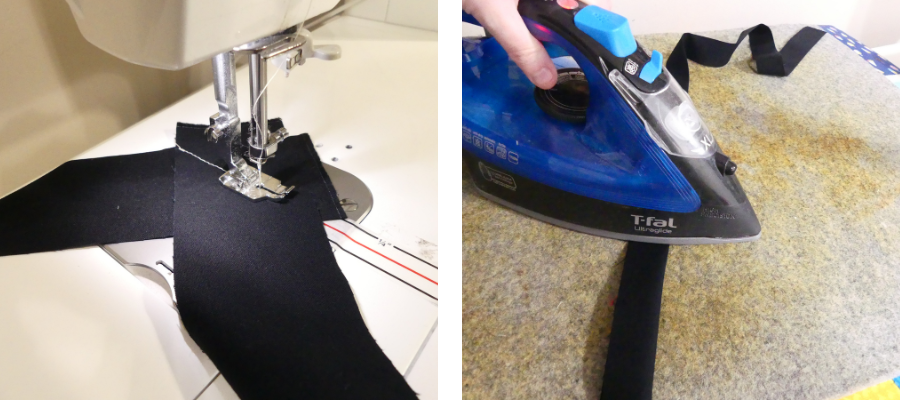
With right sides together, position the ends of two strips at a right angle to each other. Stitch across diagonally from outside edge to outside edge. Keep going with the rest of your strips until you have a long continuous strip and then trim off the excess fabric.
Press the strip along the entire length with wrong sides and raw edges together.
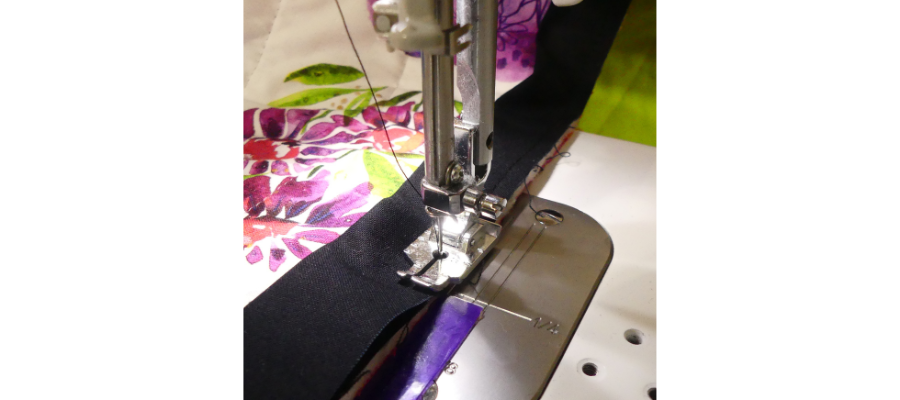
Leaving a tail of around 5″ and starting somewhere along the centre of the bottom edge, align the raw edges of the binding with the edge of the back of the quilt and start to stitch down with a 1/4″ seam allowance.
When you get to a corner, stop stitching 1/4″ away and backstitch to secure. Rotate so the next edge is on the right, as if ready to be fed through the sewing machine. Then fold the binding strip up so it creates a 45-degree angle from the corner point and finger-press the fold. Bring the binding back down again over this fold, so that the second fold is even with the side of the quilt you just stitched, and the raw edges are aligned with the next edge of your quilt. Stitch down right from the edge.
Keep working around the edges. When you have finished mitring the last corner and are back on the starting side, stop stitching around 4″ from where you started. Trim away the excess binding fabric so each tail is about the same length, but most importantly, so they overlap by the width of the binding before it was pressed. We made a 2 1/4″-wide binding, so the overlap measures 2 1/4″.
Open out the ends of the strips and position, with right sides together, at a 90-degree angle, as you did when you first joined the strips. The end of each strip should be flush with the side. You will likely want to pin in place. Sew diagonally from one outside edge to the other and trim off the excess.
Press this new seam and finish sewing the binding down.
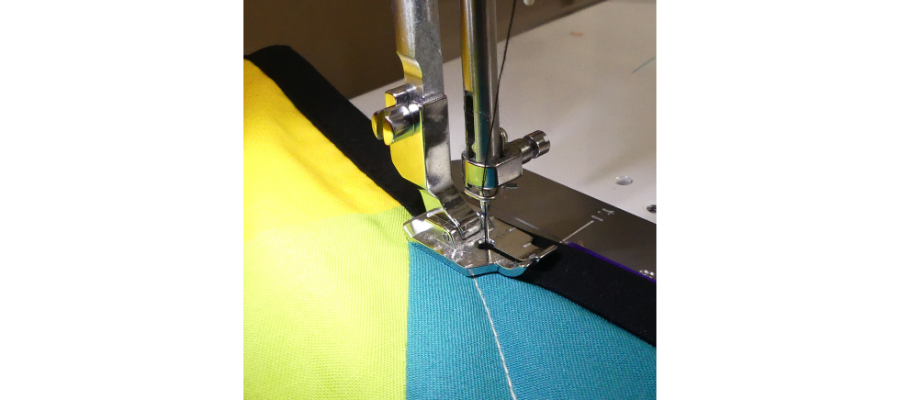
Fold the binding around to the front, just beyond the line of stitching. Pin or clip if you wish. As before, start on a straight edge, not a corner. Use a slightly longer stitch length than usual and sew directly on the binding in a matching colour thread, around 1/8″ from the edge.
When you get to a corner, fold the corner into a mitre so that both sides are parallel to the quilt edge. Stitch slightly into the mitre, pivot with the needle down, pin or clip, and continue with the next side until finished.
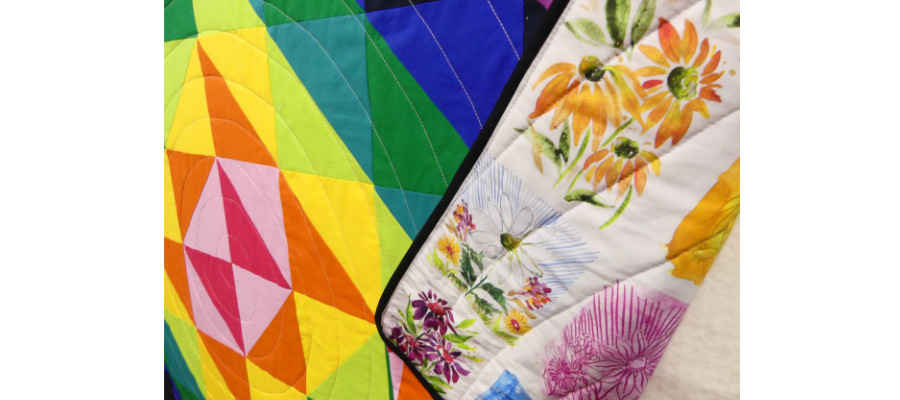
You’re done making your Sei Bella Solids Quilt! We’d love to see your creations on social media and hope you’ll share them with us! Please post, and tag us on Instagram or Facebook so we can celebrate your design! #TrendTexFabrics @trendtexfabrics
Looking for more tutorial and project ideas? Check some other ideas out here.
