Palissade Quilt Tutorial
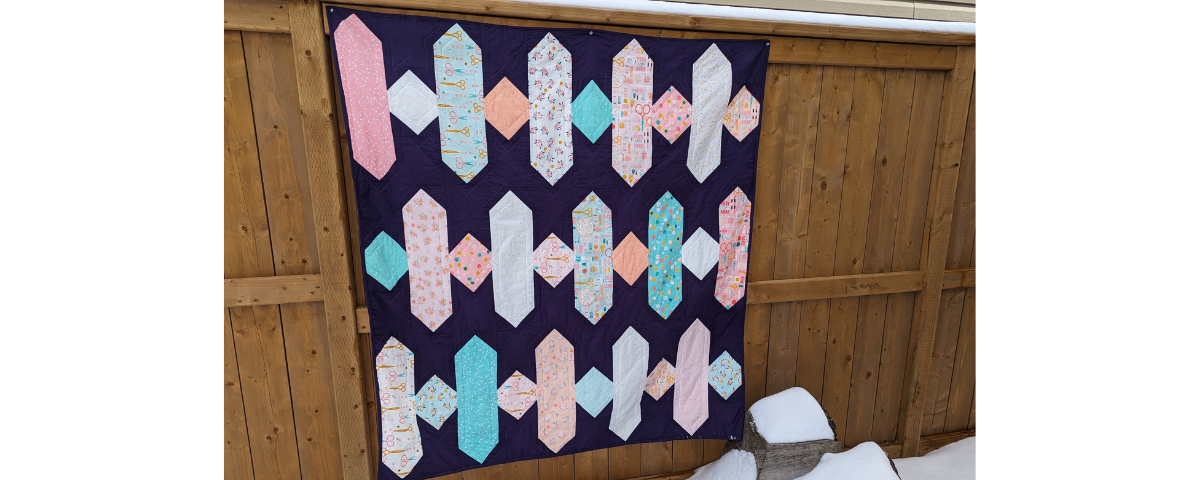
This palissade quilt is super-fast to make – if you can clear a weekend on your calendar for sewing time, you can make this quilt!
The corners are made using a generous stitch-and-flip technique, so sharp points are guaranteed, even for beginning quilters. Choose a fat eighth bundle and it’s easier still. No difficult fabric decisions – just cut and sew!
Seam allowances are ¼” unless stated otherwise for this palissade quilt tutorial.
Finished Size: 60″ x 63″ Difficulty: Easy Time to make: a weekend
Here’s what you’ll need for your Palissade Quilt:
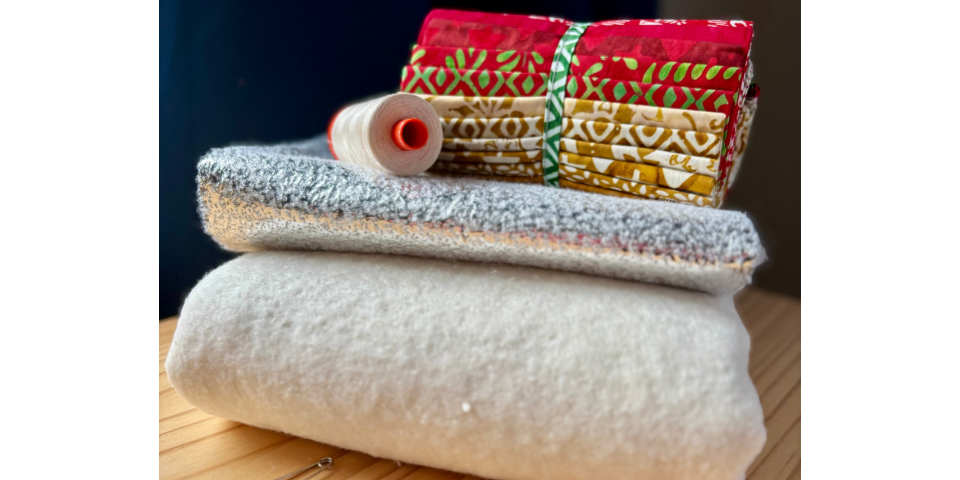
- Fat eighth bundle – we used Sew Wonderful by Paper & Cloth
- 2m background fabric, such as a coordinating Bella Solid
- 3.5m backing
- 0.5m binding (we used the same as the background)
- 1.75m 90″ wide batting
- General quilting notions: rotary cutter, ruler and mat, sewing machine, marking pen or pencil, basting pins, thread, etc.
Cut the following pieces:
Background: Cut the five 6 ½” wide strips across the width of the fabric. Sub-cut each strip into six 6 ½” squares to make a total of 30.
Cut 12x 3 ¾” wide strips across the width of the fabric. Sub-cut each strip into 10x 3 ¾” squares to make a total of 120.
Colour 1 – three fat eighth pieces: Cut two of the pieces down to 6 ½” x 21 ½”. Cut the remaining piece into two pieces measuring 6 ½” x 9 ½”.
Colour 2 – four fat eighth pieces: Cut three of the pieces down to 6 ½” x 21 ½”. Cut the remaining piece into two pieces measuring 6 ½” x 9 ½”.
Colour 3 – three fat eighth pieces: Cut one of the pieces down to 6 ½” x 21 ½”. Cut the remaining two pieces into two measuring 6 ½” x 9 ½” each for a total of four.
Colour 4 – six fat eighth pieces: Cut five of the pieces down to 6 ½” x 21 ½”. Cut the remaining piece into two pieces measuring 6 ½” x 9 ½”.
Colour 5 – three fat eighth pieces: Cut two of the pieces down to 6 ½” x 21 ½”. Cut the remaining piece into two pieces measuring 6 ½” x 9 ½”.
Colour 6 – four fat eighth pieces: Cut two of the pieces down to 6 ½” x 21 ½”. Cut the remaining two pieces into two measuring 6 ½” x 9 ½” for a total of four. You only need to use three, so you can set one aside.
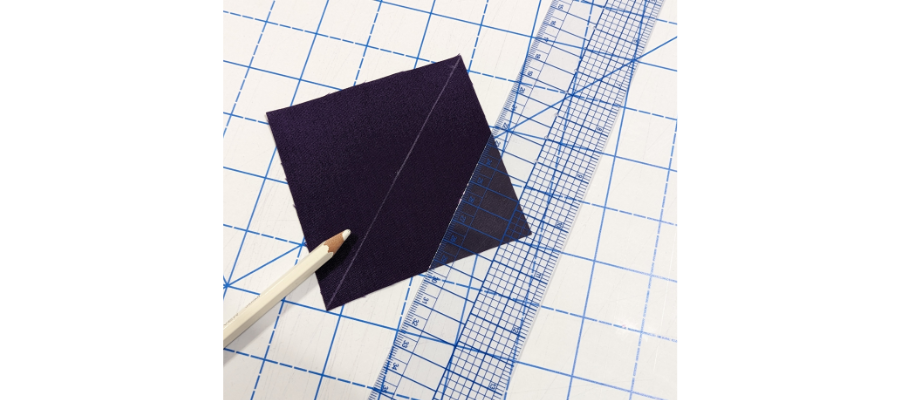
Mark a line corner to corner across the diagonal on the back of all 120 3 ¾” squares.
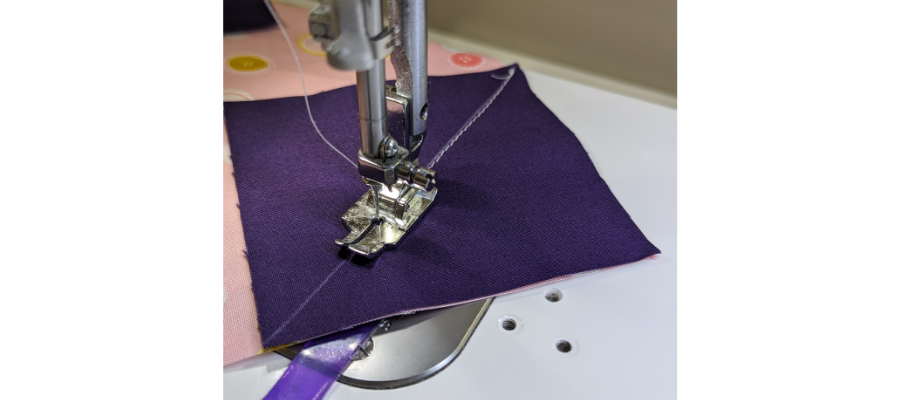
With right sides together, position the foot in the corner of one of the rectangular pieces with the line running from one edge to the adjacent edge as shown. Sew along the line.
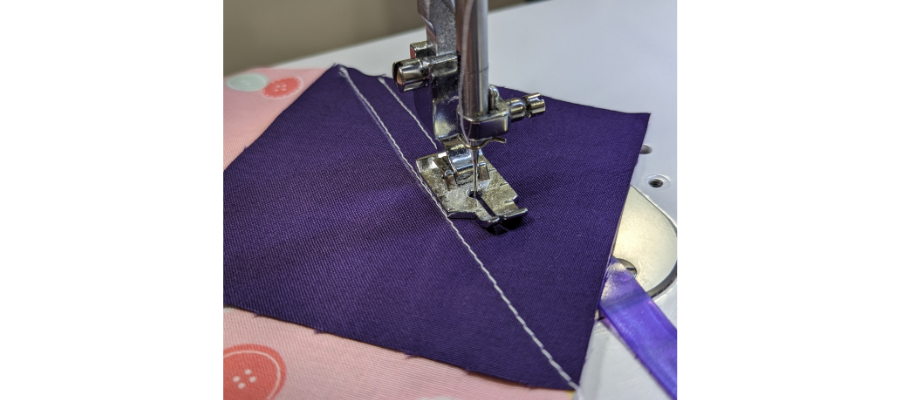
Tip: For bonus half-square triangle (HST) units you can use to sew a matching cushion, or add to the back of the quilt, sew another line of stitching ½” outside of the line. When you cut between the lines you will have extra HSTs – this reduces fabric waste!
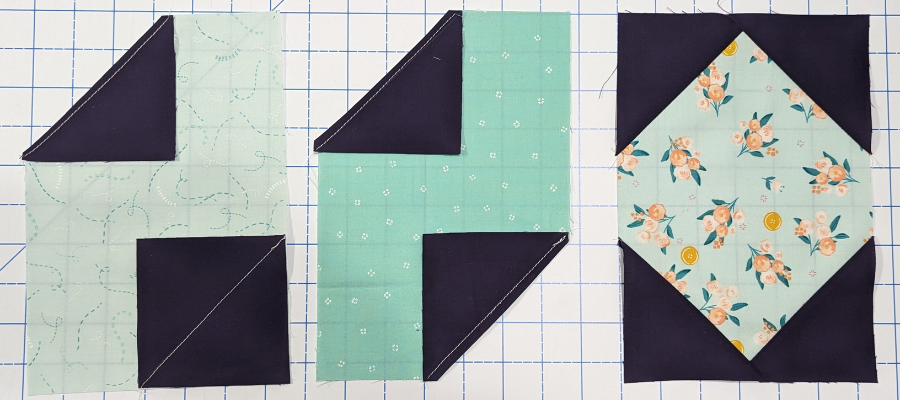
Sew along the marked lines in this way for all 30 rectangle pieces (15x 21 ½” tall, 15x 9 ½” tall). Work two opposing corners, then trim and press open, before sewing the remaining two corners.
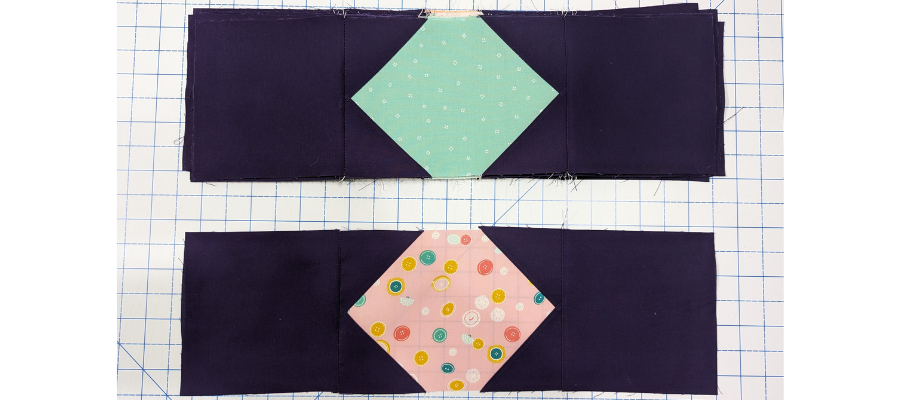
Sew a 6 ½” square to each end of the shorter rectangle. These should come out to the same length as the longer ones – 21 ½”. If they’re a little longer, trim down.
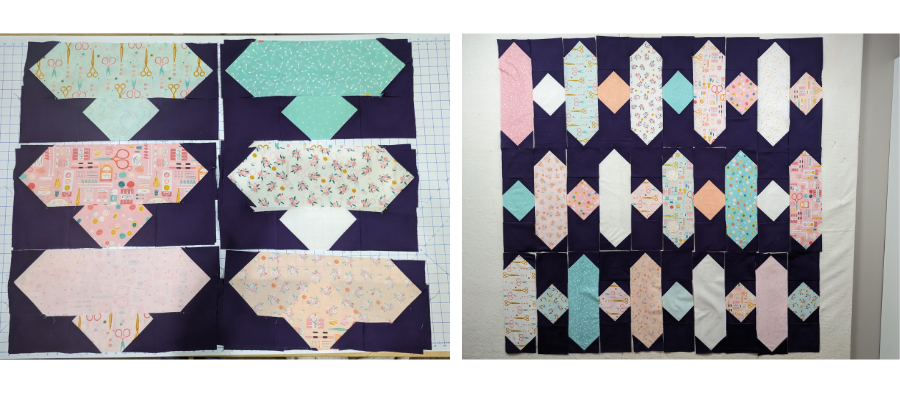
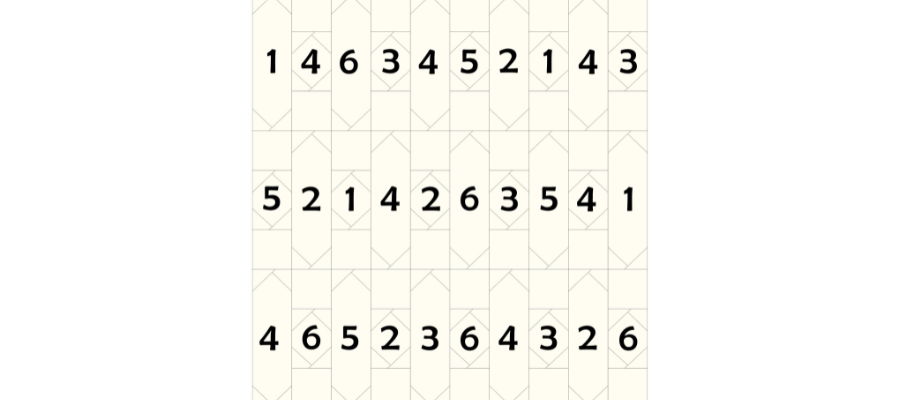
Sort the units into colour groups, and small and large rectangles. Arrange in three rows of 10 units in an alternating layout you find pleasing, or follow our colour chart for placement. Start with a longer rectangle in the top left. In this example, colour 1 is dark pink, colour 2 is light pink, colour 3 is peach, colour 4 is white, colour 5 is teal and colour 6 is aqua blue.
Download a blank colouring guide for your own quilt planning!
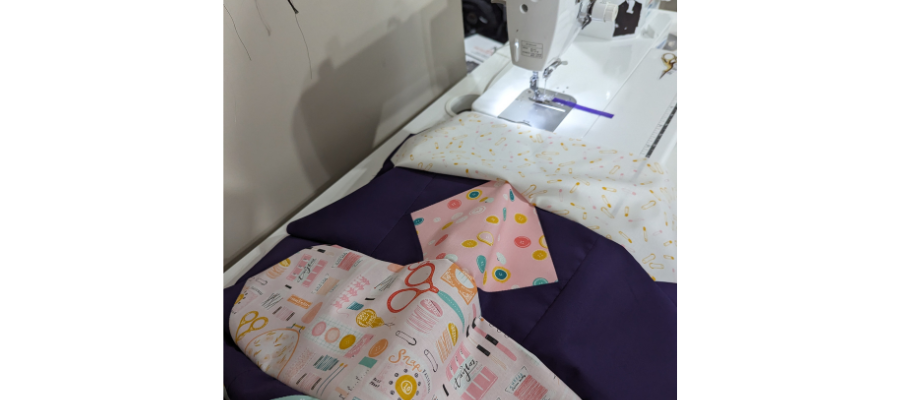
Once you’re happy with the layout, sew the blocks together into rows and press each row in alternate directions to help nest the seams.
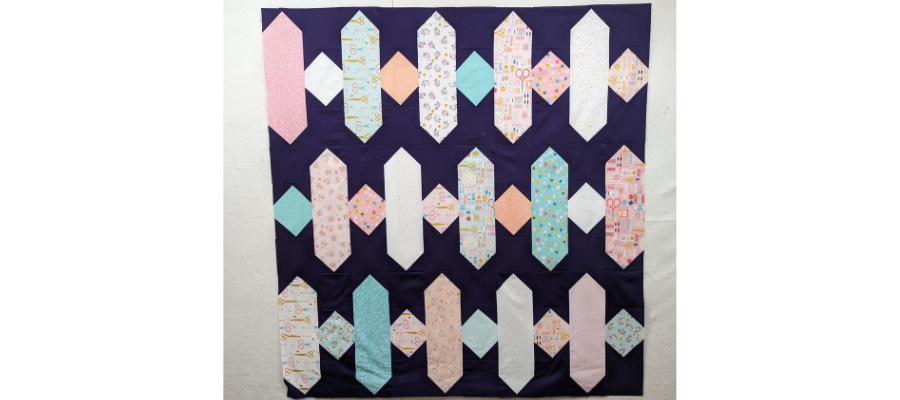
Sew the rows together to finish the quilt top.
Cut your backing fabric in half (if using regular width fabric) and then sew the selvedges together to make a double-wide piece. Press well.
Baste your quilt with batting sandwiched between the backing and top using pins, or your preferred method.
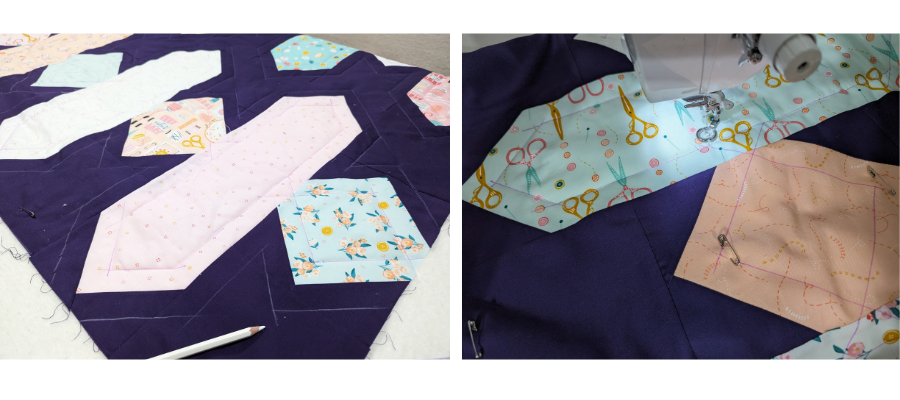
Quilt as desired – for our quilt, we marked an inch inside and outside the shapes, and then echo-quilted to create a less dense, quick design. Washing the quilt will remove markings if you choose to quilt in the same manner.
All you have left to do is bind the quilt! Cut the binding fabric into six strips 2 ¼” wide.
Follow the binding instructions on the Sei Bella quilt project to machine-bind your quilt!
Did you make this palissade quilt? Which part was your favourite, and which fabrics did you choose? Please post, and tag us on Instagram or Facebook so we can celebrate your design! #TrendTexFabrics @trendtexfabrics
Looking for more tutorial and project ideas? Check some other ideas out here.
