Kitchen Tea Towel Tutorials
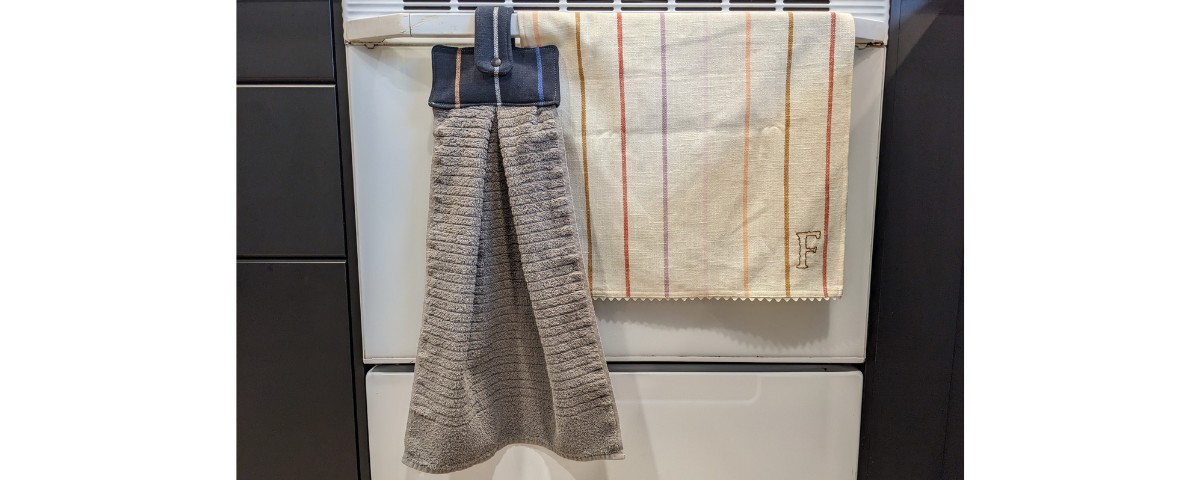
We have a couple of quick tutorials for you: two kitchen tea towel projects that make ideal gifts for bakers and people who love to cook featuring Moda toweling.
In some places around the world, the term “tea towel” is used to describe both absorbent terry towel cloths, as well as the decorative, thinner linen variety. In this post, we will be making one of each; a linen tea towel – originally used for adorning tea trays, and a useful baking accessory – plus, an absorbent dish towel or kitchen towel with a handy hanger. Of course, you can use them however you wish!
The fabric we’ve used is Warp and Weft Chore Coat by Ruby Star Society, a double-sided medium-to-heavyweight cotton that is yarn-dyed instead of printed. Moda also offers 18″ wide toweling, which is also perfect! Ask your local fabric store to see what they have in stock.
Seam allowances are ¼” unless stated otherwise.
Here’s what you’ll need for the Embellished Tea Towel project:
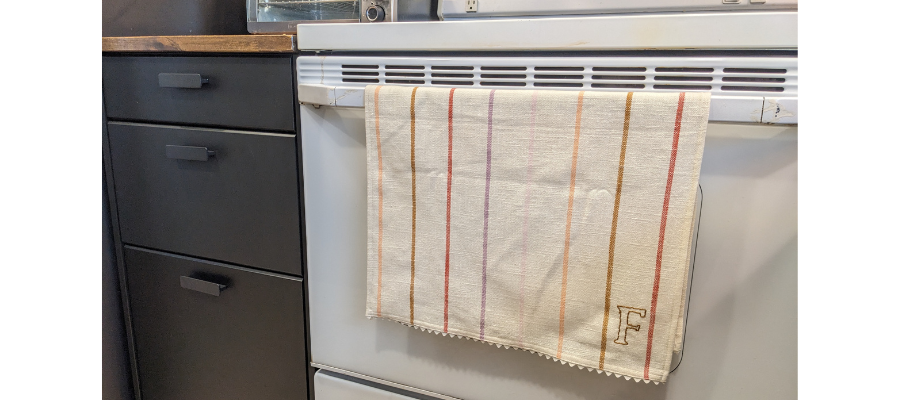
- Sewing machine
- Cutting tools: rotary cutter, mat, and ruler
- 3/4m cotton linen fabric
- 1m wide rickrack
- Embroidery floss and hand sewing needle
- General sewing notions: iron, marking pen, pins, scissors, thread, etc.
- Optional: you may also want to print a monogram for tracing
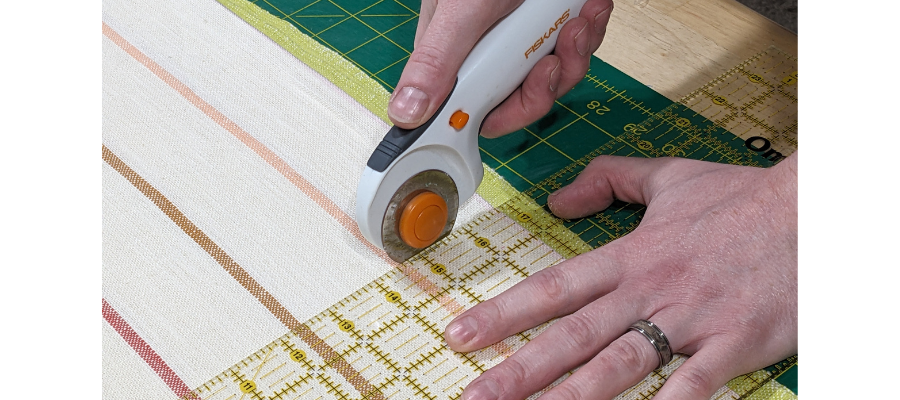
Cut your fabric to 19″ x 29″, or an inch larger in both directions than the size you want your finished tea towel to be. If using Moda 18″ toweling, you will just have a slightly narrower finished project.
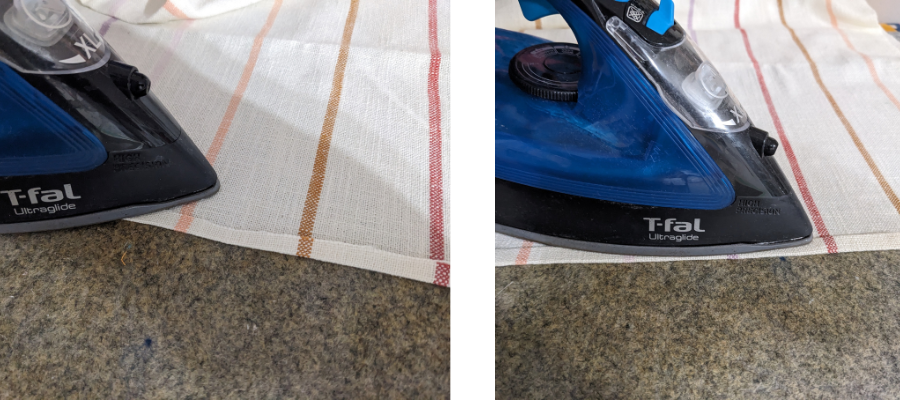
Fold the shorter sides over by ¼” and press, then fold again so that the raw edges are inside.
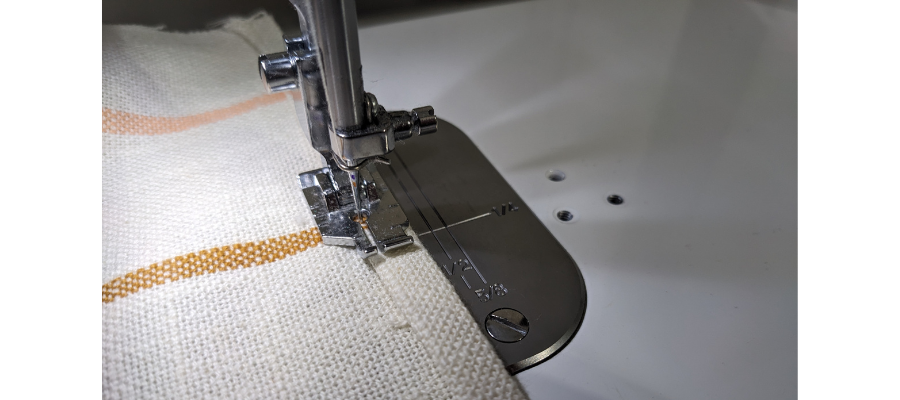
Top-stitch close to the edge of the fold. Repeat for the opposite side but leave the longer sides unhemmed for now.
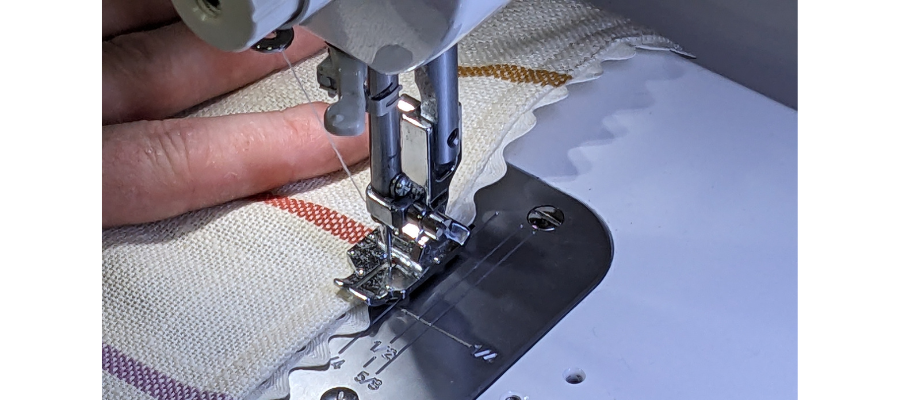
Cut two pieces of rickrack to the length of the hemmed edges. Flip over the towel and position the rickrack underneath so it’s centred under the edge, and carefully top-stitch close to the fold, making sure the rickrack is evenly positioned as you work. Repeat for the other side.
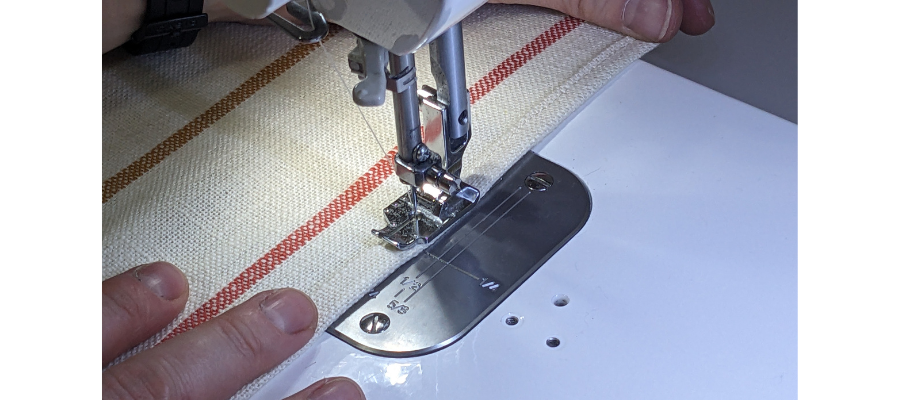
Fold and press the long sides of the towel to the same side as you hemmed the shorter sides. Push any raw ends of the rickrack inside the folds and top-stitch close to the fold. Repeat for both sides to finish all the edges of the tea towel.
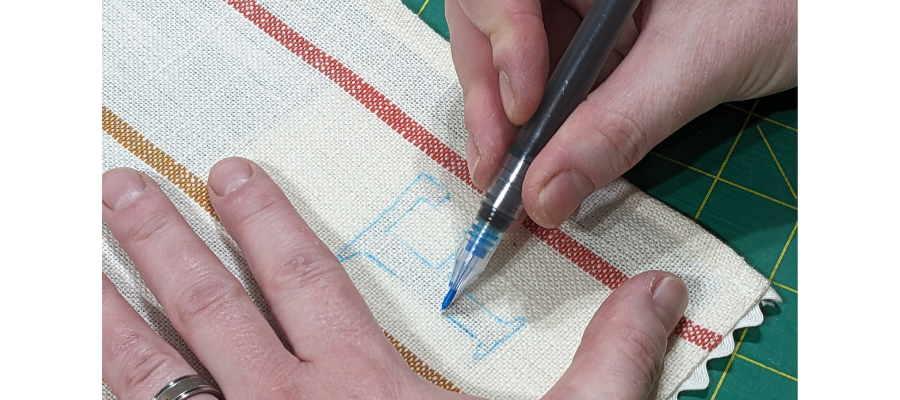
For the monogram, you can either freehand or trace a design. For ours, we printed a letter in Lucida Bright font at 200 pt. size, to trace into the bottom-right corner. Trace the outside of the letter or letters the right way round onto the right side of the towel with a water or air-erasable marker.
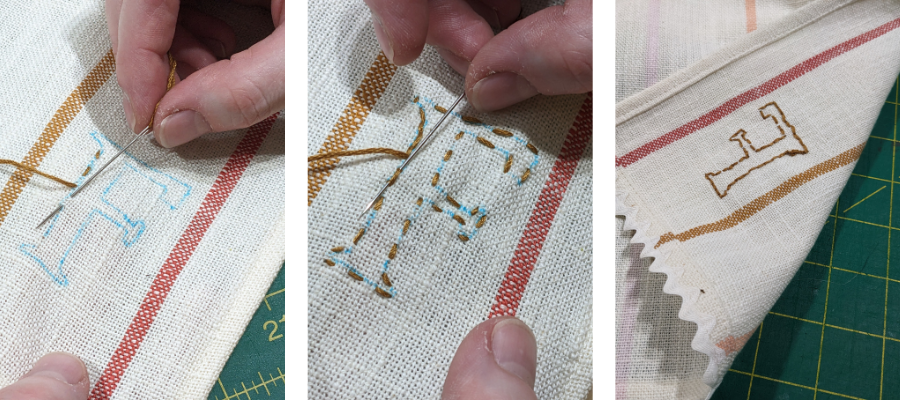
Thread a needle with embroidery floss and knot it. You can sew a backstitch if you wish, or try a double running stitch as shown. These stitches are good choices because they’ll look very similar on both sides.
Sew an even running stitch all the way around. The gaps between the stitches should be similar in size to the stitches as you work. You may have to adjust slightly as you get to the end, because you want the end of your final stitch to meet the beginning of your first. Then sew around again, filling in the gaps and pulling the needle through the same holes you used before. To tie off, weave back through a couple of times and make small stitches in place before cutting the thread.
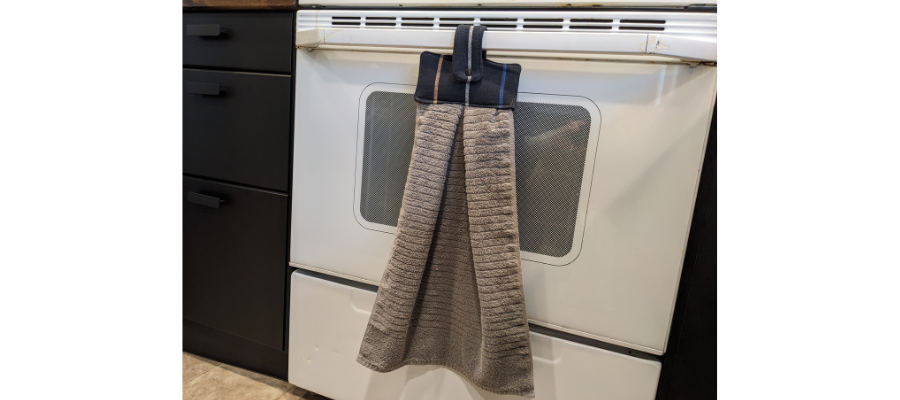
Here’s what you’ll need for the Hanging Dish Towel project:
- Sewing machine
- Cutting tools: rotary cutter, mat, ruler, scissors
- Fat quarter of fabric for hanger – this can be quilting cotton or medium-heavyweight cotton as shown
- Fat quarter of fusible fleece (optional)
- A hand towel, approximately 15″ x 24″ (the one shown here measured 15 ½” x 25 ½”)
- Awl
- A metal snap and setting tools, plus a mallet (optional – you could sew a button and buttonhole as an alternative)
- General sewing notions: iron, marking pen, pins, thread, etc.
You will also need to print the template, available HERE.
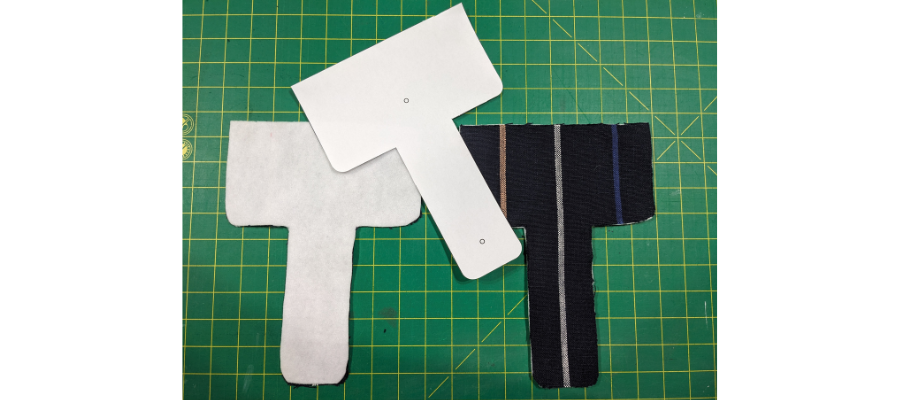
Using the template, cut two matching pieces of exterior fabric and two of fusible fleece. The fleece is optional, but it gives a more plush feel and also supports the snap better once it is placed. You can use regular fusible interfacing if you prefer. Trimming ¼” from the straight edge of the fusible fleece will also make it easier to fold later.
With your iron, fuse the fleece onto the wrong side of the fabric (if it has one).
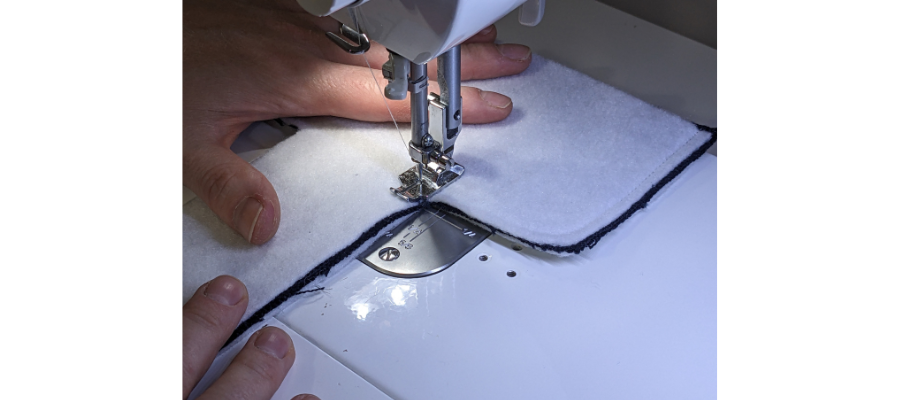
Position the two pieces right sides together and sew around the outside, backstitching at the start and end and leaving the edge with the square corners open.
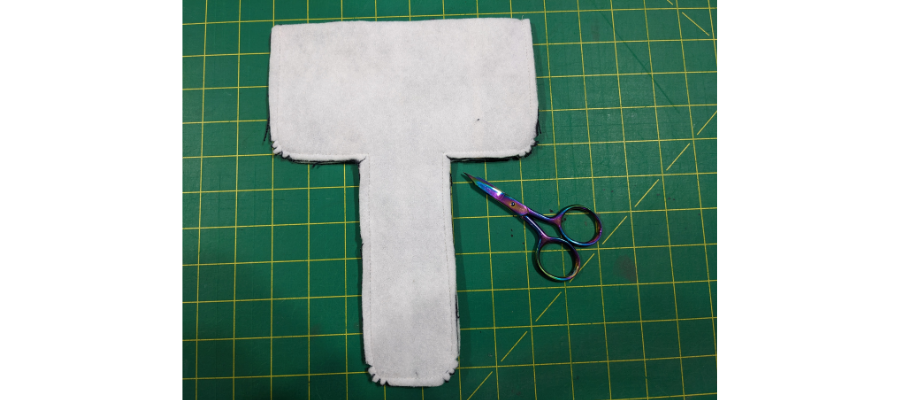
Clip into the curves, removing small triangles but taking care not to clip the thread. You will also need to snip into the inside corners.
Turn right side out, and press well.
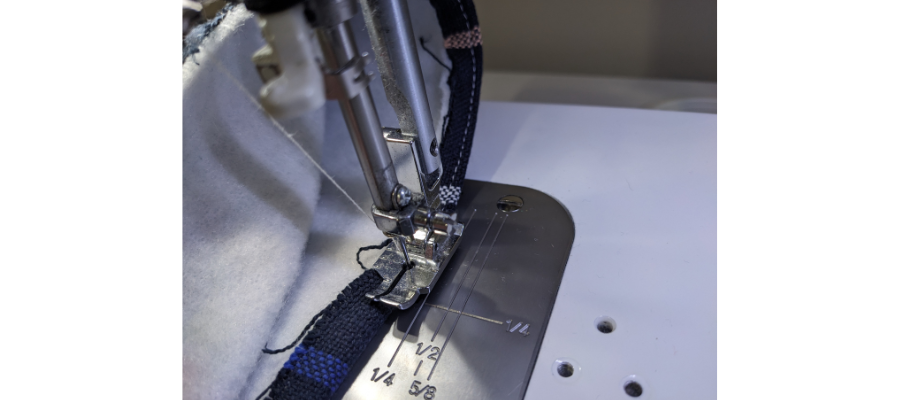
Fold the open edge over to the inside by ¼” and stitch about ⅛” from the edge. It is easiest to sew from the inside and rotate it slowly under your machine.
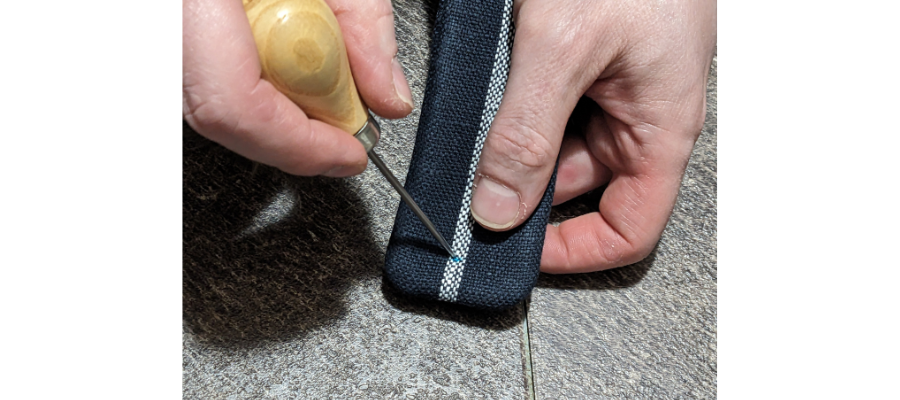
On what will be the inside of the hanger, measure and mark 2″ in the centre from the edge you just stitched and ½” from the edge on the thinner “flap” part that will fold over. This is where the snap will go. Make a hole with an awl or a thin, sharp pair of scissors – all the way through the flap and just through the first layer on the mark nearest to the wider edge.
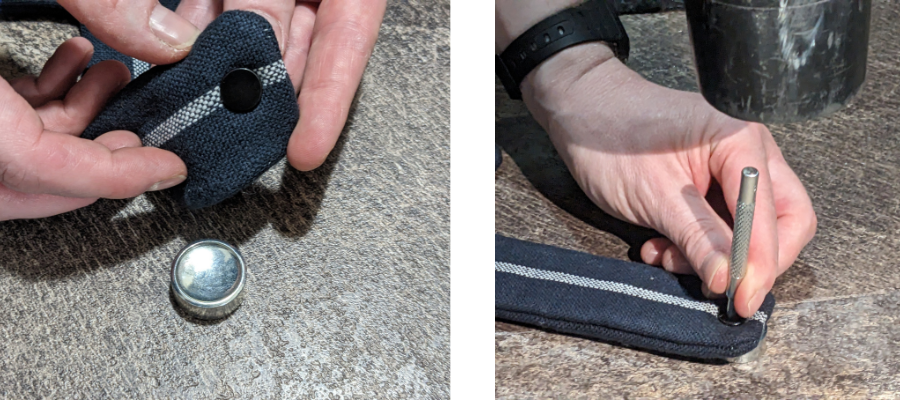
Following the instructions provided with the snaps, Apply the cap end through from the outside to the inside of the hanger flap and position the doughnut-shaped part of the snap over the top. Using the round side of the anvil and the pointed setting tool, tap these parts together firmly several times.
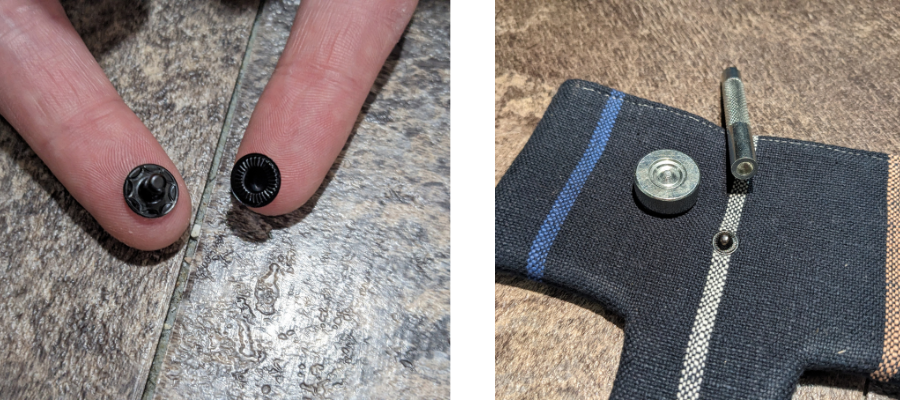
For the second half of the snap, there will be two pieces that are stud-shaped; one longer and one more of a mushroom shape. Push the longer side through from the inside and position the smaller stud on top. Using the dimpled side of the anvil and the concave setting tool and mallet, tapping together firmly to set.
Set the hanger piece aside while you make the towel the right size.
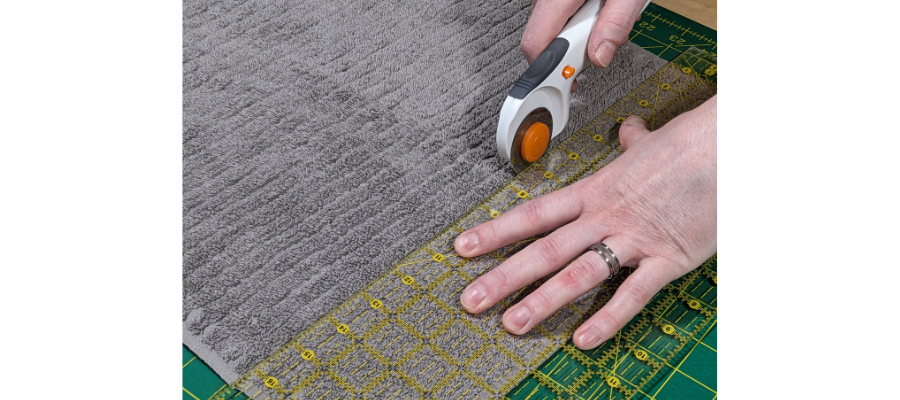
So that the finished towel is not too long for where it will hang, you may have to cut the length down to around 21″. On our example, this meant cutting off around 4″.
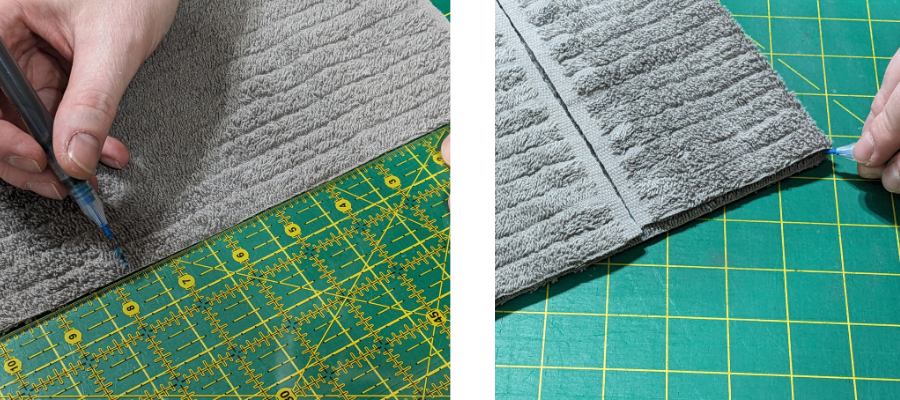
Mark the centre of the cut edge. Our towel measured 15 ½” wide, so this mark was made at 7 ¾”. Fold the sides to meet the centre and mark on the insides of the folds. Unfold the towel again.
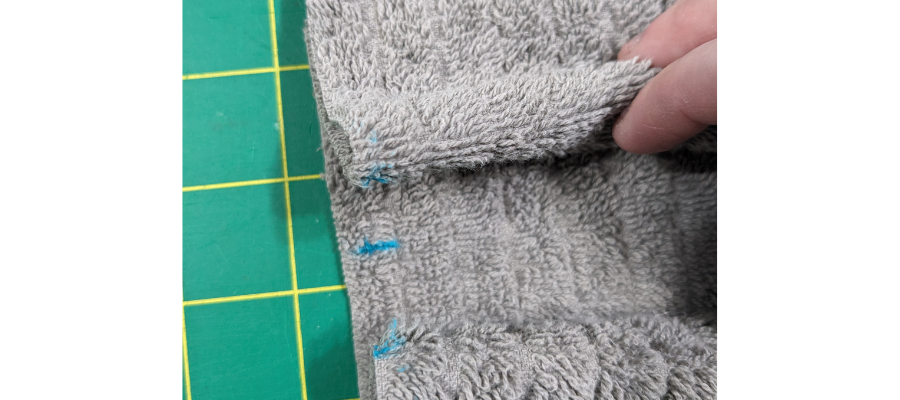
Fold the towel on the outside marks and bring the marks to meet the centre, forming a large pleat. You may need to ease the towel a little bit so it matches the width of the open edge of the hanger. You can do this by pushing the outer edges alongside the reverse of the pleat slightly. Pin if you wish.
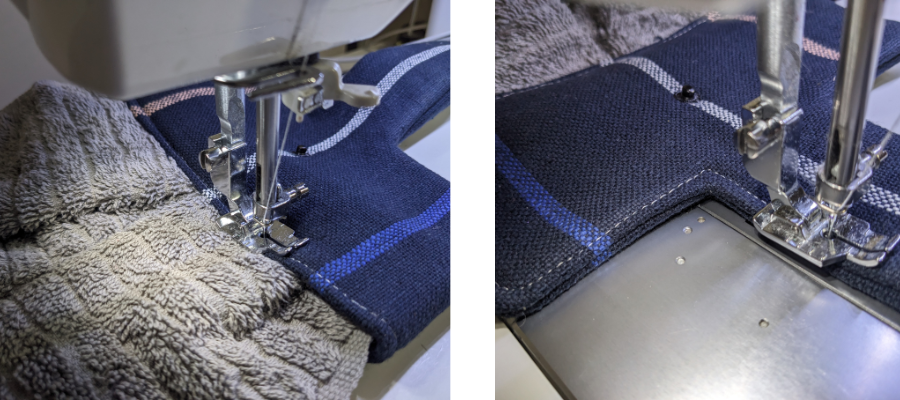
Push the towel inside the open edge of the hanger by around an inch. Sew across to secure, about ¼” from the edge, and then continue around the rest of the hanger to top-stitch at about ⅛” from the edge to finish.
Did you make one or both of our tea towel projects? We would love to see! Please post, and tag us on Instagram or Facebook so we can celebrate your design! #TrendTexFabrics @trendtexfabrics
Looking for more tutorial and project ideas? Check some other ideas out here.
