English Paper Piecing – basting, stitches and project ideas
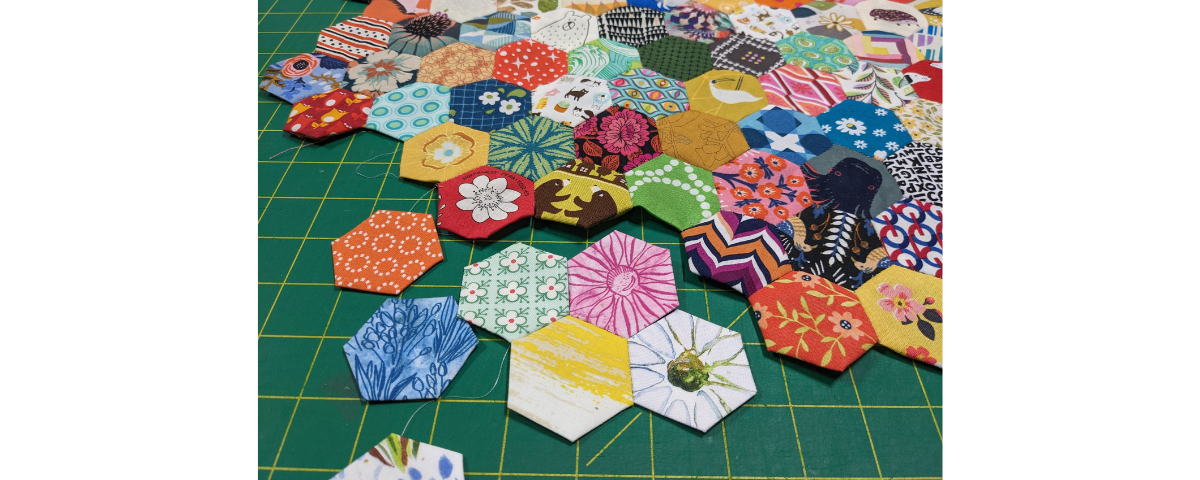
English Paper Piecing (EPP) is a hand-sewing technique that enables you to sew shapes together that might otherwise be tricky on a machine.
The general concept is that you wrap fabric around paper shapes, then stitch them together by hand. Not only is this a convenient way to tackle designs that would otherwise have Y-seams to sew by machine, but it also makes for a portable sewing project you can take anywhere – no machine required!
Here’s what you’ll need for this English Paper Piecing project:
- Cutting tools: rotary cutter and mat, or scissors
- 1″ hexagon papers (or other shape/size of your choice)
- Glue pen
- Hand sewing needles
- 12 wt thread if thread basting, 60 wt polyester thread for sewing shapes together (optional)
Basting Method
Basting is the process of attaching the fabric to the papers. Traditionally, this was done by stitching through the paper and the fabric, but with the more recent innovation of glue pens, glue basting has become very popular.
To start, you’ll need papers, either bought or cut yourself. The inch measurement for hexagons (or hexies) refers to the length of the sides. All the papers need to be the same size so that they sew together properly, and roughly the weight of cardstock. If the paper is too thin, it will be hard to feel the edges as you wrap the fabric around, but too thick and you won’t be able to bend them as you sew them together.
You will need to cut your fabric about ¼” bigger than each paper piece, all the way around. You can do this by positioning the paper and then cutting around with scissors or a rotary cutter. If you prefer to cut more precisely, acrylic templates are available.
Thread Basting
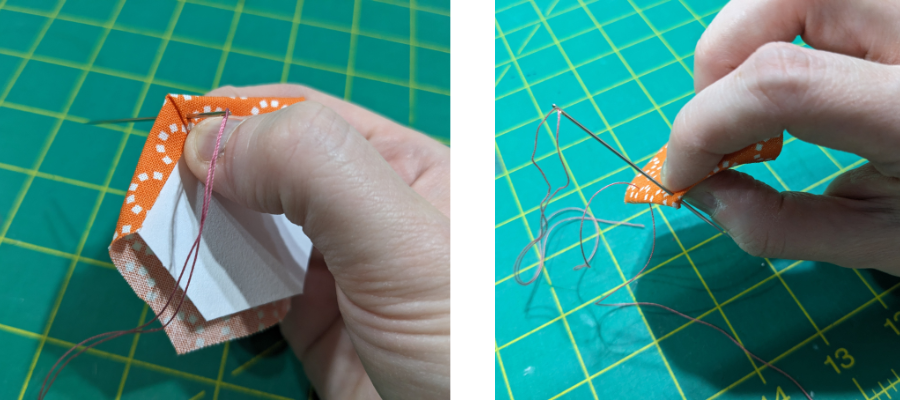
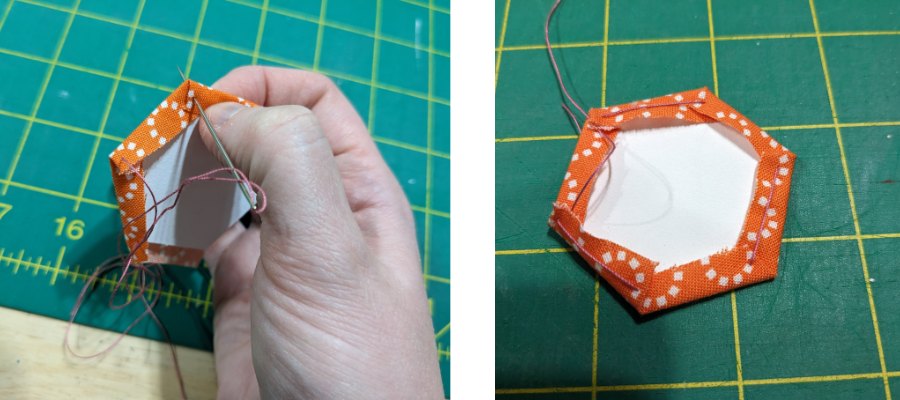
To thread-baste, you’ll need a needle threaded with 12 wt thread. This will be removed later, so no need to secure the tail ends.
Position the paper on the back of the fabric and fold over one edge, then an adjacent edge to make a corner. You can clip the fabric to the paper to hold it in place.
Bring the needle all the way through all the layers. It doesn’t matter which side you start on. Fold down the next edge to form the next corner and bring the needle through again from the side the thread exited from, forming a large stitch.
Keep working your way around and finish in the same corner where you started. You can press your hexagons with an iron for crisper edges before you sew them together if you like.
Easy-Release Glue Basting
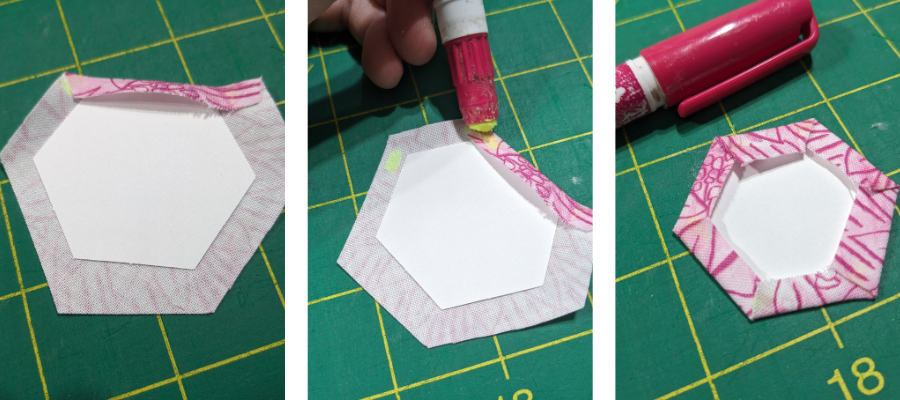
Glue basting is very popular, however gluing directly to the paper can sometimes make it difficult to remove afterward.
So, use a tiny dot of glue to hold the fabric and paper together as you work. Next, apply a dot of glue on either side of the first edge you are going to fold. Then fold the fabric over. The aim is to glue the fabric only to itself, and not apply glue directly to the paper.
For the next edge, you’ll apply glue to the unfolded side as before, but the other dot will be on the fabric you previously folded, just below the edge of the paper. Fold the fabric down and continue to work this way until all of the edges are folded under. Pressing your hexies is advisable when using this technique, so that you have easy edges to sew.
Sewing the Hexies Together
Once you have a pile of hexagons, it’s time to sew them together. This demonstration will show you how to assemble a flower shape. From this shape, you could choose to make a traditional pattern like Grandmother’s Flower Garden, or you could sew in rows or more organically for larger pieces.
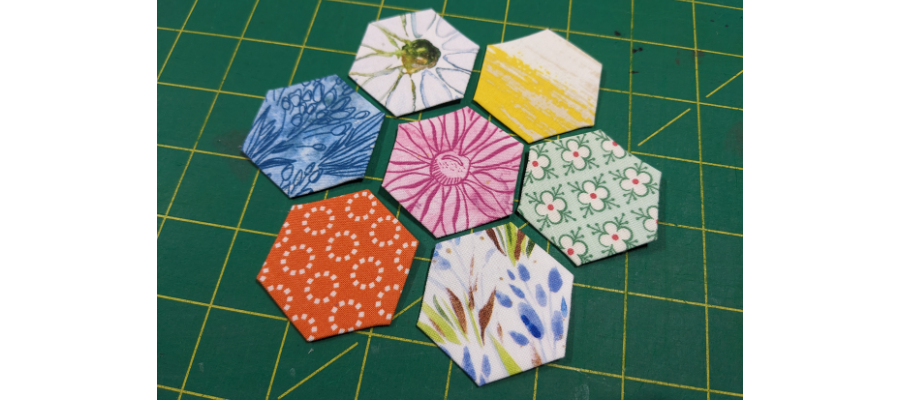
The most efficient way to sew the flowers together is shown on the diagram. Attach a petal hexagon to the centre, then attach a new petal and tie off the thread on the outside. Then sew the hexagon you just added to the centre and add a new one, and so on. There are a few different stitches you can try listed below. For all of them, we recommend using a fine polyester thread in a neutral colour, which will make your stitches almost invisible.
Whip Stitch
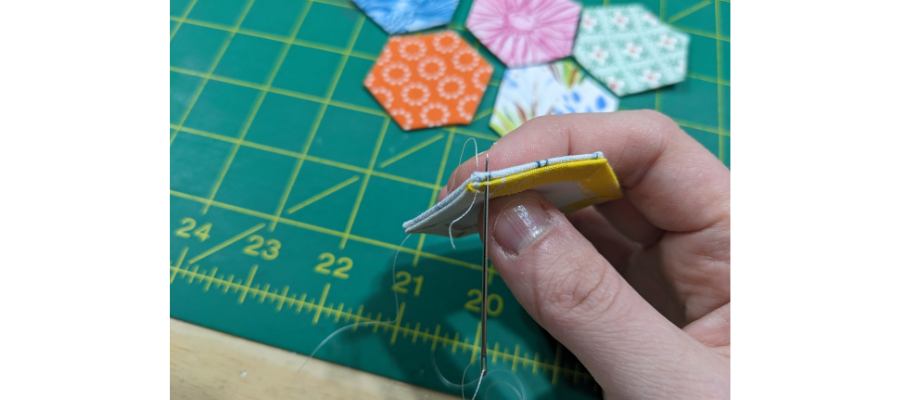
Knot your thread (our video on how to do that is here). With the hexies facing one another, catch just a few threads of each fabric along the edges, avoiding the paper. A whip stitch goes in the same direction with each stitch, so if you entered the fabric from below and exited at the top of the join, you’ll make the rest of your stitches by pushing your needle up from the bottom.
Ladder Stitch
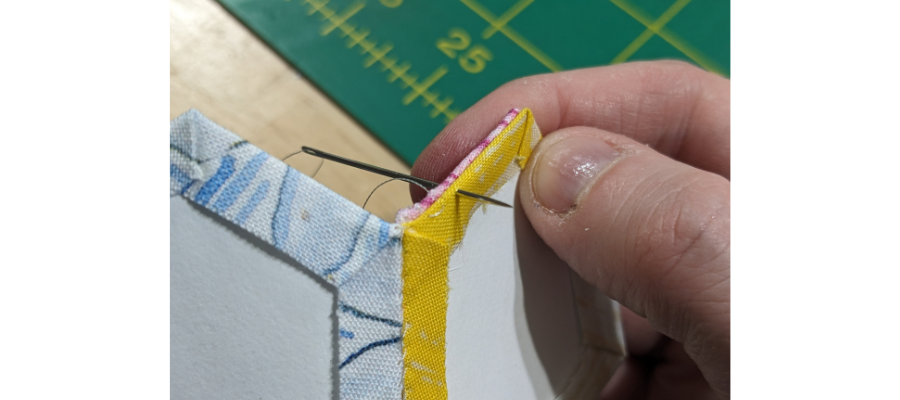
A ladder stitch is similar in that you will have the hexagons right sides together and take tiny “bites” out of the fabric. Our thread knotting video is also helpful here. The difference with a ladder stitch is that you will work the needle alternately from each side, creating tiny stitches on each hexagon, instead of working from the same direction. This stitch is a little more invisible, but requires more dexterity.
Flat Back Stitch
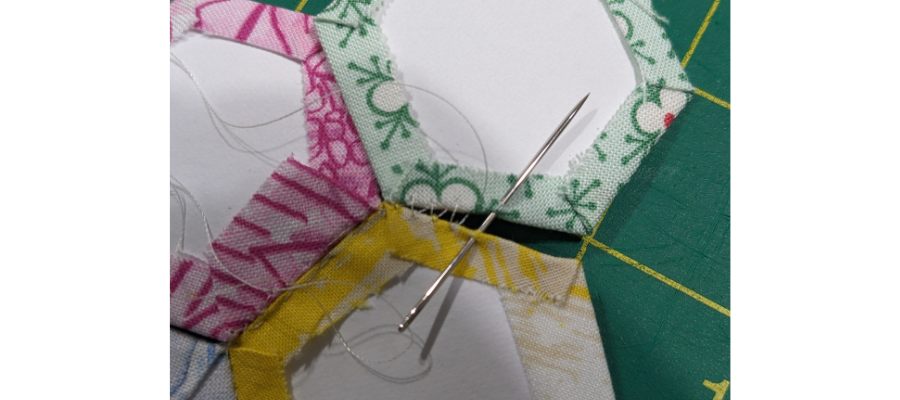
The flat back stitch is the ultimate invisible stitch! It is also the least convenient to hold. With this stitch, you will work a whip stitch (or ladder if it is easier for you), but instead of putting the hexagons together at the start, you will work on the back and lay them side by side. The stitches will exit the fabric close to the edges, but on the back of the hexagon, so nothing is visible in the seam.
To finish off your threads for any of these stitches, make three tiny stitches in place at the end of each row.
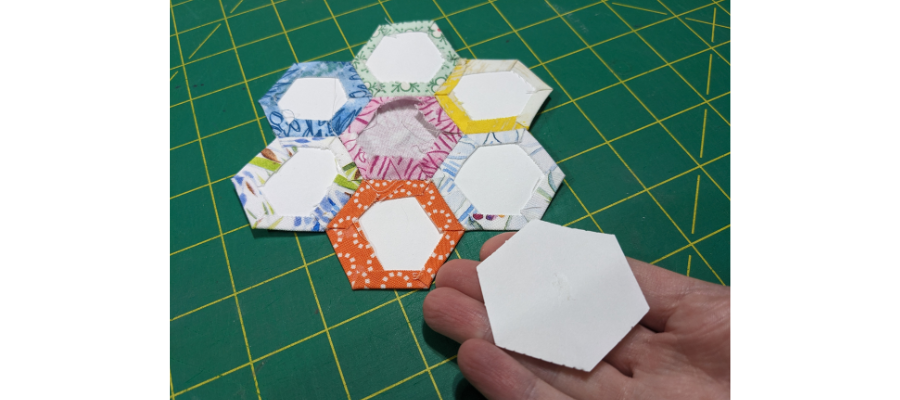
Once a hexagon has another joining each of its sides, you can remove and reuse the paper. If you thread-basted, you will need to pull out the basting thread and then pull the paper away.
Project Ideas to Practice English Paper Piecing
Here are some of our previous projects that you could make with EPP. Leave your papers in the edge hexagons for as long as possible, until it is time to cut the panel down, or appliqué it in position. This will help your work keep its shape.
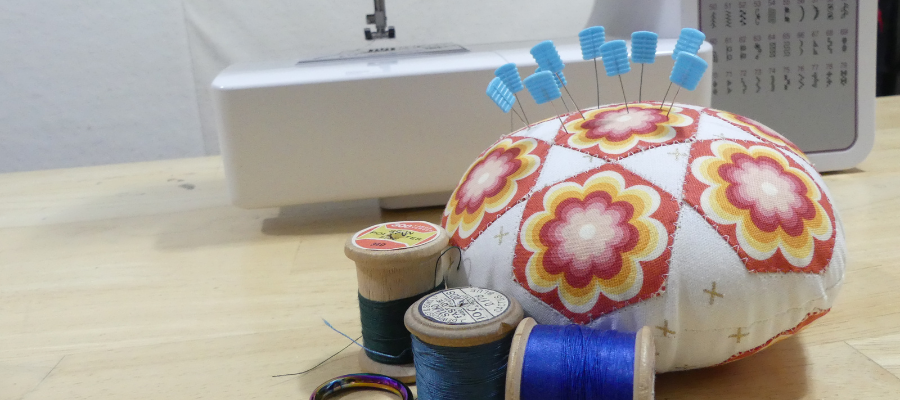
This pincushion is made by appliquéing individual hexies – if you don’t feel like hand-sewing them together.
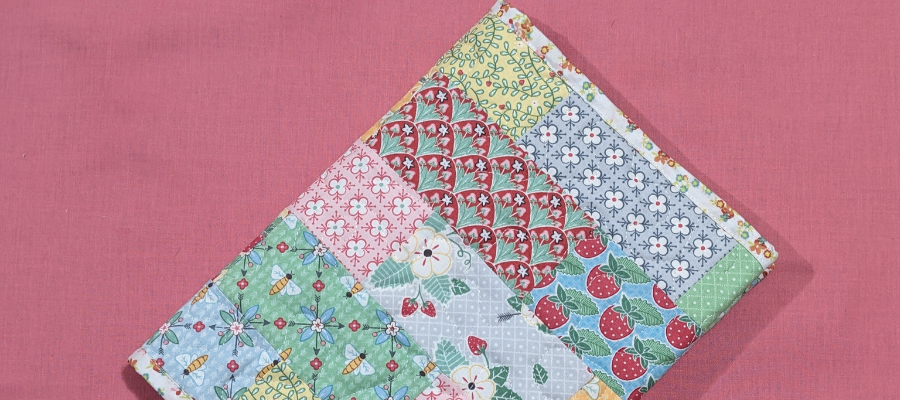
How about a notebook cover? Skip the piecing instructions and instead make a panel measuring at least 22″ x 10 ½” (or 1″ taller and 7″ wider than your book when open flat). A little bigger is better. Keep your eye on the size of your panel as you work so you don’t sew more hexagons than you need, then continue to follow the instructions to quilt the panel and trim it down to size.
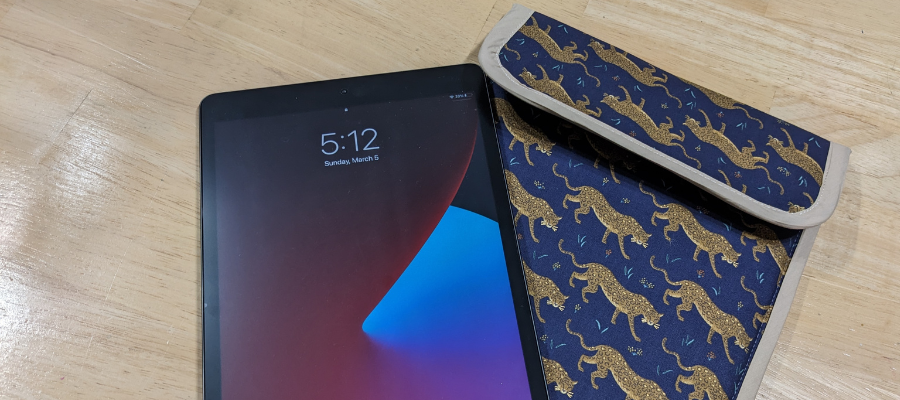
You could also make a tablet sleeve. There are two exterior pieces: an all-in-one back and flap piece and a front piece, and you could make one or both of these in EPP! For a regular iPad, these pieces measure 16″ x 9″ and 12″ x 9″ respectively. Once your panel is at least the size needed, cut interfacing to size and fuse it to the reverse, then trim the panel down to the size of the interfacing.
We’d love to see your English Paper Piecing projects! Please post, and tag us on Instagram or Facebook so we can celebrate your design! #TrendTexFabrics @trendtexfabrics
Looking for more tutorial and project ideas? Check some other ideas out here.
