Canada Day Bunting Tutorial
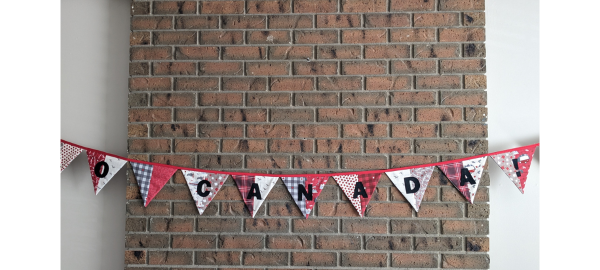
This beginner-friendly quilted Canada Day bunting is sure to add a festive and charming touch to your July 1 celebrations!
The fabric shown here for the Canada Day Bunting Tutorial is True North by Kate and Birdie for Moda, exclusively distributed through Trendtex Fabrics.
Finished Size: 2 ½ metres in length
Difficulty: Beginner
Time to make: An afternoon
Seem allowances are ¼”.
Here’s what you’ll need for this notecards for quilters tutorial:
- Project templates
- Sewing machine
- Cutting tools: rotary cutter, mat and ruler
- 8″ or larger 60-degree triangle ruler (or use template provided)
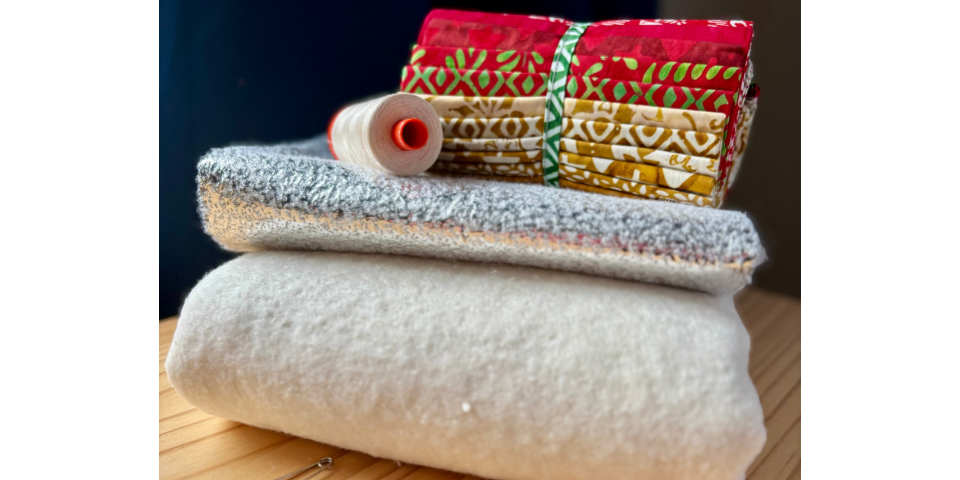
- An assortment of fabrics totalling approximately 2 ½ m, or a Layer Cake
- ½ m fusible web
- 5 m red twill tape, at least ½” wide
- Two sheets of black felt, or other black fabric
- General sewing notions: iron, pressing cloth, pins, scissors, thread, etc.

Cut 26 fabric pieces measuring 5 ½” x 8 ¼”. If using directional fabric, make sure the pattern runs along the shorter edge.
Make 13 pairs of contrasting fabric designs and sew them together along a long edge. Press seams open.
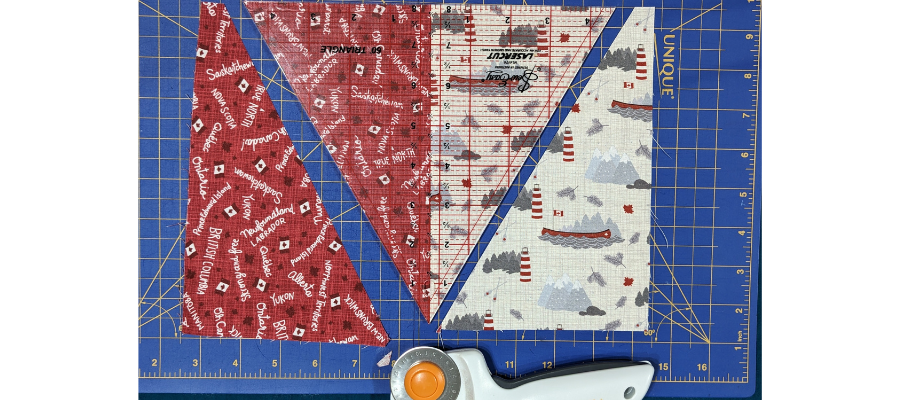
With a 60-degree triangle ruler, line up the centre with the seam, and the 8″ line with the top of the fabric pair, and cut out a triangle. If using our template, fold in half to find the centre and align this with the seam line.

Trace the reversed lettering from the template onto the paper side of your fusible web. You will need to trace one of each letter, plus an extra two As.
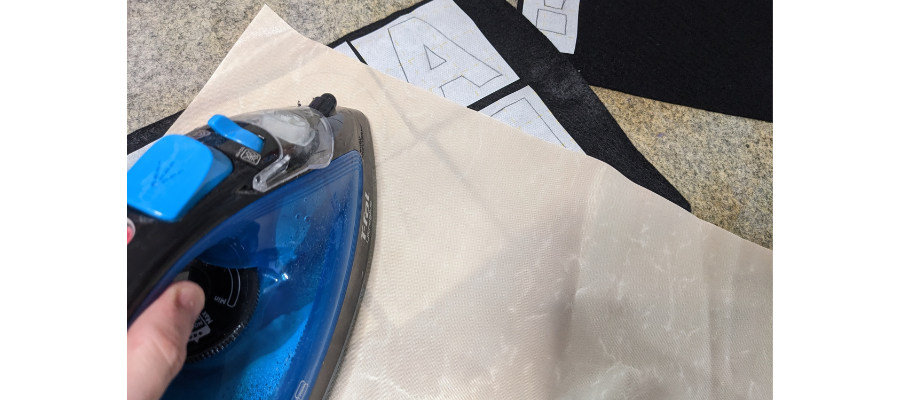
Roughly cut out and fuse the textured side to your felt, or the reverse of your chosen fabric. If working with acrylic felt, you will need to use a pressing sheet or cloth as it will melt!
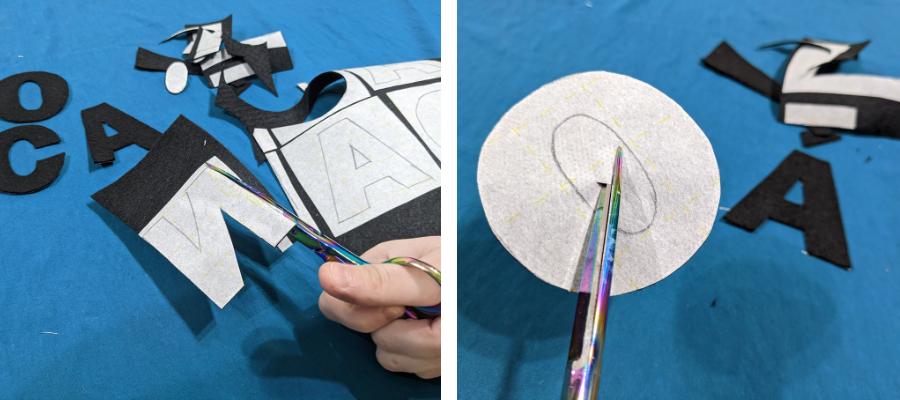
Cut out the letters along the lines, including the centre of the As and the O. You will need to fold and snip into the negative space to get your scissors in.
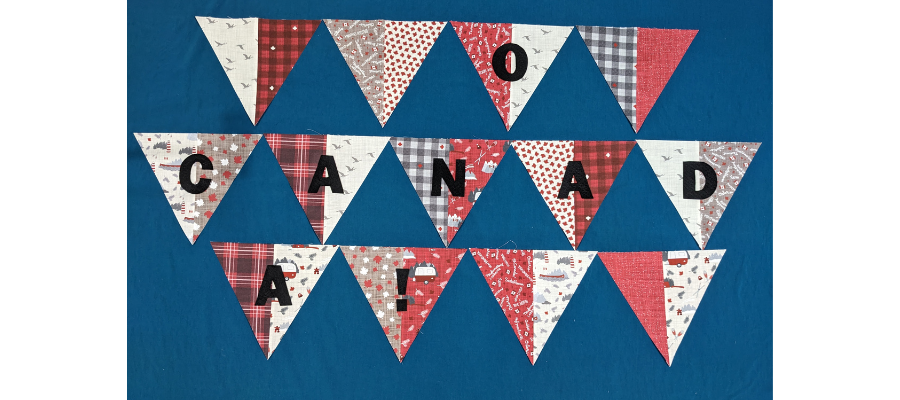
Decide on the order you want your triangles to go. You will have two blank ones at the start and the end, while the other nine spell out “O Canada!” including a space.

When you are happy with your layout, position the letters centrally, 1 ½” from the top of the triangle, and fuse in place, remembering to use a pressing cloth if you need one.

This step is optional, but it looks nice! Top-stitch closely around the edge of your letters in a matching thread for extra security.

Cut out 13 more 8″ triangles from your remaining fabric, for the backs. Layer them right sides together with your front pieces in an order that is pleasing.

Take your pairs to your sewing machine and sew two sides, leaving the top open and backstitching at the start and finish. Trim off the points close to the stitching and turn right side out, pushing from the inside with a blunt object to make it extra-pointy. Press flat.

Cut your twill into two 2 ½” lengths. Leaving a tail of around 12″, pin your triangles to the tape, in order, aligning the open edges with the centre of the tape, with corners of the triangles touching. Trim off any excess over 12″ from the end once you’re done, so it’s nice and even.
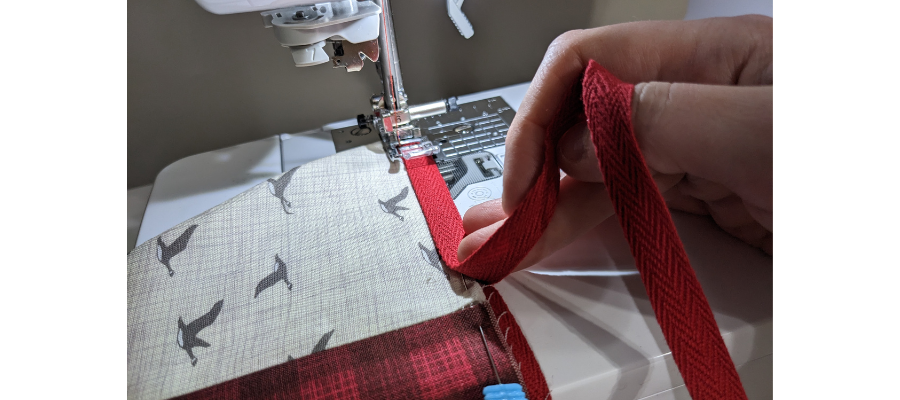
Sew the twill tape close to the edge, on the triangle side, using red thread; align the second length of twill tape over the top as you go. Remove the pins as you work, and sew slowly and carefully to make sure all the raw edges are caught.
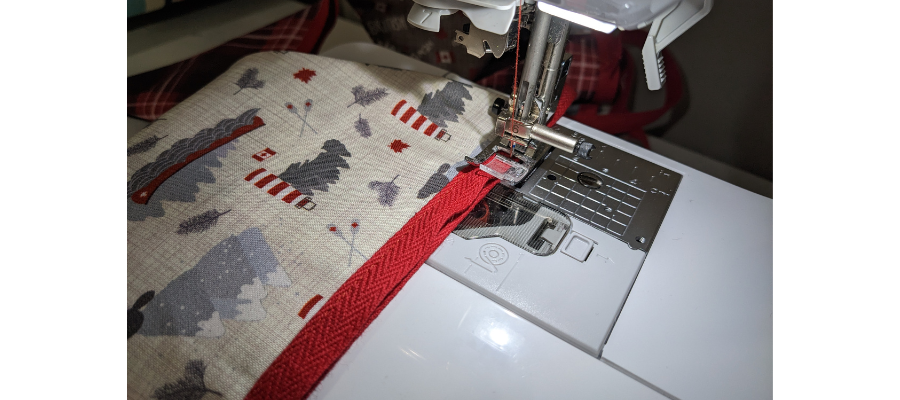
Once you’ve sewn the full length, repeat for the top edge of the twill tape to enclose the raw edges.

You’re done! We’d love to see your creations on social media and hope you’ll share them with us! Please post, and tag us on Instagram or Facebook so we can celebrate your design! #TrendTexFabrics @trendtexfabrics
Looking for more tutorial and project ideas? Check some other ideas out here.
