Bearspaw Canada Day Quilt Tutorial
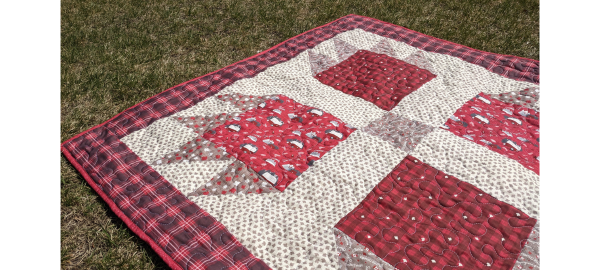
Make a quilt block super-size for a quick bearspaw quilt project! You can hang it on the wall for Canada Day decor, or use it as a lap quilt or small picnic blanket while you watch the fireworks.
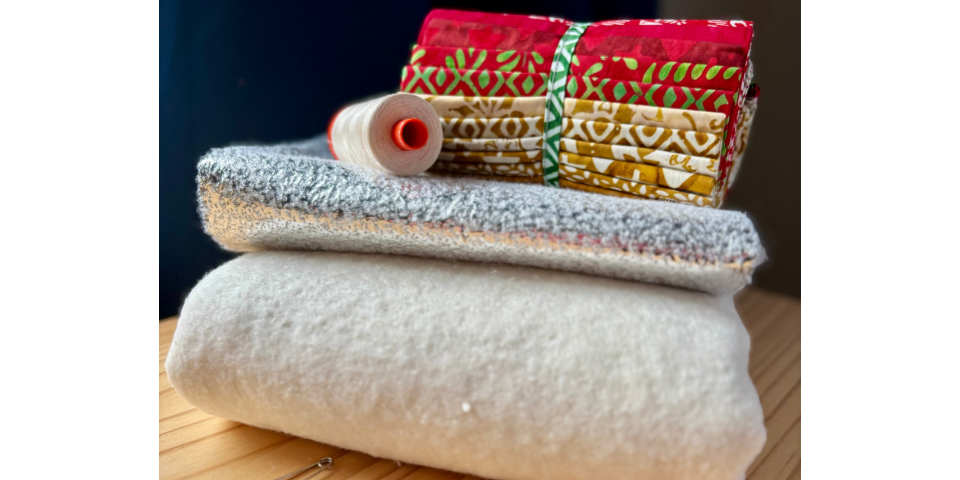
This bearspaw quilt is backed with Fireside, a snuggly-warm fleecy fabric, making it suitable for winter months, too. If you want your quilt to be cooler, you could back it with quilting cotton instead. Or, you could even leave out the batting and make a coverlet.
The fabric shown here is True North by Kate and Birdie for Moda, exclusively distributed through Trendtex Fabrics.
Finished Size: 52″ square
Difficulty: Beginner to Intermediate
Time to make: A weekend
Seem allowances are ¼”.
Here’s what you’ll need for this notecards for quilters tutorial:
- Sewing machine
- Cutting tools: rotary cutter, mat and long ruler
- 2 – 0.4m red square fabric
- 2 – 0.25m HST fabric
- 1m background fabric
- 1m border fabric (or 1.6m if cutting lengthwise)
- 0.5m binding fabric
- 1.6m wide backing fabric
- 1.6m batting (at least 60″ wide)
- General sewing notions: iron, pins, scissors, thread, pen, etc.
Cutting List:
You will need to cut the following:
Background fabric 8 – 7″ squares 4 – 6 ½” squares 4 – 18 ½” x 6 ½” rectangles
HST fabrics (x2) 4 – 7″ squares 1 – 6 ½” square (from one fabric)
Red square fabrics (x2) 2 – 12 ½” squares
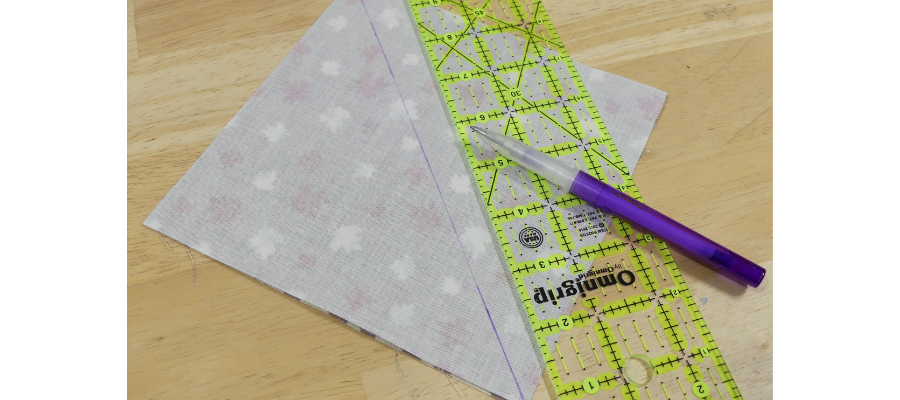
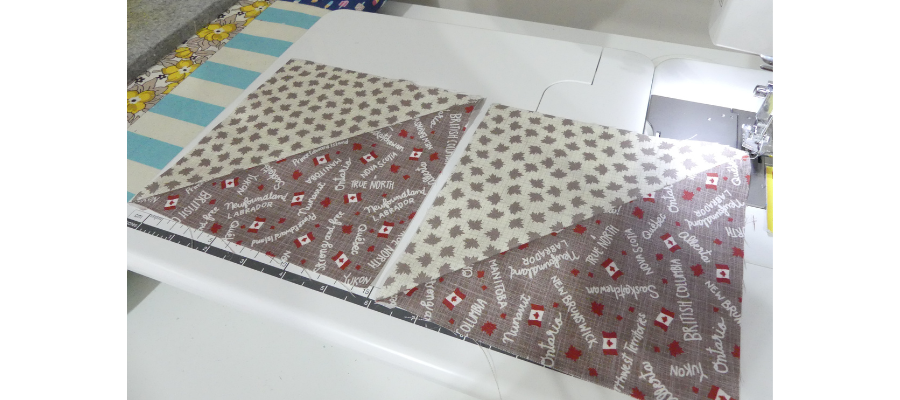
Start by making your half-square triangles (HSTs). Stack a background 7″ square and a grey 7″ square right-side together. Draw a line diagonally from one corner to another.
Sew at a scant ¼” on either side of the line. It doesn’t have to be extremely accurate; just straight.
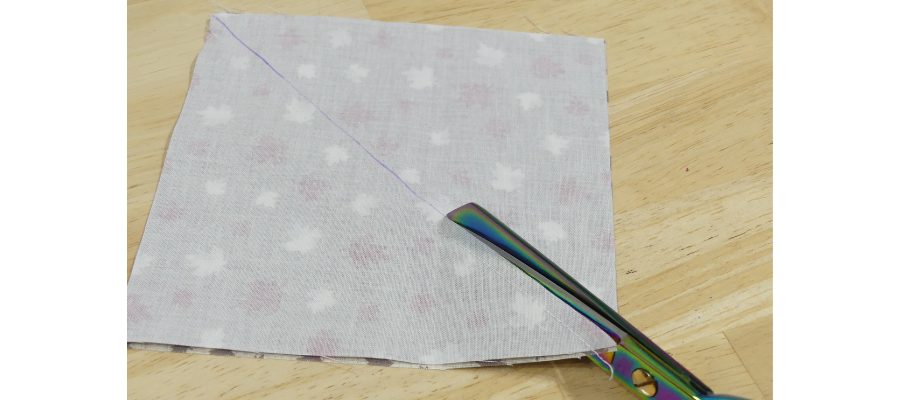
Cut along the drawn line, between the stitching lines, to make two HSTs.
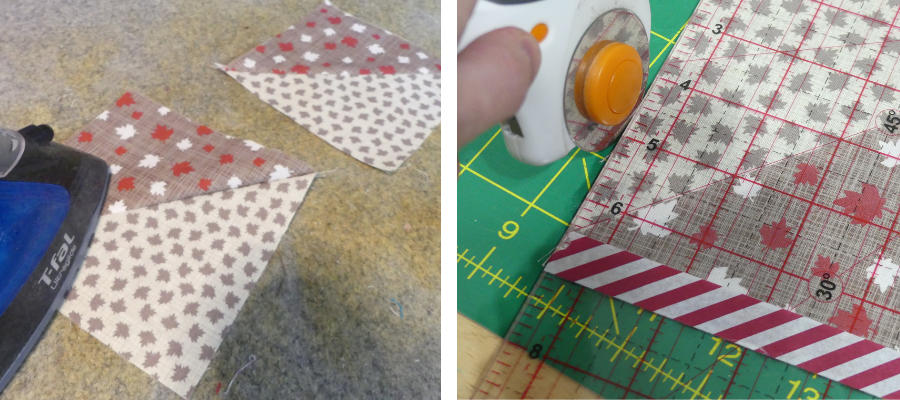
Open and press the seams toward the darker fabric. To trim, line up the 45-degree line on the ruler with the seam. Add Washi Tape to your ruler if you wish to mark the 6 ½” line horizontally and vertically, unless your ruler is 6 ½” wide already. Make sure the seam ends right where the ruler edge and the 6 ½” line meet. Trim the side and the top. Rotate and use the vertical 6 ½” line to trim the two remaining sides.
Repeat with the remaining seven pairs of 7″ squares to make a total of 16 HSTs.
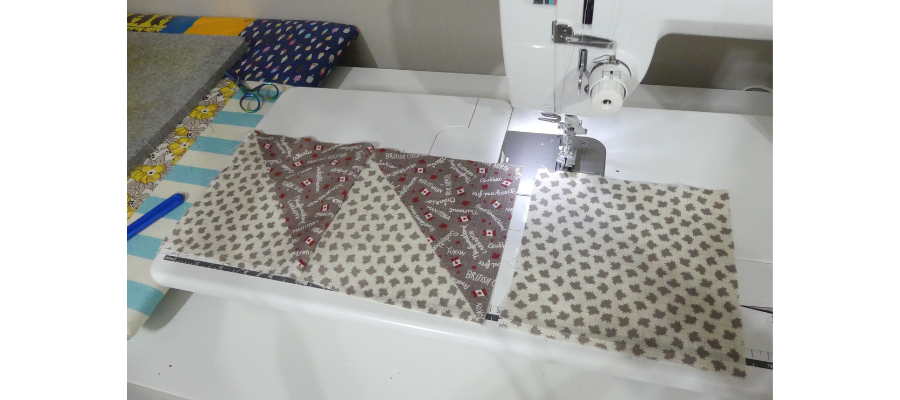
To make a quarter block, sew two HSTs together with the grey fabrics pointing top right. Sew a 6 ½” background square to the right. Press the seams toward the square.
Sew together another pair of matching HSTs, with the grey fabrics pointing to bottom right. Press the seams; either way is fine.
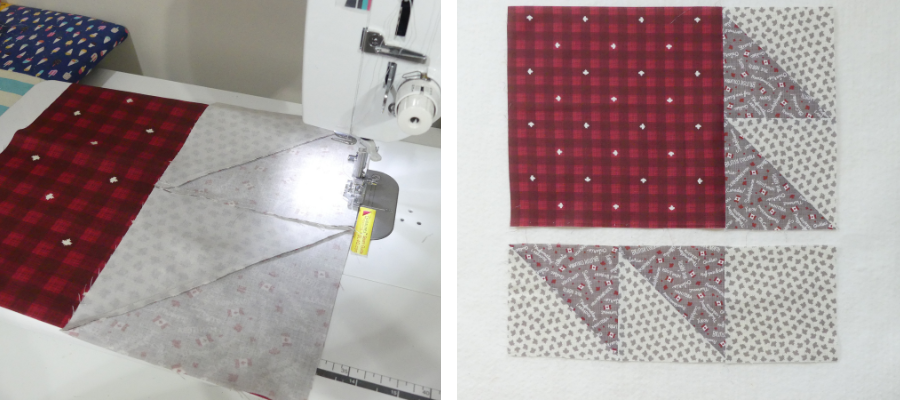
Sew the two HSTs units to the right side of a 12 ½” red square. The grey triangles will be stacked vertically and pointing to the bottom left. Press the seams toward the red square.
Sew the 6 ½” strip of units to the bottom of the red square unit. The seams will run in opposite directions to make matching them easier.
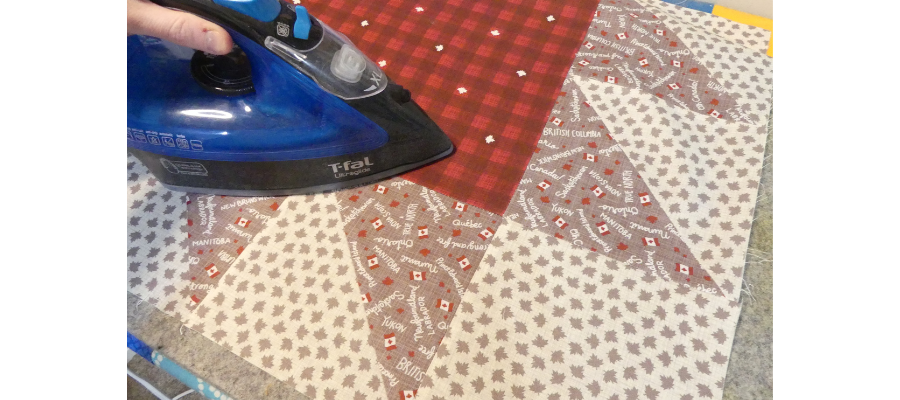
Press the block well. Trim to an 18 ½” square if necessary.
Make four. For this design, Colour 1 grey and red fabrics were assembled in two blocks, and Colour 2 grey and red fabrics were used together in the other two.
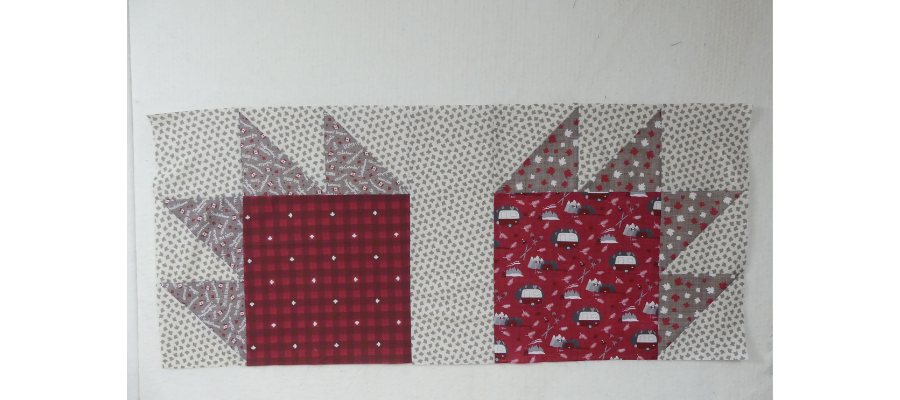
Take a Colour 1 paw unit and a Colour 2 paw unit, and arrange so that the paws point upward and the background squares are in the outer corners. Arrange a 18 ½” background strip in between vertically. Sew together to make a row. Press the seams to the right.
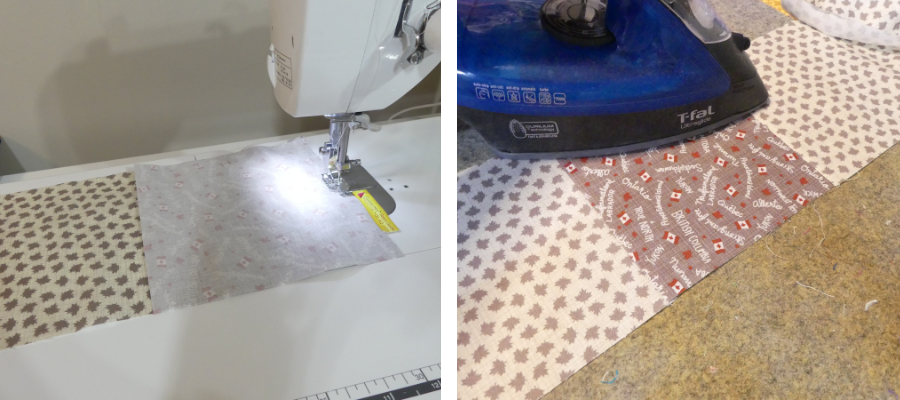
Take a 18 ½” background strip and the 6 ½” grey square and sew together. Add another 18 ½” strip to the opposite side of the square. Press the seams to the left.
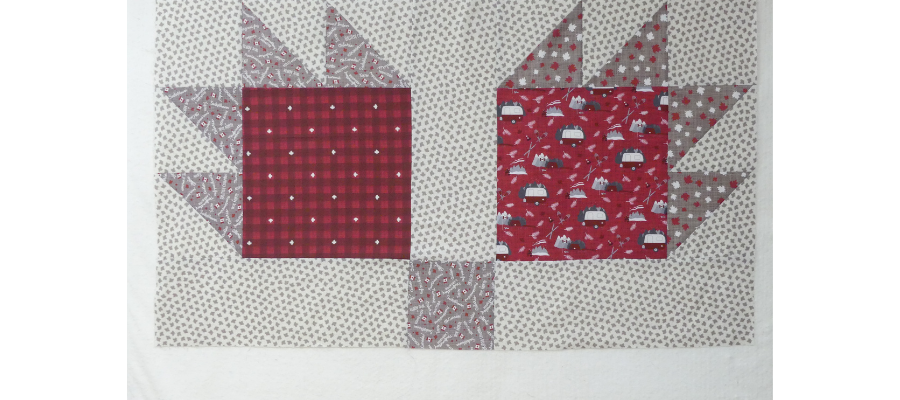
Sew this row to the bottom of the first row. The alternating seams will make points easier to match.
Make the bottom row with the remaining two paw units pointing downward, with the background squares in the outer corners. This time, Colour 2 will be on the left and Colour 1 on the right.
Arrange a 18 ½” background strip in between vertically. Sew together to make a row. Press the seams to the right. Sew this row to the rest to complete the giant bearspaw block. Press again.
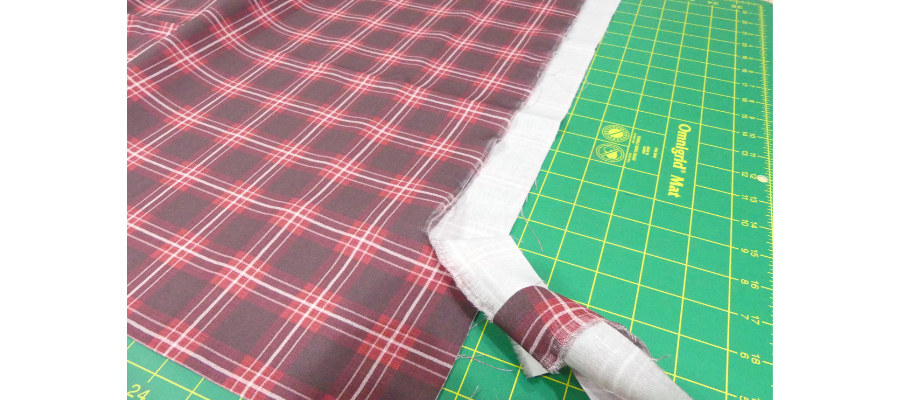
If you’re not using plaid fabric for borders, skip ahead!
Snip the fabric through the selvedge and tear to find the true straight grain (because sometimes the fabric can get warped a little in production).
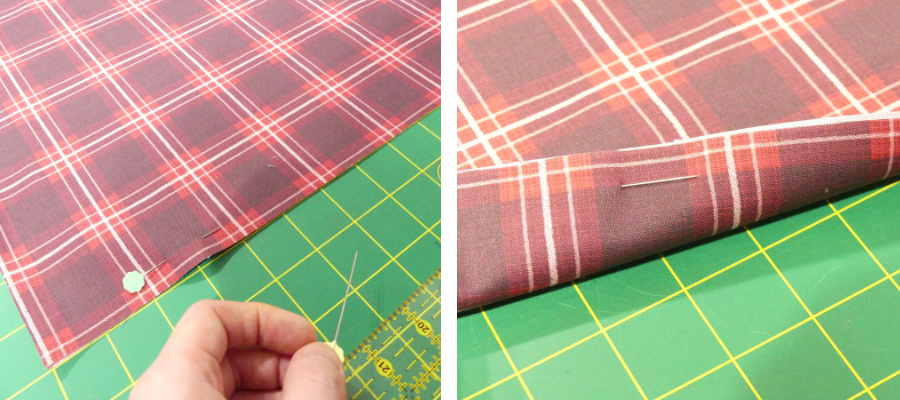
Press the fabric and fold back in half, matching the torn edges. Pin along a recognizable vertical line, ensuring the front and back are pinned through the same vertical. Trim off the torn edge.
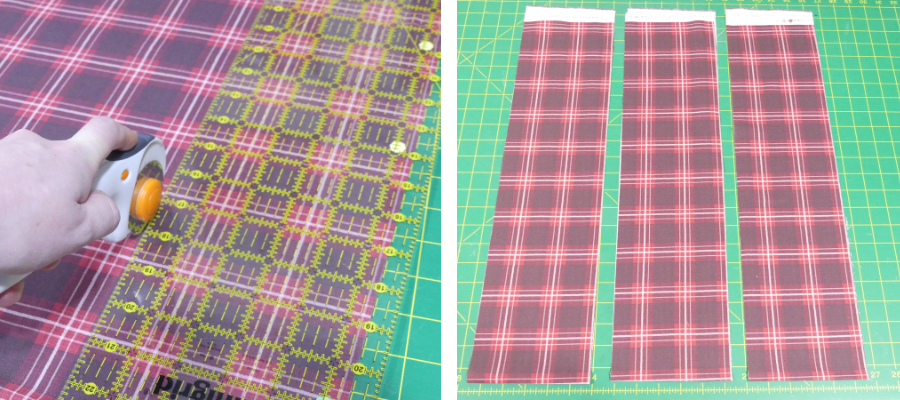
Cut two strips for borders 5 ½” wide and trim down to 42 ½” long. Repeat the pinning process for each cut.
Trim to a recognizable line and make another 5 ½” cut. Trim to the same line again and make a second and third cut to make three matching strips.
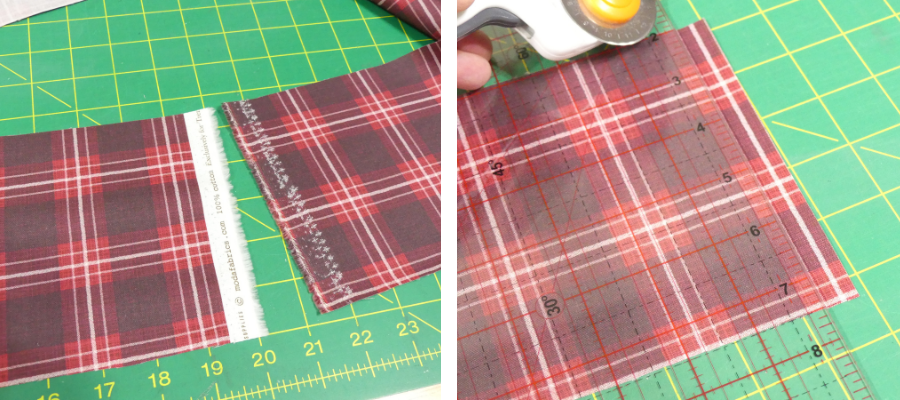
To join the ends, find a recognizable line again and add a ¼” seam allowance to each side by cutting an extra ¼” away from this line on both pieces to be joined.
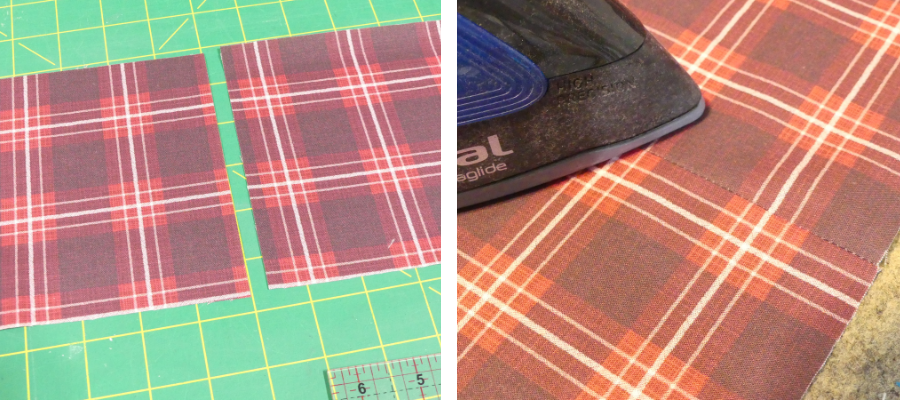
Stitch these pieces together carefully, matching the horizontal lines. When you press, your pattern should match.
Repeat to add the third piece and make a long strip.
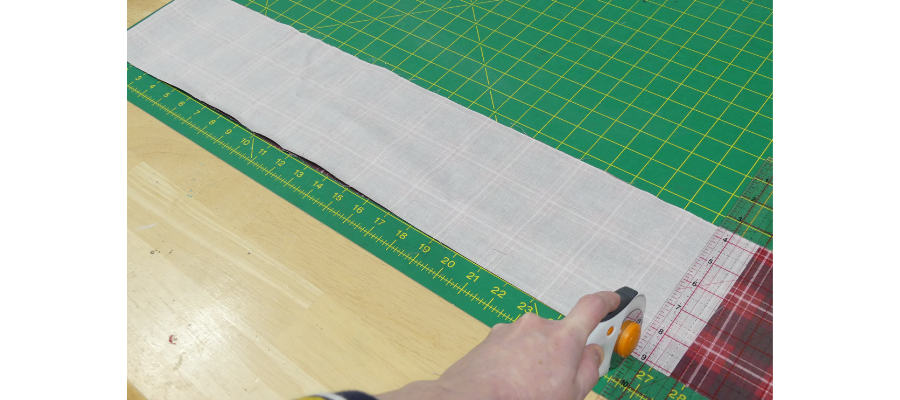
Cut two pieces measuring 52 ½” from this long strip. To make this easier, fold the fabric in half, align the fold with the edge of your mat (or long ruler) and cut at 26 ¼”.
Rejoin here if not using plaid fabric! You can either join your border strips together, cut across the width of the fabric, or, if you prefer to cut your pieces without joins, cut all four border strips along the length of your fabric. You will need two 42 ½” and two 52 ½” strips 5 ½” wide.
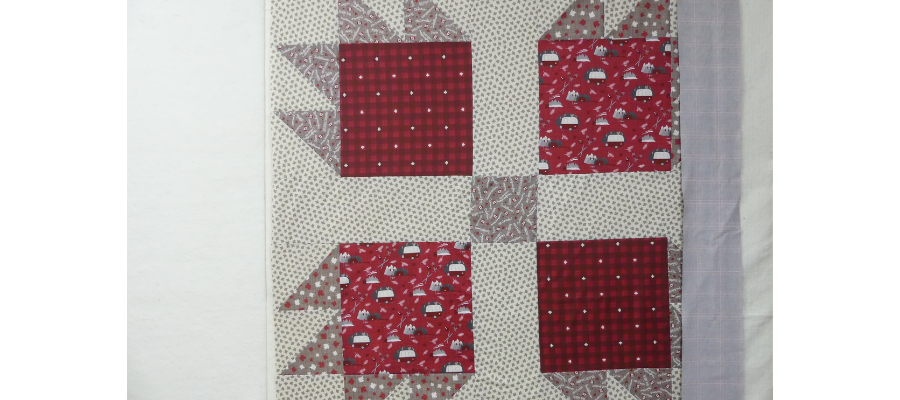
Sew the shorter strips on either side of the block, pinning at the top and the bottom before sewing. Press.
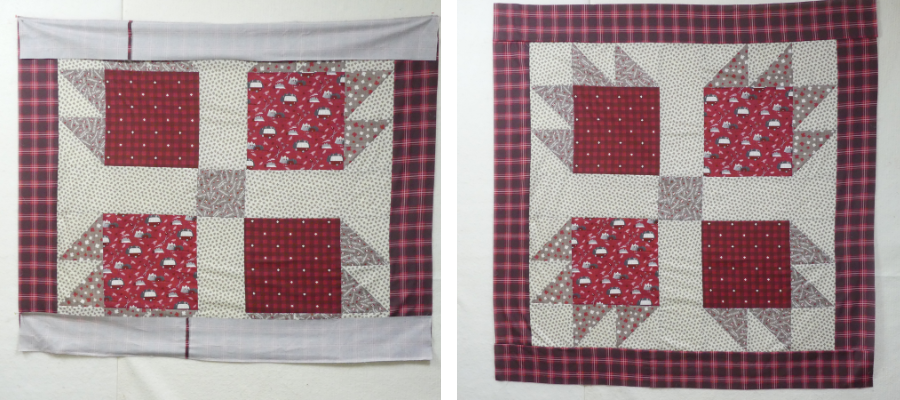
Add the longer strips to the top and the bottom in the same way, pinning the ends first and adding more pins in between, stitching in place and then pressing to finish the quilt top.
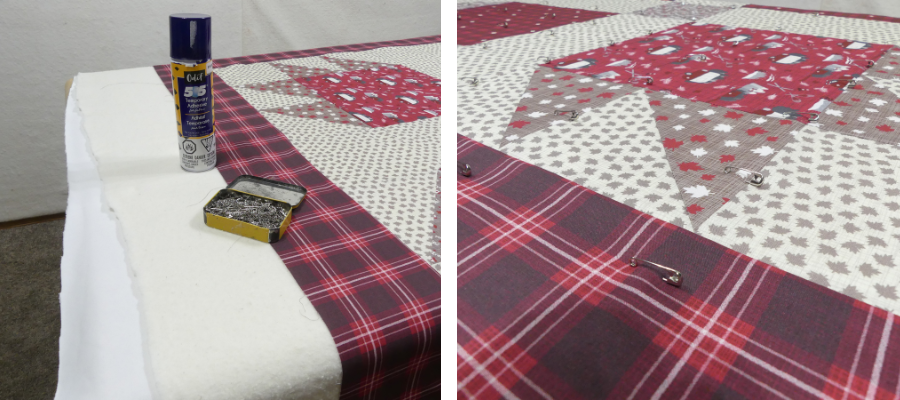
Time to baste! Layer your backing fabric, batting and quilt top so they’re nice and smooth. Since this is a small project, you should be able to do this with good results on a tabletop. Pin or spray-baste the layers together.
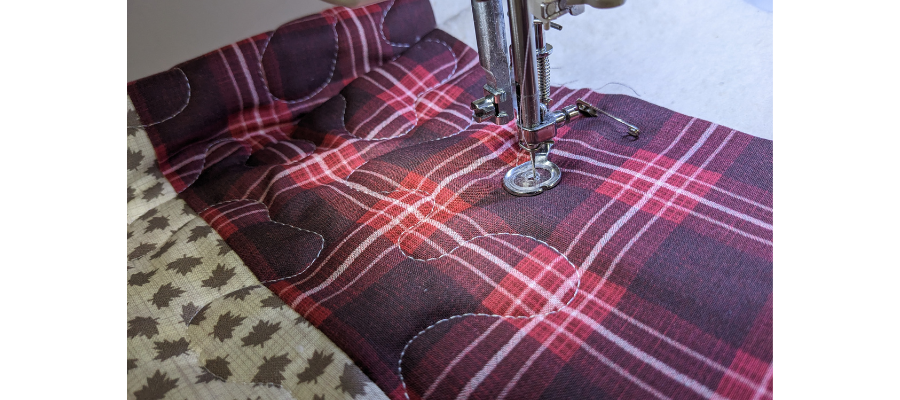
Quilt as you wish. For quick results, you can stipple quilt, which is a meandering design of curvy lines that don’t cross, but wiggle all over the quilt at random.
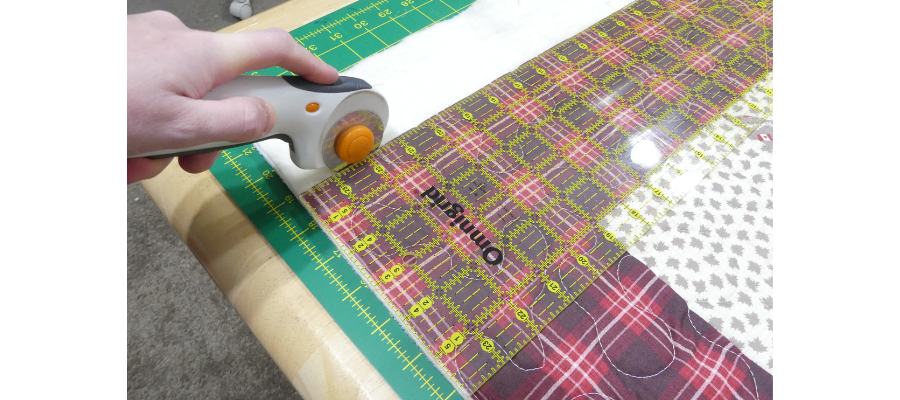
Once it is quilted, it’s time to trim. Use the edge of the block as a guide to trim evenly, and make sure the corners are 90 degrees.
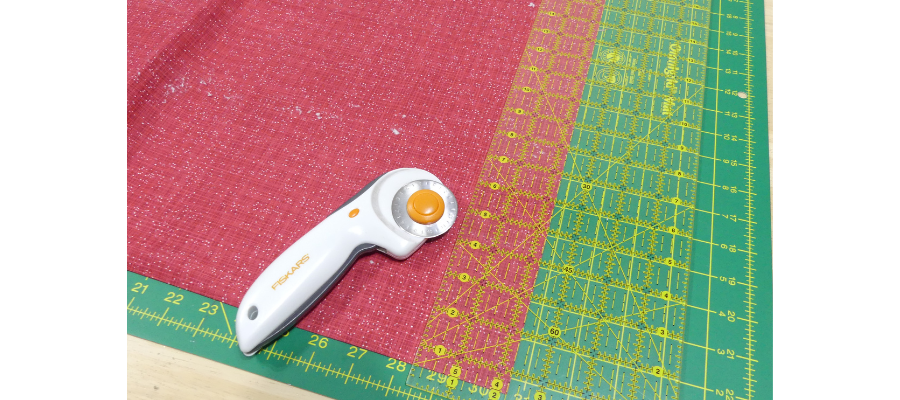
Cut six 2 ¼” strips for binding across the width of the binding fabric.
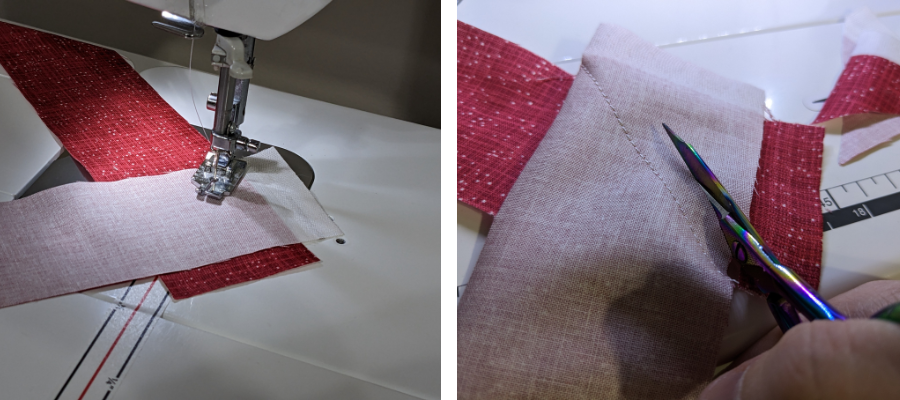
With right sides together, position the ends of two strips at a right angle to each other. Stitch across diagonally from outside edge to outside edge. Keep going with the rest of your strips until you have a long continuous strip and trim off the excess fabric.
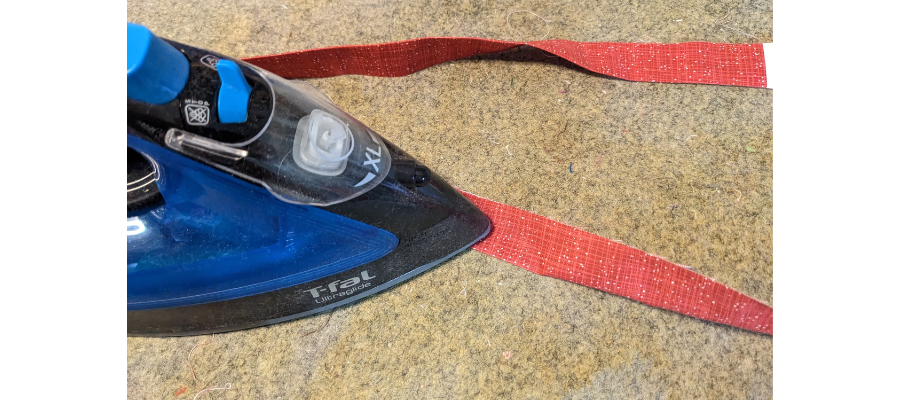
Press the strip along the entire length with wrong sides together and raw edges meeting.
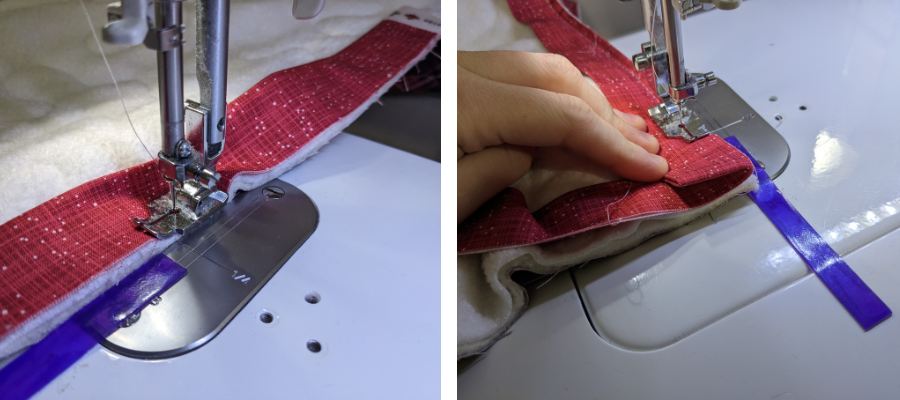
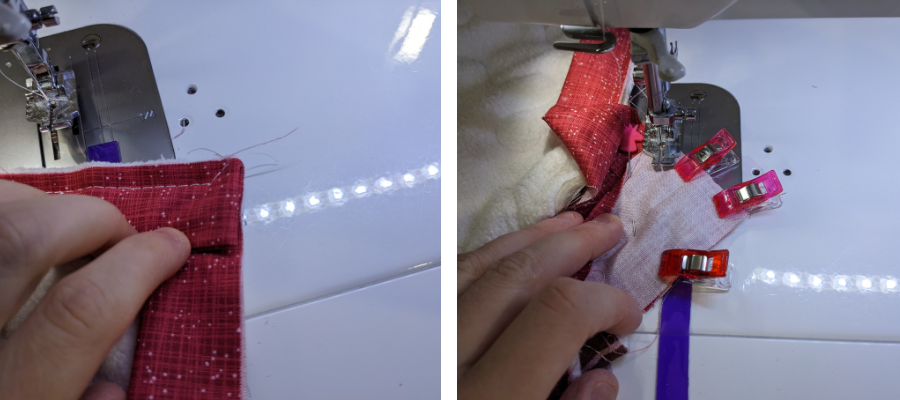
Leaving a tail of around 5″ and starting somewhere along the centre of the bottom edge, align the raw edges of the binding with the edge of the back of the quilt and start to stitch down with a 1/4″ seam allowance.
When you get to a corner, stop stitching 1/4″ away and backstitch to secure. Rotate so the next edge is on the right, as if ready to be fed through the sewing machine. Fold the binding strip up so it creates a 45-degree angle from the corner point and finger-press the fold. Bring the binding back down again over this fold, so that the second fold is even with the side of the quilt you just stitched, and the raw edges are aligned with the next edge of your quilt. Stitch down right from the edge.
Keep working around the edges. When you have finished mitring the last corner and are back on the starting side, stop stitching around 4″ from the place you started. Trim away the excess binding fabric so each tail is about the same length, but most importantly, so they overlap by the width of the binding before it was pressed. We made a 2 1/4″-wide binding, so the overlap measures 2 1/4″.
Open out the ends of the strips and position, with right sides together, at a 90-degree angle, as you did when you first joined the strips. The end of each strip should be flush with the side. You will likely want to pin in place. Sew diagonally from one outside edge to the other and trim off the excess.
Press this new seam and finish sewing the binding down.
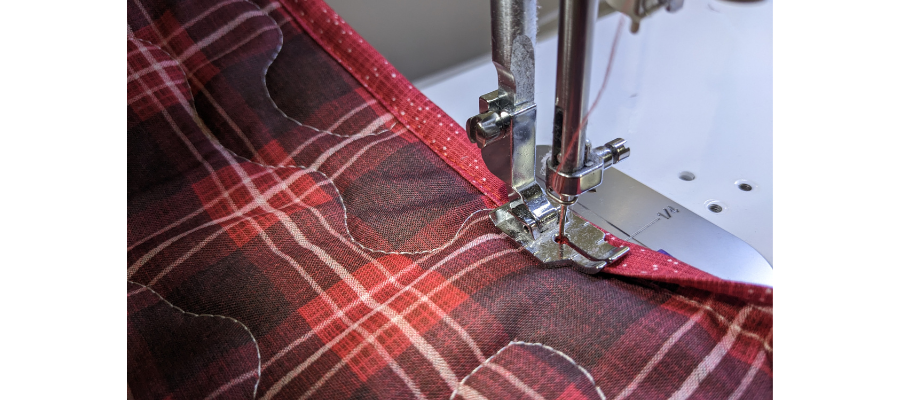
Fold the binding around to the front, just beyond the line of stitching. Pin or clip if you wish. As before, start on a straight edge, not a corner. Use a slightly longer stitch length than usual and sew directly on the binding in a matching colour thread, around 1/8″ from the edge.
When you get to a corner, fold the corner into a mitre so that both sides are parallel to the quilt edge. Stitch slightly into the mitre, pivot with the needle down, pin or clip, and continue with the next side until finished.
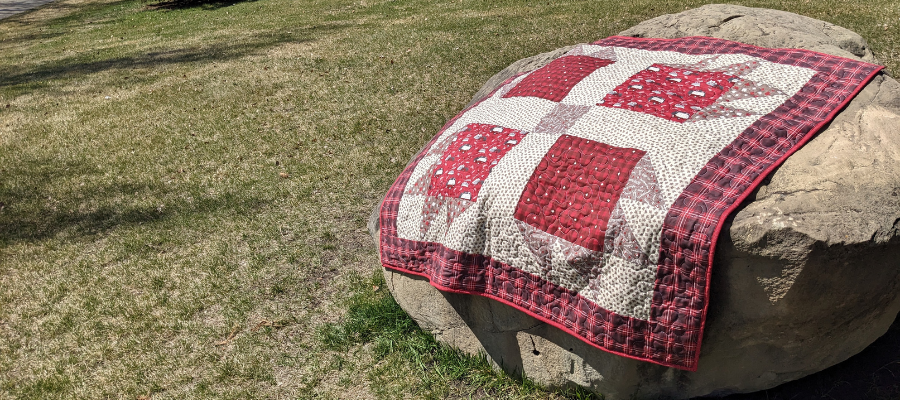
You’re done! We’d love to see your creations on social media and hope you’ll share them with us! Please post, and tag us on Instagram or Facebook so we can celebrate your design! #TrendTexFabrics @trendtexfabrics
Looking for more tutorial and project ideas? Check some other ideas out here.
