Tannenbaum Quilt Tutorial
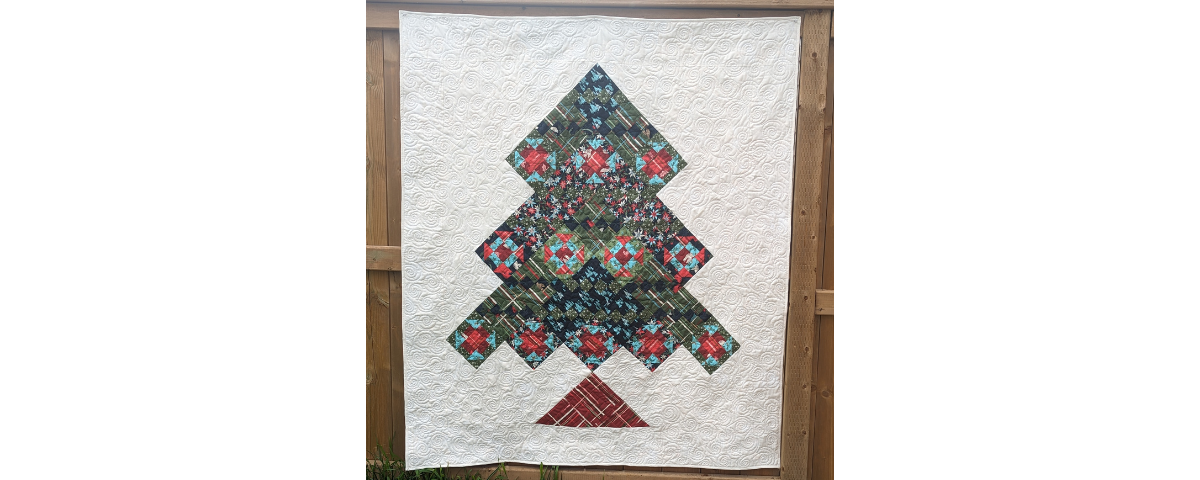
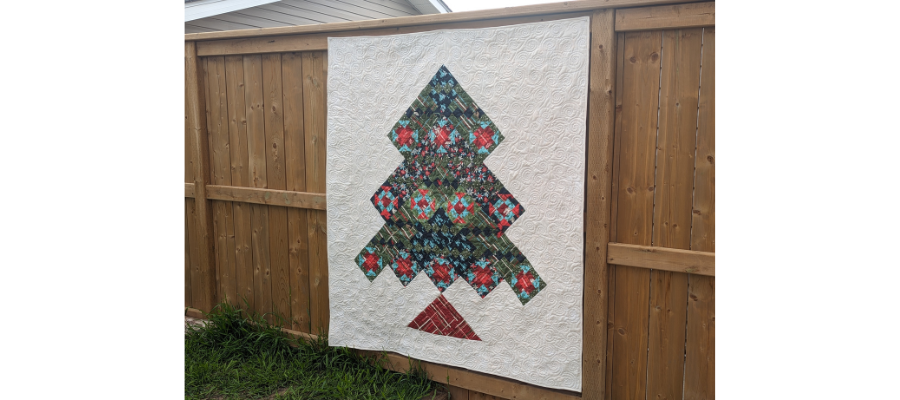
Practise arranging your quilt blocks on point to make this Christmas tree design!
This design includes two simple types of blocks to sew. Grab a stack of fat quarters and let’s go!
Finished size: 48” x 57”
Difficulty: Intermediate
Project time: A couple of weekends
Here’s what you’ll need for your quilt:
- 3x dark-teal fat quarters (Colour 1)
- 3x green fat quarters (Colour 2)
- 2x dark-red fat quarters (Colour 3)
- 1x red fat quarters (Colour 4)
- 1x light-blue fat quarters (Colour 5)
- 2m background fabric (white Grunge)
- 1 1/2m batting
- 1/2m binding fabric
- 1 1/2m wide backing fabric, or 12 fat quarters
- General sewing notions: sewing machine, thread, pins, cutting tools, iron
Note: Seams are ¼” throughout.
This tutorial uses the fabric collection “Good News Great Joy” by Fancy That Design House for Moda.
Double Four Patch Blocks
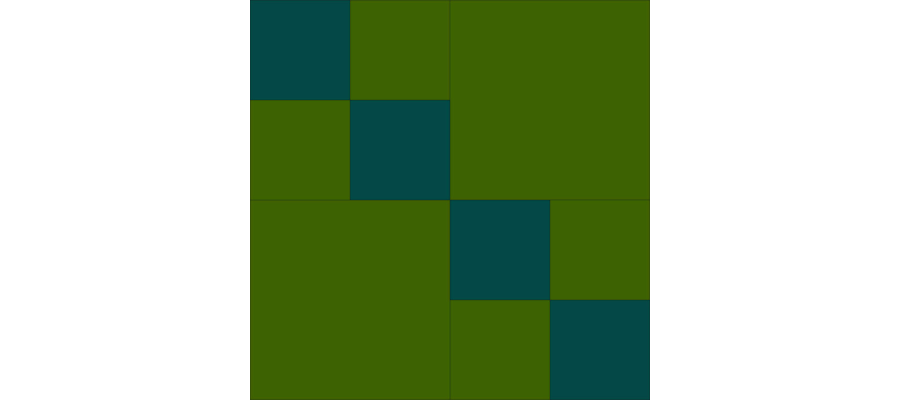
Block A: Make seven.
For Block A, you will need one Colour 1 and one Colour 2 fat quarter. Cut the following:
Colour 1 (dark teal): 28 – 2” squares. Save leftovers for block E.
Colour 2 (green): 14 – 3 ½” squares, 28 – 2” squares.
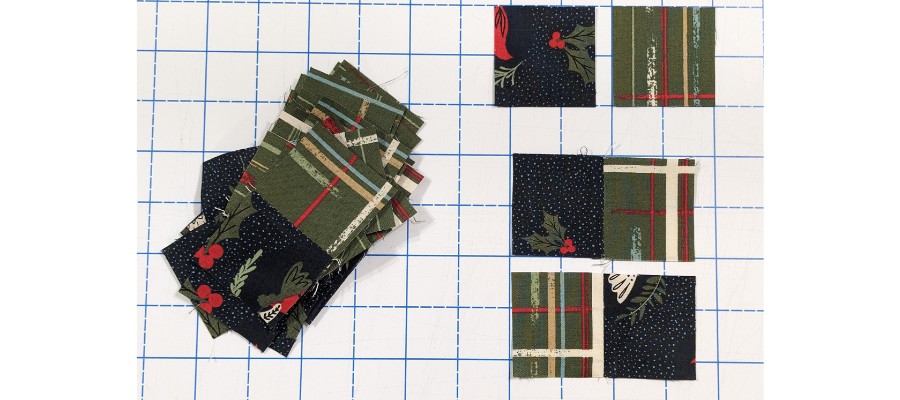
1) Pair up a Colour 1 and a Colour 2 square and sew together. Press seams to the darker fabric.
2) With the Colour 1 fabrics arranged top left and bottom right, sew two units together to make a square, nesting the seams in the centre. You will need two per finished block.
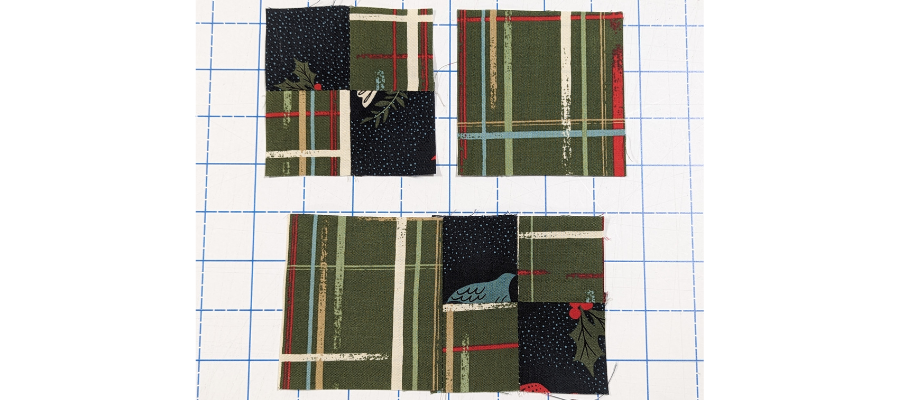
3) Sew a 3 ½” square to the left of one square unit and one to the right of another. Press seams opposite ways.
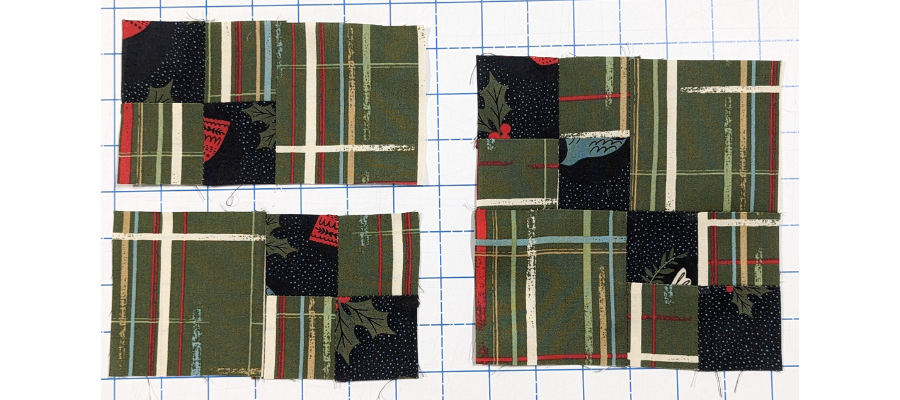
4) Lock the seams together and sew these two rows together to make a finished block. Trim to 6 ½” if needed.
5) Make a total of seven blocks.
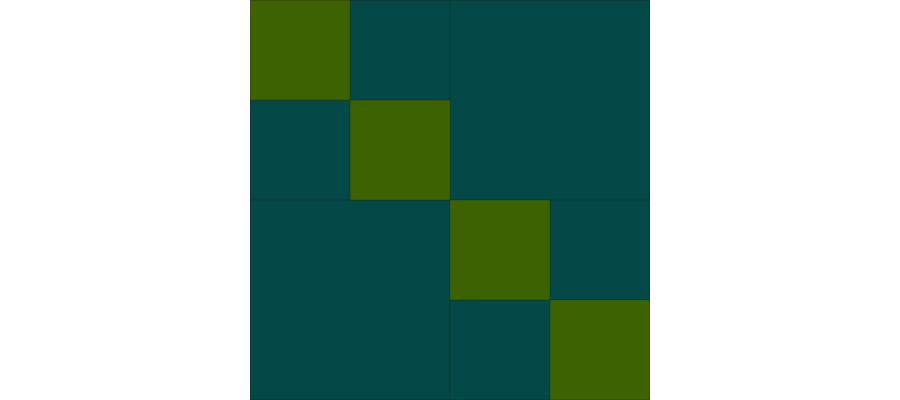
Block B: Make eight
For Block B, you will need two Colour 1 fat quarters and one Colour 2 fat quarter. If you want to create them so that they’re all the same, you will need a half yard of Colour 1.
Cut the following:
Colour 1 (dark teal) FQ 1: 8 – 3 ½” squares, 16 – 2” squares. Save leftovers for block D.
Colour 1 (dark teal) FQ 2: 8 – 3 ½” squares, 16 – 2” squares.
Colour 2 (green): 32 – 2” squares. Save leftovers for Block C.
Follow steps 1–4 above to make this block, but change the instructions so that Colour 1 is in the place of Colour 2 and vice versa. Make eight.
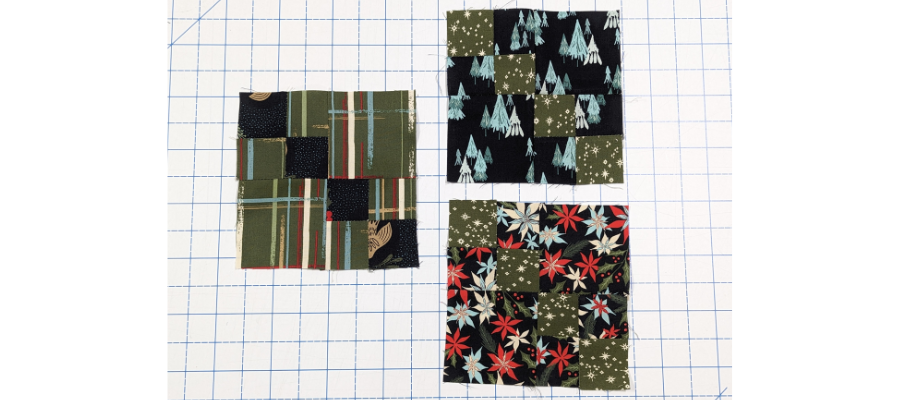
Make the blocks so that they only use two fabrics. You will end up with four with FQ1 Colour 1 fabrics, and four with FQ2 Colour 1 fabrics. We will refer to these blocks in the quilt diagram as B1 and B2.
Greek Square Blocks
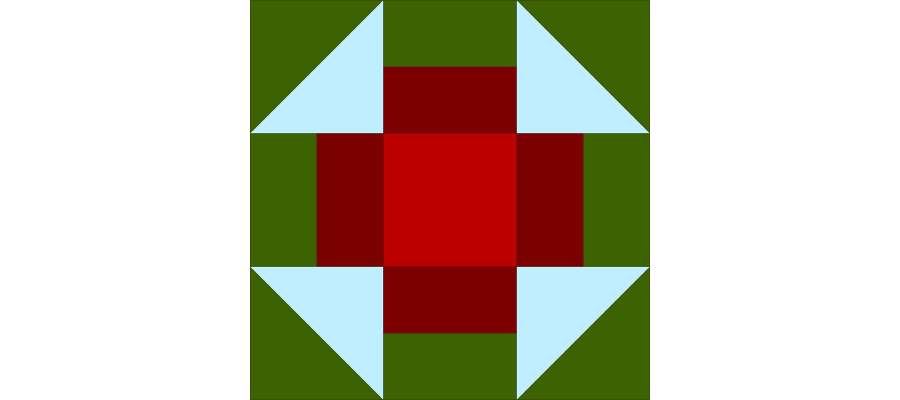
Block C: Make four
For Block C, you will need a fat quarter of Colour 3, Colour 4, and Colour 5, plus the leftover Colour 2 from Block B.
Cut the following:
Colour 2 (green): 8 – 3” squares, 16 – 2 ½” x 1 ½” rectangles.
Colour 3 (dark red): 16 – 2 ½” x 1 ½” rectangles. Save leftovers for blocks D, E, and F.
Colour 4 (red): 4 – 2 ½” squares. Save leftovers for blocks D, E, and F.Colour 5 (light blue): 8 – 3” squares. Save leftovers for blocks D, E, and F.
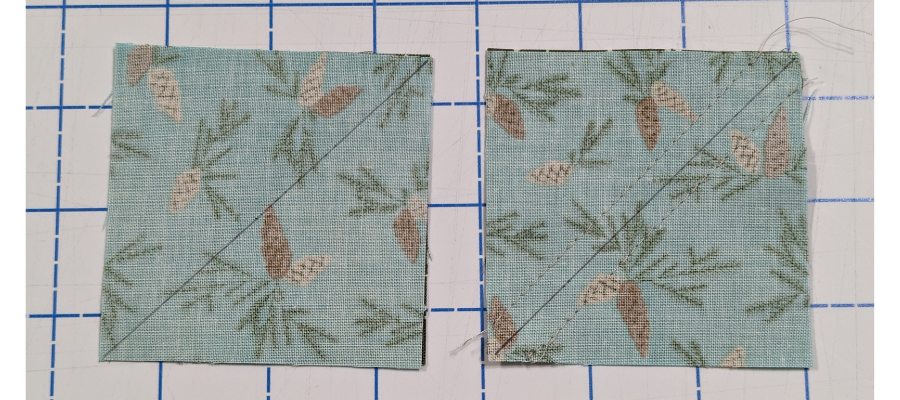
1)For each block you will need two Colour 2 and two Colour 5 3” squares. Pair one of each fabric, right sides together. Draw a line diagonally on the back of each.
2)Sew a scant ¼” on either side of the line. Cut down each line to make a total of four units.
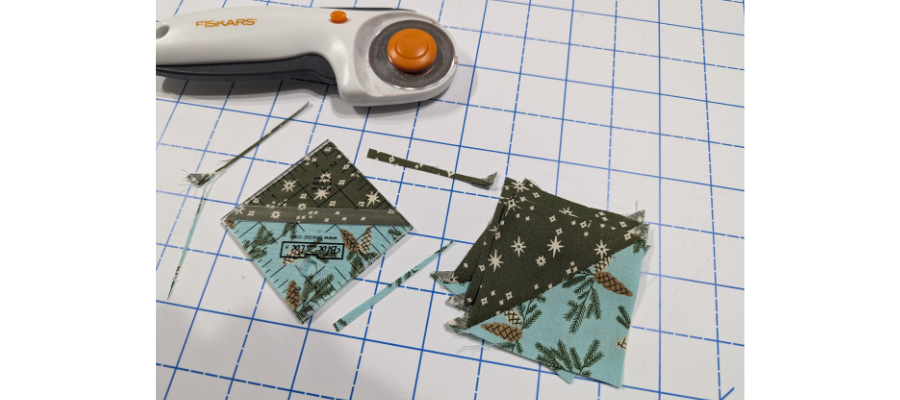
3) Press seams to the darker fabric. Trim down to 2 ½”.
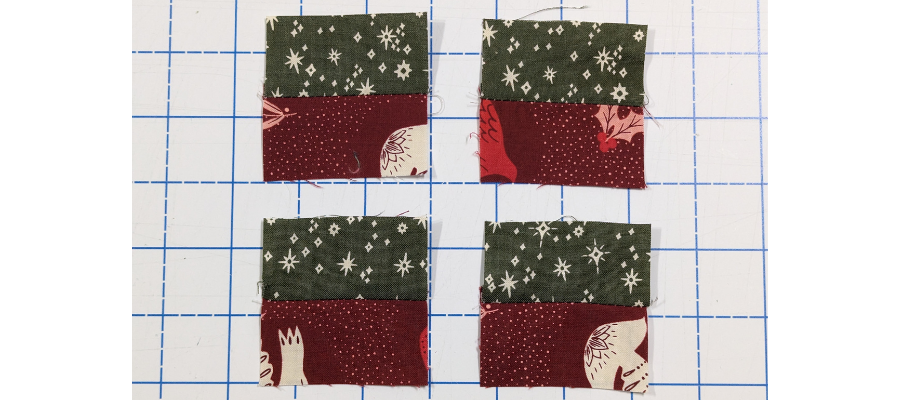
4) Pair up a Colour 2 and a Colour 3 rectangle and sew them together along the longer edge. You will need four per block.
5) Press to the darker fabric and trim to 2 ½” if needed.
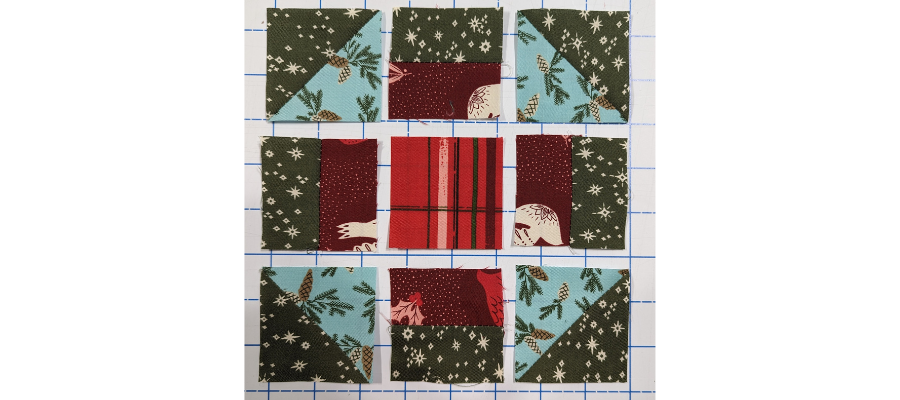
6) Arrange the block as shown, with the half-square triangle units (HSTs) in the corners, Colour 2 pointing outward, and the Colour-3 sides of the pieced squares pointing in, with the Colour 4 square in the centre.
7) Sew together in rows, pressing the middle row’s seams in the opposite direction of the top and bottom.
8) Sew the rows together, nesting the seams. Press well.
9) Make a total of four blocks.

Block D: Make four.
For Block D, you will need the leftovers from Block C in Colours 3, 4, and 5, plus the leftover Colour 1 from Block B.
Cut the following:
Colour 1 (dark teal): 8 – 3” squares, 16 – 2 ½” x 1 ½” rectangles.
Colour 3 (dark red): 16 – 2 ½” x 1 ½” rectangles. Save leftovers for Blocks E and F.
Colour 4 (red): 4 – 2 ½” squares. Save leftovers for Blocks E and F.
Colour 4 (light blue): 8 – 3” squares. Save leftovers for Blocks E and F.
Follow steps 1–8 above to make this block, but change the instructions so that Colour 1 is in the place of Colour 2. Make four.

Block E – Make two.
For Block E, you will need the leftovers from blocks C and D in colours 3, 4 and 5, plus the left over colour 1 from block A. Cut the following:
Colour 1 (Dark Teal): 4 – 3” squares, 8 – 2 ½” x 1 ½” rectangles.
Colour 3 (Dark Red): 2 – 2 ½” squares. Save leftovers for block F.
Colour 4 (Red): 4 – 3” squares. Save leftovers for block F.
Colour 4 (Blue): 8 – 2 ½” x 1 ½” rectangles. Save leftovers for block F.
Follow steps 1–8 above to make this block, but change the instructions so that the colours match the above diagram. Make two.
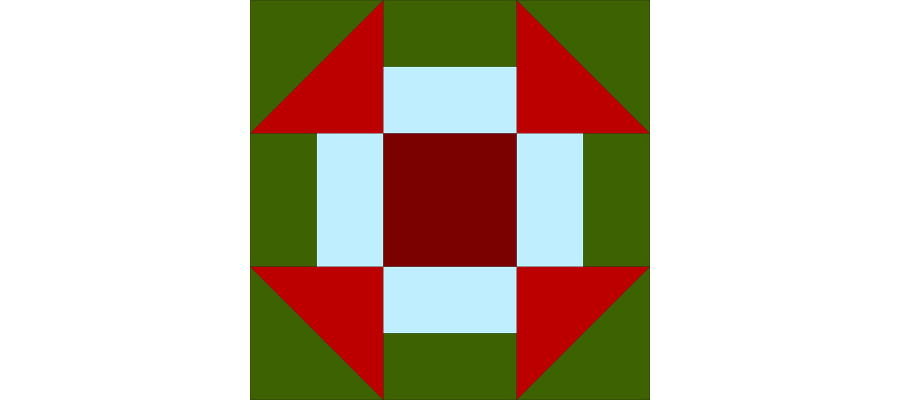
Block F: Make two.
For Block F, you will need the leftovers from Blocks C, D, and E inColours 3, 4, and 5, plus the remaining Colour 2 fat quarter.
Cut the following:
Colour 2 (green): 4 – 3” squares, 8 – 2 ½” x 1 ½” rectangles.
Colour 3 (dark red): 2 – 2 ½” squares.
Colour 4 (red): 4 – 3” squares.
Colour 4 (light blue): 8 – 2 ½” x 1 ½” rectangles.
Follow steps 1–8 above to make this block, but change the instructions so that the colours match the above diagram. Make two.
Additional cutting and completing the quilt top
Cutting the borders first for the most economical use of the fabric, cut the following from the background fabric:
2 – side borders: 6 ½” x 51 ½”
2 – top and bottom borders: 6 ½” x 49”
22 – 6 ½” squares
4 – 9 ¾” squares. Cut these across the diagonal in both directions to make a total of 16 setting/side triangles.
2 – 5 ⅛” squares. Cut these across the diagonal once to make four corner triangles.
From the remaining Colour 3 fat quarter, cut the following:
1 – 6 ½” square
1 – 7” square. Cut across the diagonal once to make two setting triangles.
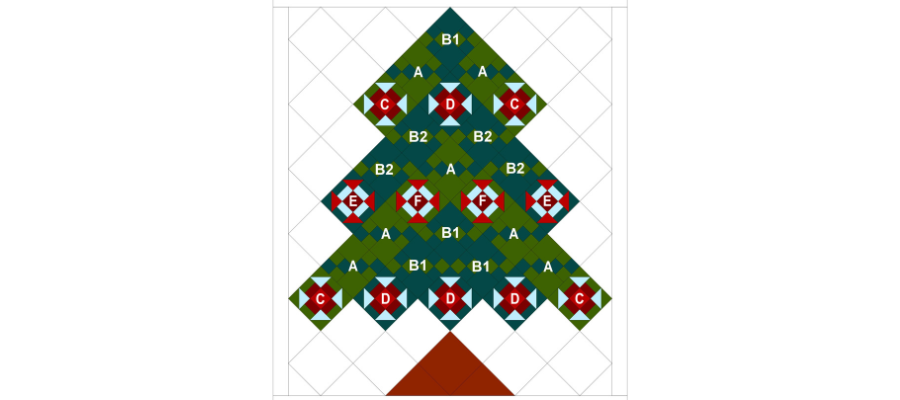
Setting the borders aside for now, arrange the blocks as shown in the diagram above.
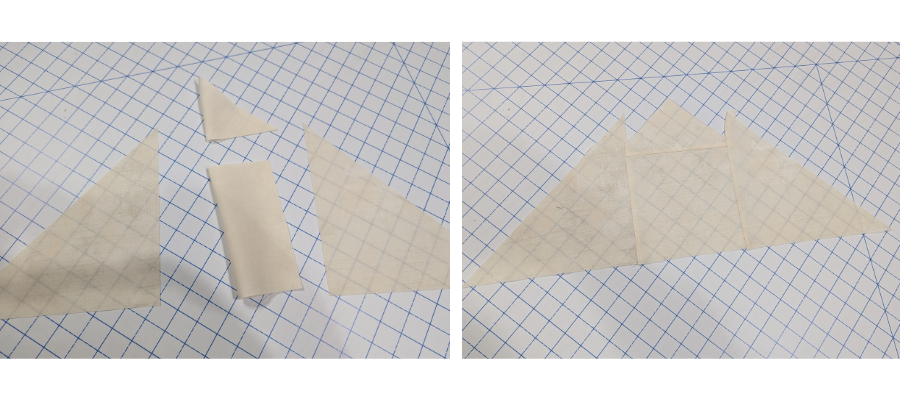
Starting at the top left, fold to find the centre points, then sew the corner triangle to the square on the next row. Sew the setting triangles on either side, aligning the bottom of the triangles with the bottom of the square.
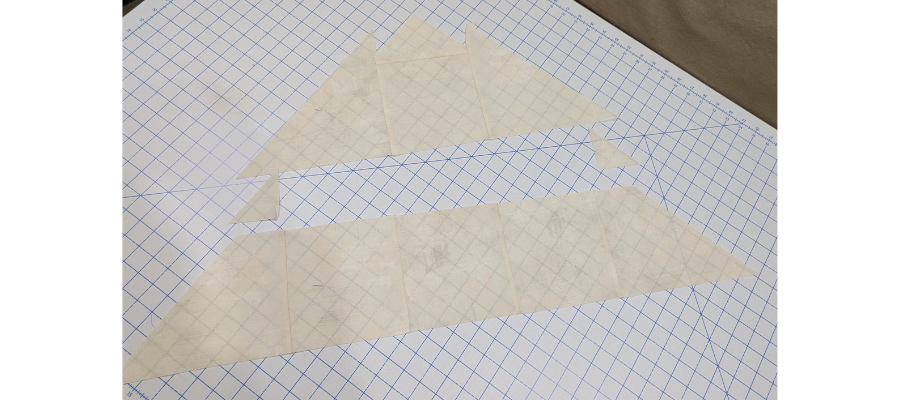
Sew together in rows, alternating the pressing of seams as you go to make matching the points easier. If you find you have excess in the points of the setting triangles compared to the rest of the row, you can trim these off.
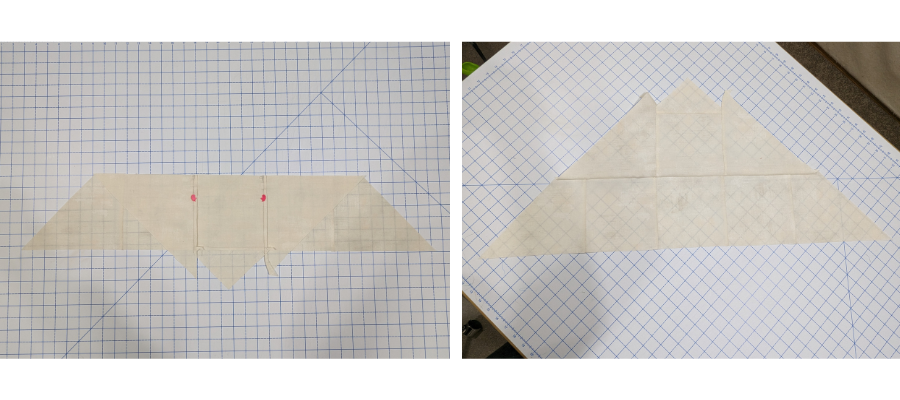
Sew the rows together as you work to stay on track.
Tip: As the rows get longer it can be harder to note what goes where, so take your time and label each block to avoid mistakes.
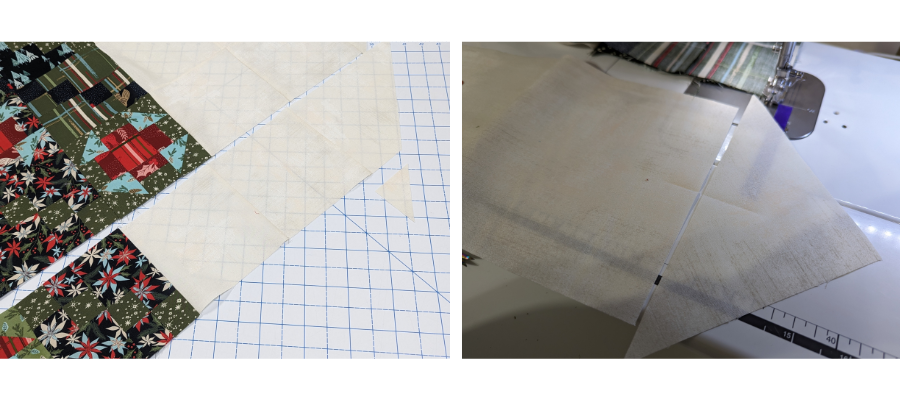
Once you get past the halfway mark, the trimming of the points will likely flip to the bottom of the row instead of the top – if you need to trim at all. To join a corner triangle to the end of a row, finger-press in half to find the centre of the two adjoining pieces and sew, matching up the marks.
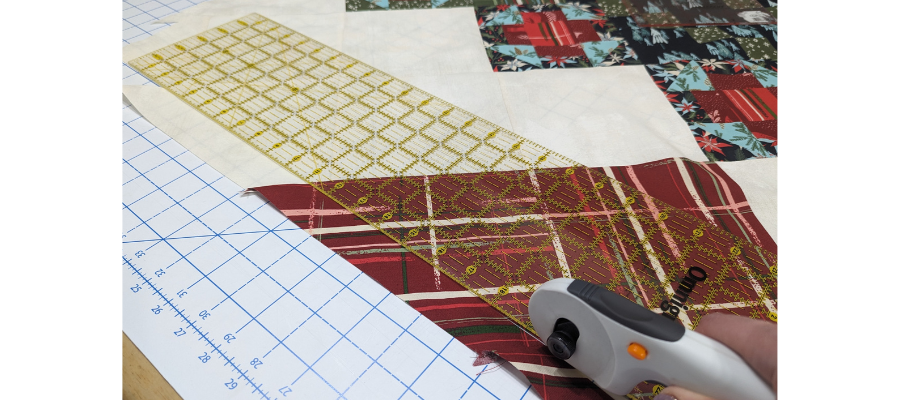
Once all the rows are together, trim down as necessary. Your pre-border quilt top should measure approximately 42 ½” wide by 60” tall.
Sew on the side borders first, folding the top to find the centre and finger-pressing, then finding the centre of the border strips in the same way and aligning the marks. Pin along the edge and then sew down. Repeat for the second side and press. Trim excess flush with the top and bottom of the quilt if needed.
Sew the top and bottom in the same way, finding the centres, stitching, pressing, and trimming.
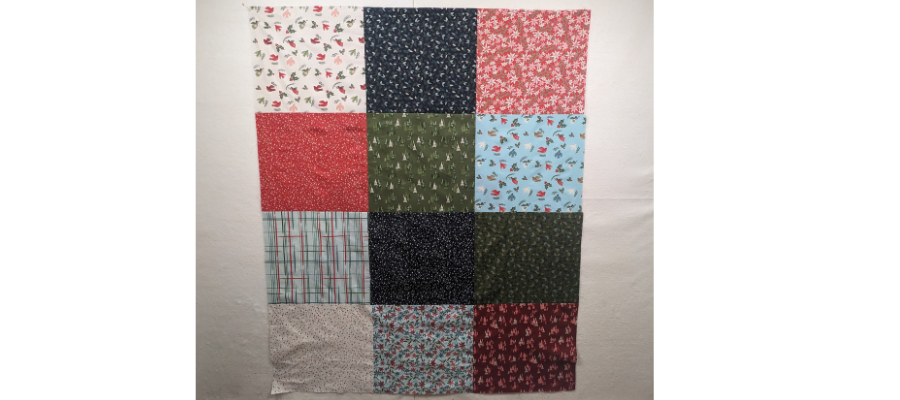
You can use a piece of extra-wide backing on the back, piece your own, or use this layout of coordinating fat quarters. In this example, the fat quarters were pressed and then trimmed to 18” tall by 20” wide. They were sewn together in four rows of three pieces along the shorter edges. The seams were pressed alternate ways so that the seams could be nested, and then it was pressed well.
Baste your quilt with your batting sandwiched between the backing and top using pins, or your preferred method.
Quilt as desired. For ours, we quilted a loopy design in green across the tree, a linear design in red on the base, and then swirls in white all over the background to keep it interesting!
All you have left to do is bind the quilt. Cut the binding fabric into six strips, 2 ¼” wide. Follow the binding instructions on the Sei Bella Solids Quilt project to machine-bind your quilt.
Did you make this quilt and learn any new skills? Which fabrics did you choose? Don’t forget to tag us on Instagram or Facebook so we can see and celebrate your design! #TrendTexFabrics @trendtexfabrics
