
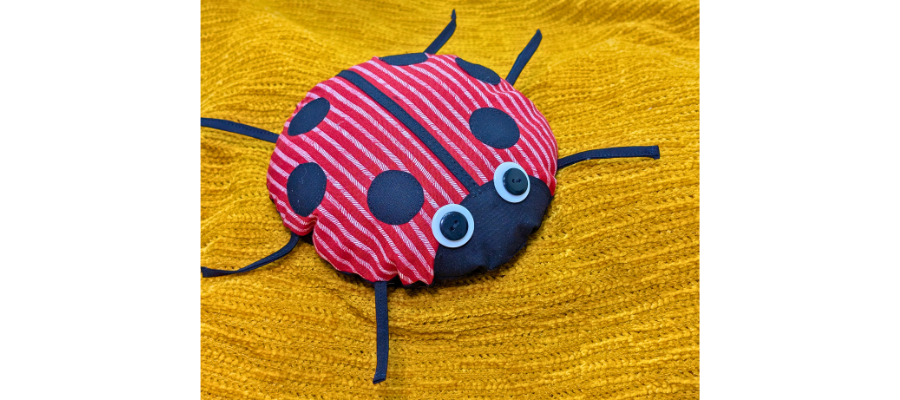
Ladybug Pincushion Tutorial
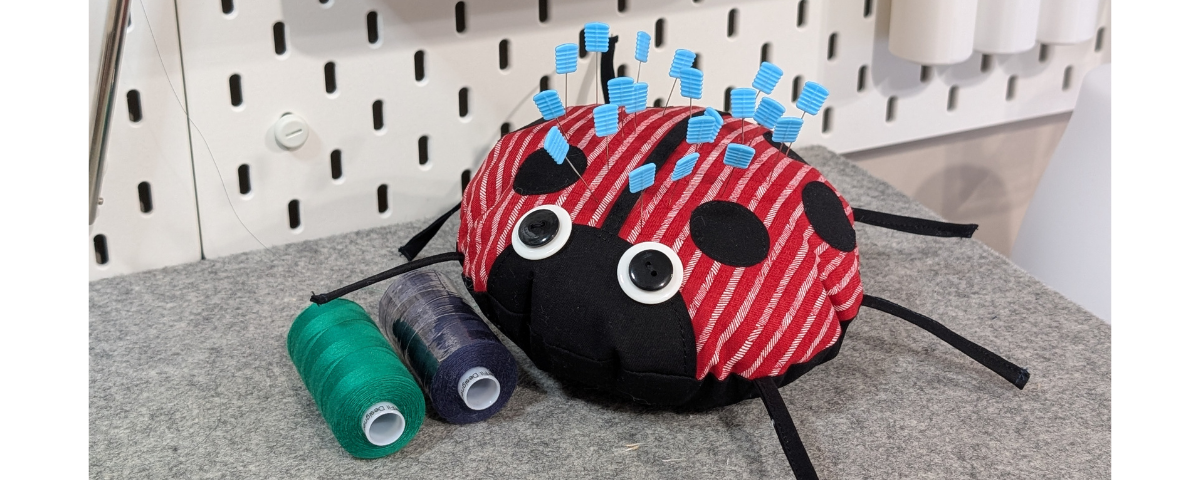
Lets sew a simple ladybug pincushion – you can choose to add legs or keep the design round and minimal.
Finished size: 7” Difficulty: Beginner Project time: 1 ½ hours
This is a versatile project; you can opt to make this project a little smaller if you like – just make that circle template an inch or so smaller and the face piece a touch smaller too. If you want to make it a stuffy, just leave out the rice or walnut shells.
You will need:
- Fat quarter of red fabric and back fabric
- Small piece of fusible web
- Fibre fill
- Pair of compasses and paper
- Small roll of tape or other small round object
- Odif 808 Paper Pattern Spray adhesive (optional)
- A pair of ⅞” white buttons and a pair of ⅝” black buttons, or a set of googly eyes
- Fibre fill
- Rice or walnut shells (optional)
- General sewing notions: sewing machine, rotary cutter, pins, iron, thread, hand sewing needles, glue stick etc.
Seam allowances ¼” unless stated otherwise. RST = right sides together.
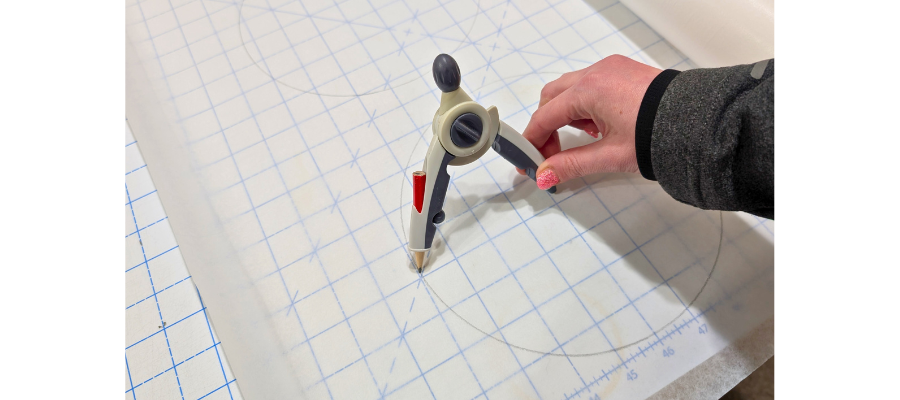
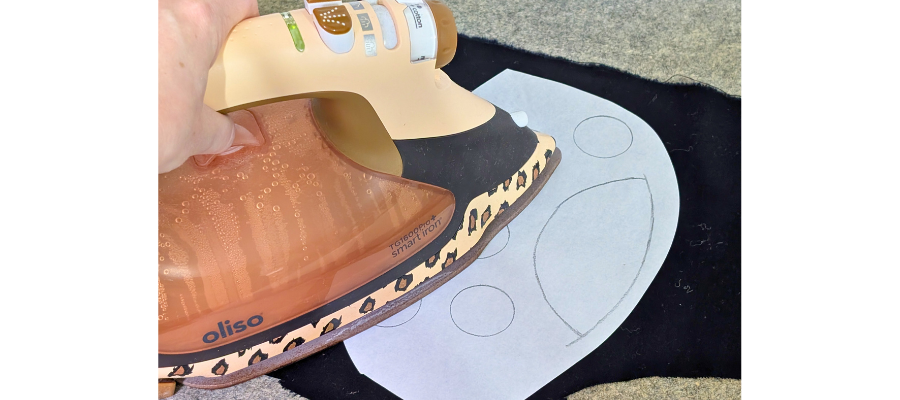
Draw a circle with a 4” radius onto paper. This paper will be your template.
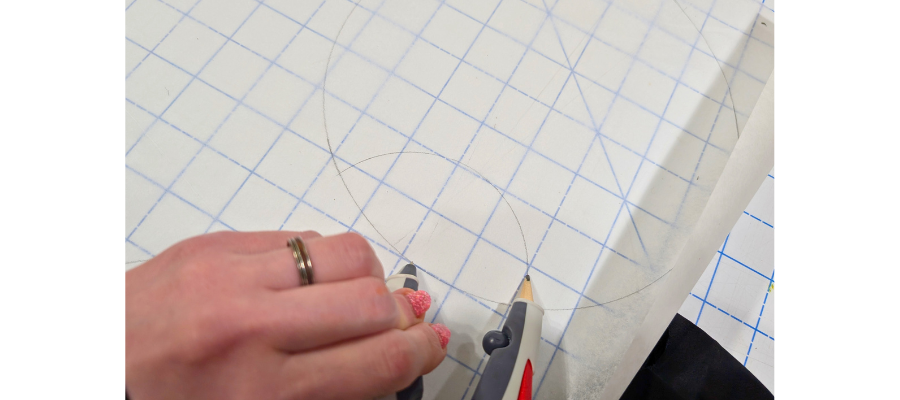
Set the compass to 2” and with the point positioned on the circle’s edge, draw an arc on the inside that touches the side.
Trace this inside arc shape onto fusible web. You will also need to draw 6 circles for spots onto the fusible. Drawing around the inside of a small roll of tape is about the right size.
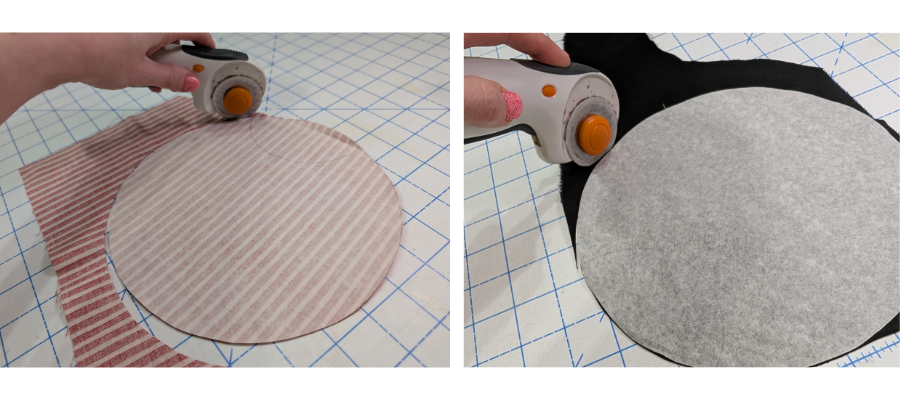
Using the circle template – cut a circle from the red and the black fabrics. You can use paper pattern adhesive to temporarily hold in place and cut through both the paper and the fabric at the same time, or you can cut out the circle and use pattern weights or pins before cutting out the fabric.
Iron the fusible onto the reverse of the black fabric thoroughly.
Cut out shapes along the lines.
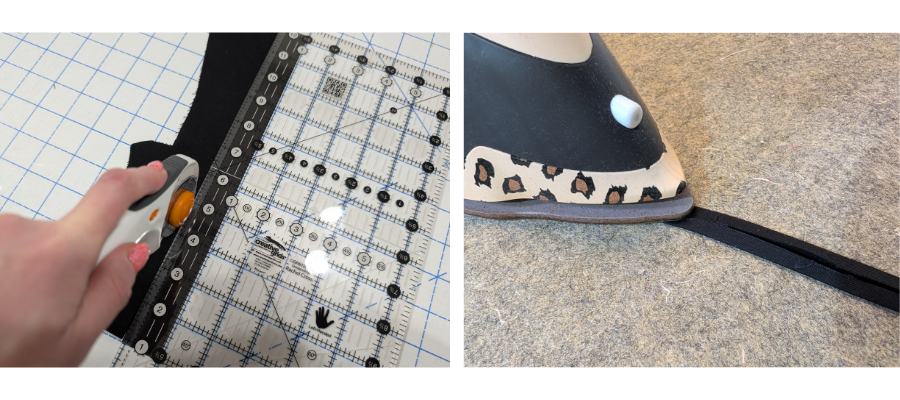
From remaining black fabric, cut a couple of 1” strips. You will need a piece that is 9” long for the body and another piece 18” long minimum for the legs.
Fold in half lengthways and press sides to the centre, wrong sides together. Fold again and press for a strip ¼” wide.
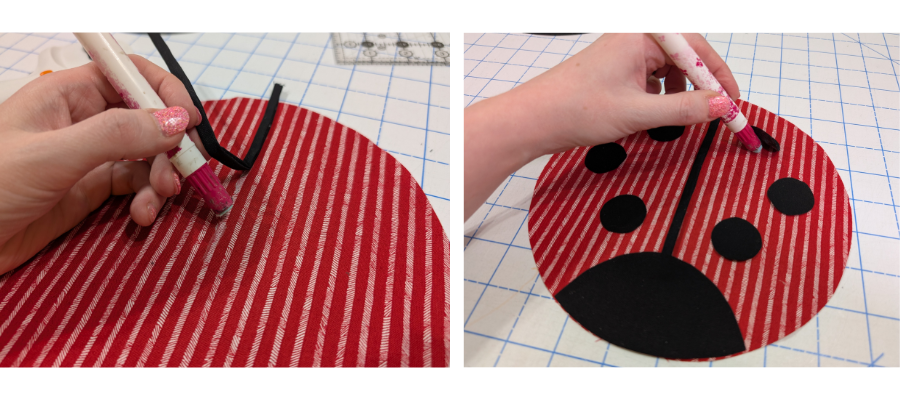
Find the centre of the circle and glue the body strip in place to temporarily hold it. Position the face piece over the top and trim off any excess of the strip. Remove the backing on the fusible pieces and arrange, using a dot of glue to hold in place if needed while you transfer to the ironing board.
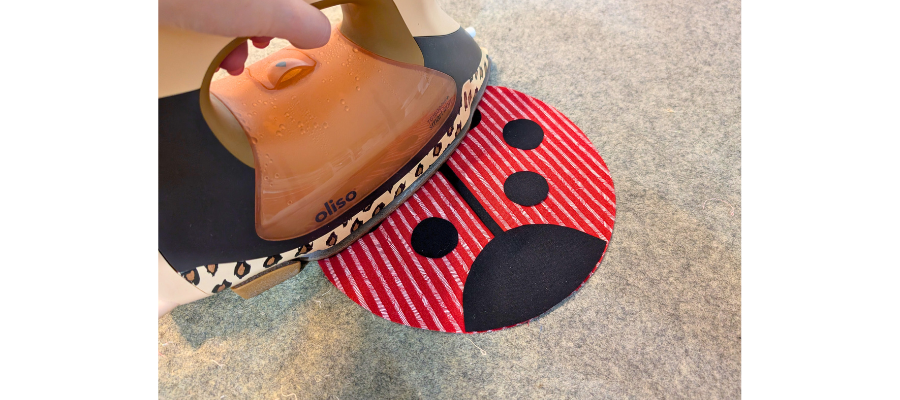
Press the black details well to fuse in place.
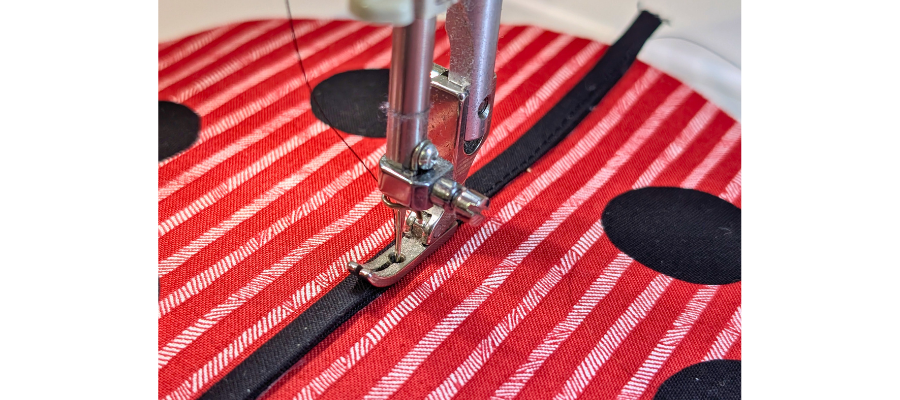
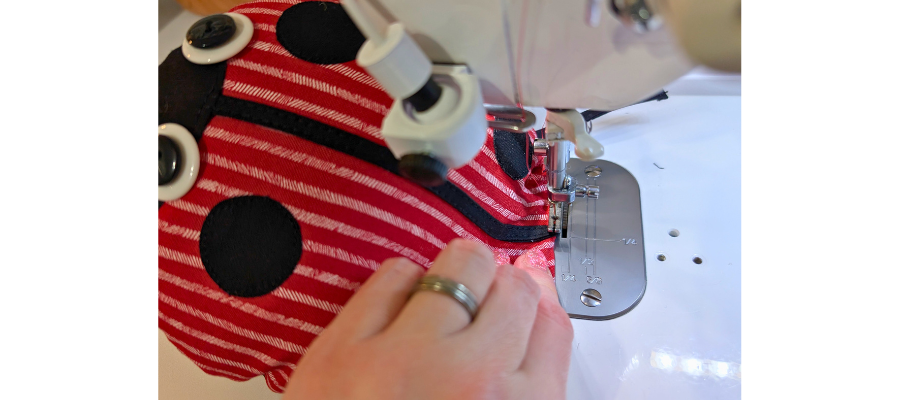
On the sewing machine, top stitch the strip, face and spots onto the body as close to the edge as possible.
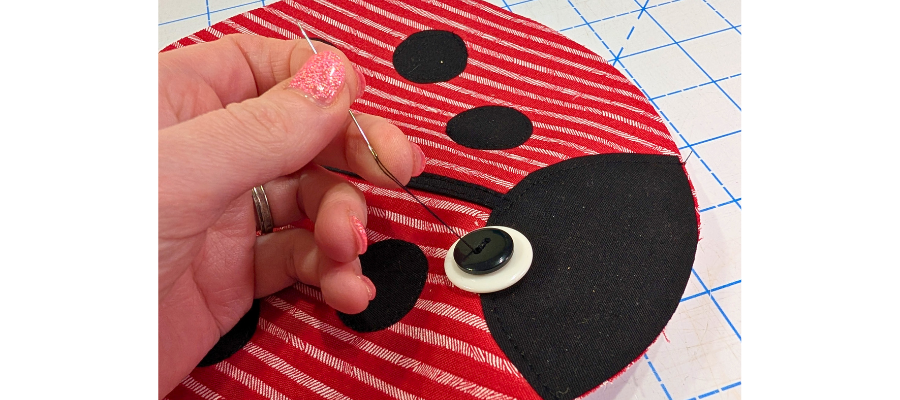
Next take your button or sew on eyes and position on the edge of the face for a cartoonish look. With the white button on the bottom and the smaller black button stacked on top, sew by hand a few times to hold in place. Repeat for the other eye and tie off.
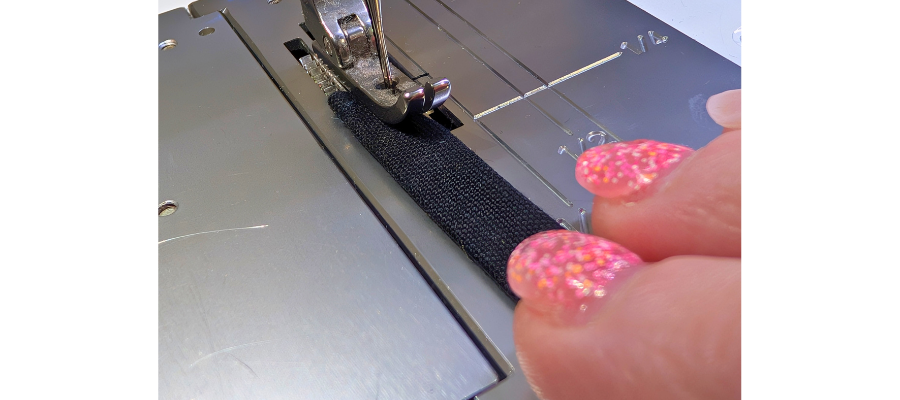
Cut six pieces of the strip measuring 3” long for the legs. On each, open up one end and fold raw edge inside. Stitch in place.
Once all six legs are completed you can refold and stitch down the open edges.
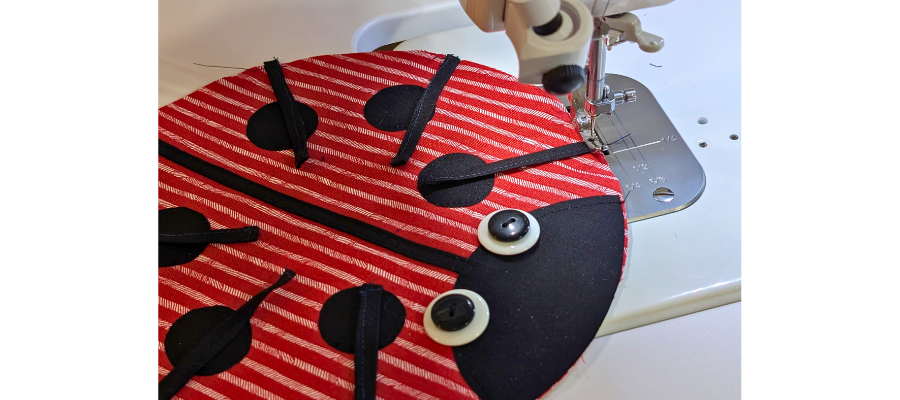
With the raw edge end aligned to the body, arrange your legs in a way you like. The finished ends will point towards the centre. Baste in place within the seam allowance.
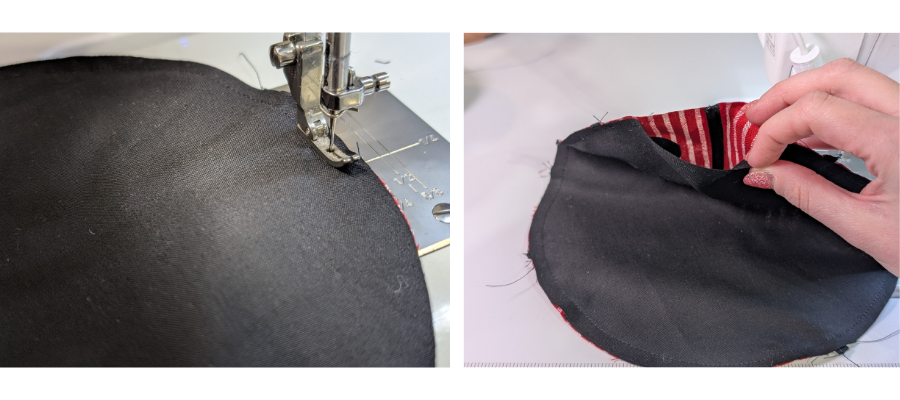
Position the black circle over the red, RST. Starting from the back of the ladybug and backstitching at the start and end, sew around the circumference of the circle, leaving a turning gap of about 3 inches.
Turn right sides out.
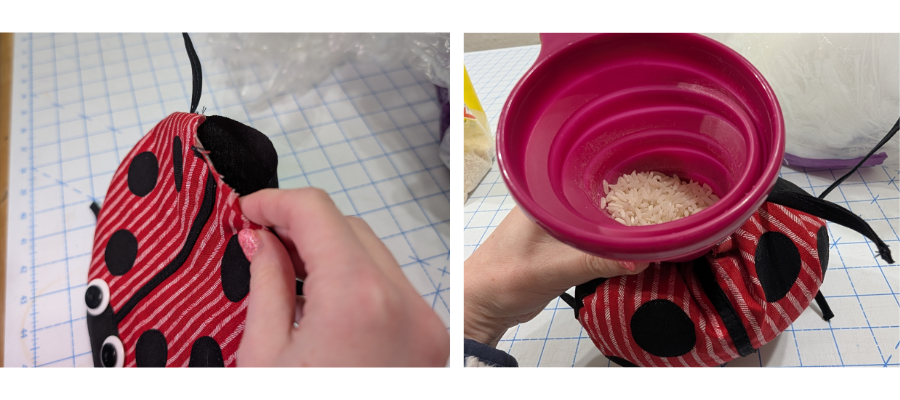
Fill ladybug with fibre fill. If you want to add a bit of extra weight, add some rice or dried walnut shells after.
Carefully sew up the turning gap with raw edges to the inside to complete.
We want to see your finished ladybugs!! Don’t forget to tag us on Instagram or Facebook so we can see and celebrate your creations! #TrendTexFabrics @trendtexfabrics