The Easiest-Ever Advent Calendar Project!

It’s super easy to sew up your own advent calendar (even if you’re new to sewing) with the Peppermint Please Advent Calendar by Sarah Watts for Ruby Star Society.
Finished Size: 29.5“ x 31” approximately Difficulty: Beginner I Time to make: 2 hours
This festive panel from Ruby Star Society comes with enough fabric to make an advent calendar, holiday bunting, and some extra designs that could become plushie tree ornaments incorporated into a quilt, or other decor. The instructions are printed on the panel, but here we offer a step-by-step photo guide to make creating something wonderful for the holiday even easier!
Here’s what you’ll need:
- A Peppermint Please Christmas Countdown Panel
- A crib size piece of batting, or a scrap measuring 40” x 35”
- Backing fabric – a metre works great but you could piece it – we used two half metres sewn together
- Binding fabric – a quarter metre is plenty but we used the stripe printed on the panel
- Scrap fabric at least 32” x 3”.
- A threaded sewing machine with a fresh needle
- Cutting tools: Rotary cutter, mat and ruler
- Hand sewing needle and thread. Self threading needles are handy for thread burying
- Pins
- Basting spray or safety pins (optional)
- A piece of dowel and ribbon for hanging
Cut and fold your advent calendar
The first step is to cut out the various pieces from the panel. There are dotted lines to cut along.

The sides have markings that say FOLD and MATCH with little lines. Pinch the fabric on the FOLD lines at each side of the calendar and lift up to meet the MATCH lines. If you have heat-resistant pins, you can pin the fold in place at each place where the vertical lines meet, and then press with a hot iron. If you have plastic pins, press first, then pin. You may find it easier to also pin the folds at the sides of the panel to reduce shifting.
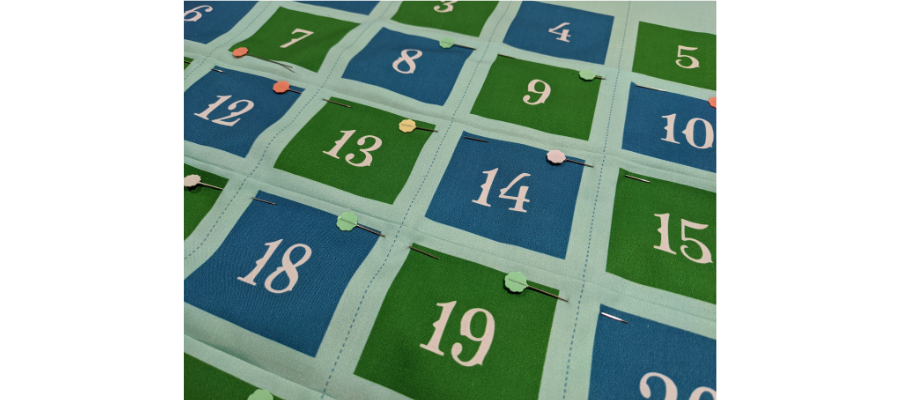
Repeat for all lines.
Prepare the quilt sandwich

If you have a single piece of backing fabric you can skip this next step! If, however, you’re using two half metres, sew them together vertically so that the selvedges are at the top and bottom, then press.
Layer the backing fabric face down, then the batting and finally the advent calendar panel on top, making sure the pockets lay nice and flat.
You can spray baste the layers together or pin. If spray basting, keep the pins in the folds on the advent calendar for now. If pinning you can switch out the pins on the advent calendar for safety pins if you wish, and go through all the layers. Alternatively, you can take out and re-pin with the existing straight pins.
It’s sew time

Leaving a tail and backstitching at the start and end, sew down the dotted vertical lines to form the pockets, removing the pins as you go. You can use a regular machine foot or you may wish to use a walking foot or even-feed foot.
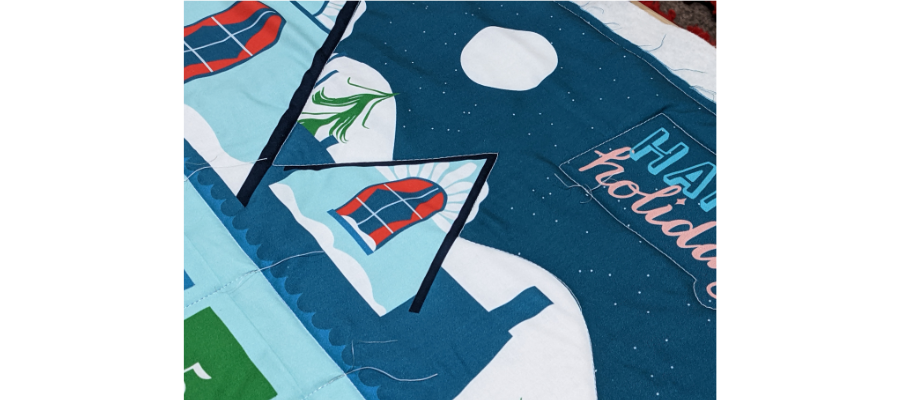
The panel only mentions sewing the vertical lines, but you can add more quilting to the top, bottom and sides if you wish, just don’t sew over the pockets.

The instructions then say to sew around the edge of the calendar with a ⅛” seam allowance, however you may wish to give yourself some extra wiggle room when trimming, so ¼” works well too.
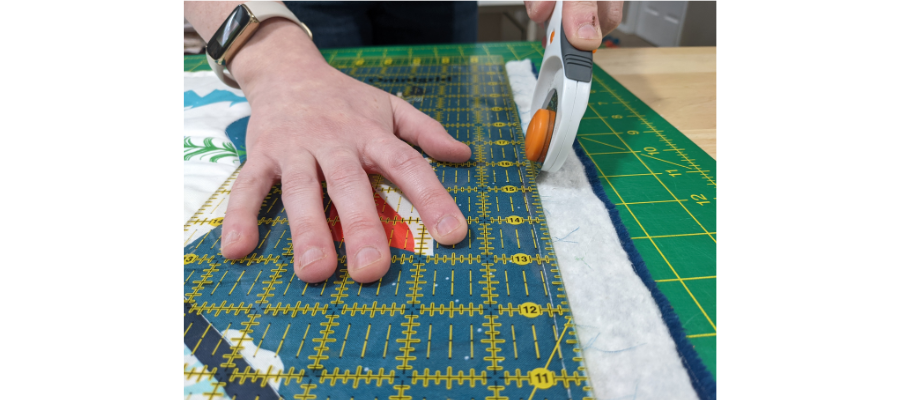
The finished advent calendar here is trimmed to a more square shape so it was small enough to used the diagonal stripe featured on the panel for binding. If you’re cutting your own binding fabric, you can trim down with your rotary cutter to the size you want. Make sure the corners are at 90 degrees and the sides measure the same. You may lose a bit of fabric where the pockets are made, but this is normal!
Cleaning up your advent calendar
It’s time to get rid of all those annoying bits of thread. Using a self-threading needle, thread the ends and make a tiny stitch on the top, then pull the needle underneath the top fabric only, and back up again. Snip any excess thread you have. These tail ends will now stay inside.

For the binding, cut enough strips to cover the circumference of the calendar plus several inches extra. For easy binding, cut strips 2” – 2 ¼” wide. If you want to use the stripe shown here, these are harder to sew and cut at 1 ½” wide. There will be some excess fabric at one side, and this is okay!

Sew the strips together end to end. To do this, your strips will need to be right-sides-together and positioned so that they are at 90 degrees, and you’ll sew diagonally to make a 45-degree seam. (If you need additional binding help, Leah Day has written a comprehensive guide on how to join the ends and mitre corners. You can find it here)

Press the seam and then fold the entire length of the binding wrong sides together and press.

One side of the fold will have a full stripe on it if you’re using the panel fabric for binding. Position this facing down, this way it will wrap to the front. Starting from the centre of an edge leaving a tail of 5 inches or so, sew the binding to the BACK of the quilt. Once you get back to the starting edge, leave a large gap to make joining the strips easier.
Join the ends together. If it’s your first time doing this, we recommend reading about Leah Day does this to result in a nice, even finish.
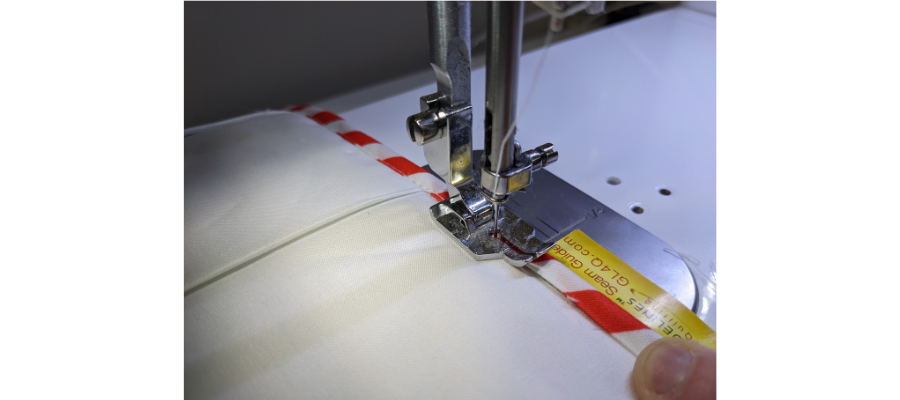
Fold the binding to the front. Sew in place as close to the edge as you can. You’ll want to make sure that the folded edge is clear of the original line of stitching throughout so that not only the front looks great, but it looks even on the back too.
Finishing touches
To hang your advent calendar, you will need a sleeve. Take the scrap of fabric and cut to 3” wide by the width of your advent calendar. Fold the short ends to the reverse side by a half inch, and then fold again. Press and sew.

Next, fold the long edges over to the back by ½” and press.
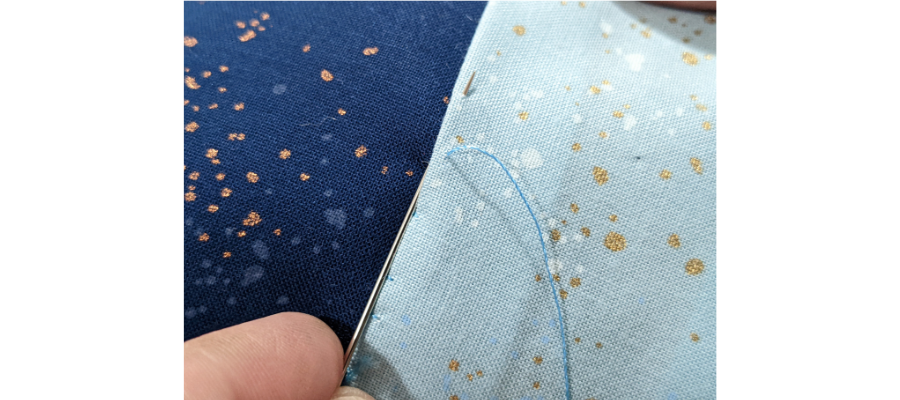
Pin to the back of the advent calendar at the top, centred. Hand sew to the backing fabric only, taking little “bites” out of the sleeve fabric. You need to sew the top and the bottom edge.
Cut a piece of dowel just wider than the finished calendar and drill a hole through each end.

Thread it through the sleeve and tie a ribbon through the hole at each end. you’ll want to make sure you have enough ribbon that you’re able to tie a knot comfortably a few times.
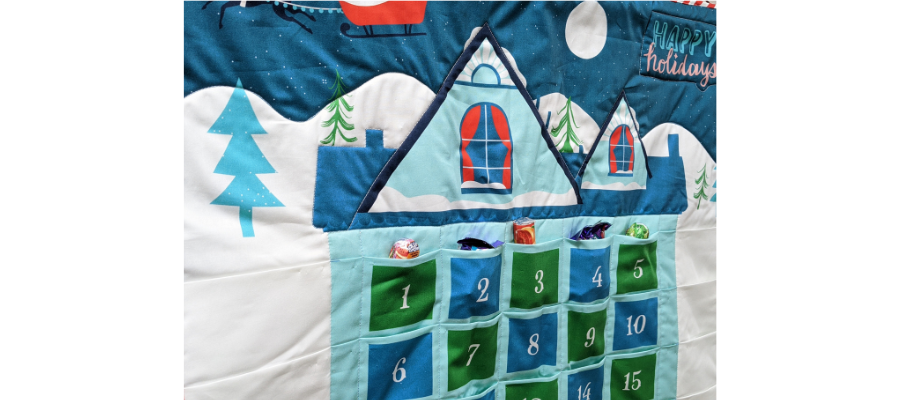
All that’s left is to fill it with goodies!
You can buy the Peppermint Please advent calendar panel from your local quilt store. We’d love to see your creations! Please tag us on Instagram or Facebook so we can see your design! #TrendTexFabrics @trendtexfabrics
