Notecards for Quilters Tutorial
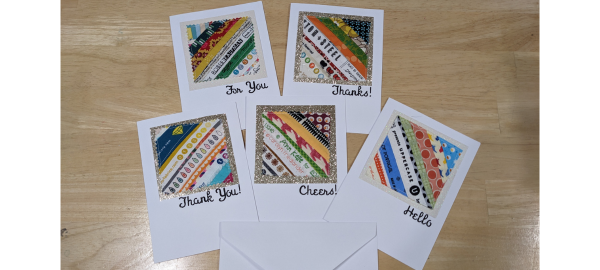
A perfect accompaniment to quilty mail and swap packages! Use tiny scraps and selvedges to showcase the fabric ranges you – and your quilting friends – love most for these notecards for quilters.
This unusual and fun project combines sewing and paper craft. There are so many fun selvedges on fabrics nowadays, so why not use them instead of throwing them away?
Finished Size: 12″ x 9″ (for current regular size iPad)
Difficulty: Intermediate
Time to make: 1 ½” – 2 hours
Here’s what you’ll need for this notecards for quilters tutorial:
- Sewing machine
- General sewing tools: rotary cutter, mat and ruler, iron
- Fabric scraps and selvedges no more than 1 ½” wide
- 5″ x 7″ blank card
- 4″ square of decorative card
- Letter stickers
- Double-sided tape
- Washi or painter’s tape (optional)
- Pinking shears (optional)
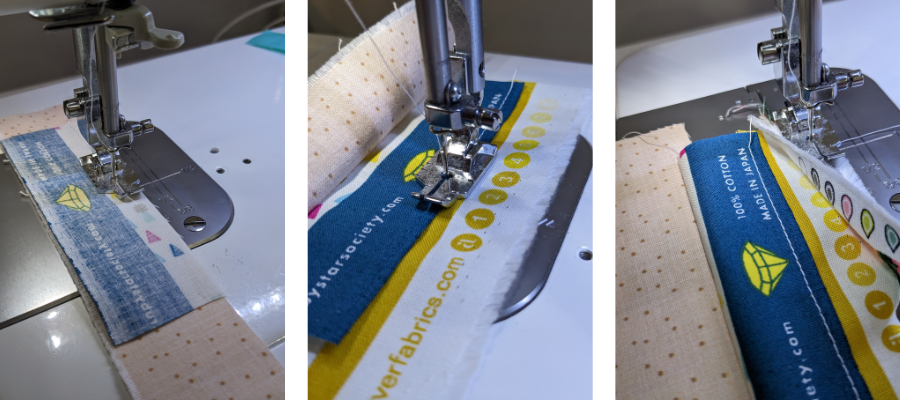
Start by sewing strips of fabric together. You want your strips to be no wider than 1 ½”, with a good mix of selvedges and colours. The strips should be at least 5″ long at the start and finish and a little longer in the middle, You can position the finished edge on the selvedges, wrong side against the next strip, if you choose, so that the details are not lost in the seam allowance.

Press your piece with all seams going in the same direction.
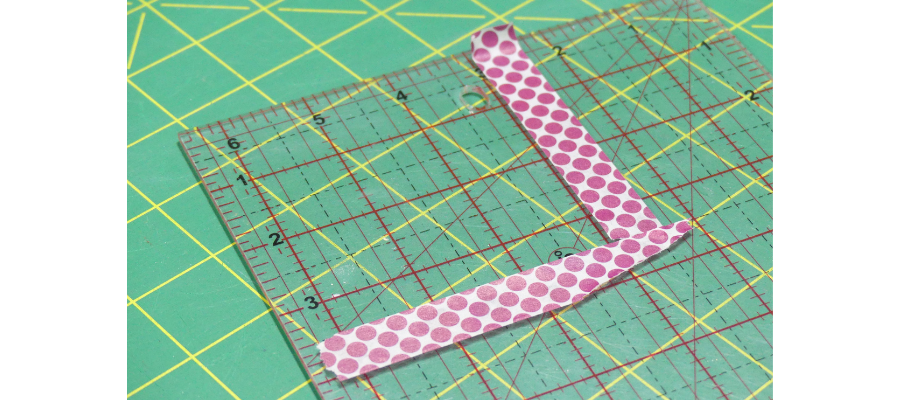
This part is optional but really helps you see what you’re cutting! Mark your ruler with tape at 3 ½” both horizontally and vertically.

Line up one of the strips with a 45-degree line on your mat or your ruler. We used the mat as shown. Position the ruler so that you have fabric visible in the whole area you taped off, and it follows the straight lines on the mat. Then trim your fabric piece to 3 ½”. If you don’t have enough fabric showing, don’t worry, just take it back to the machine and add more strips before cutting.

Pink the edges slightly if you wish. This will reduce fraying and creates a different look.
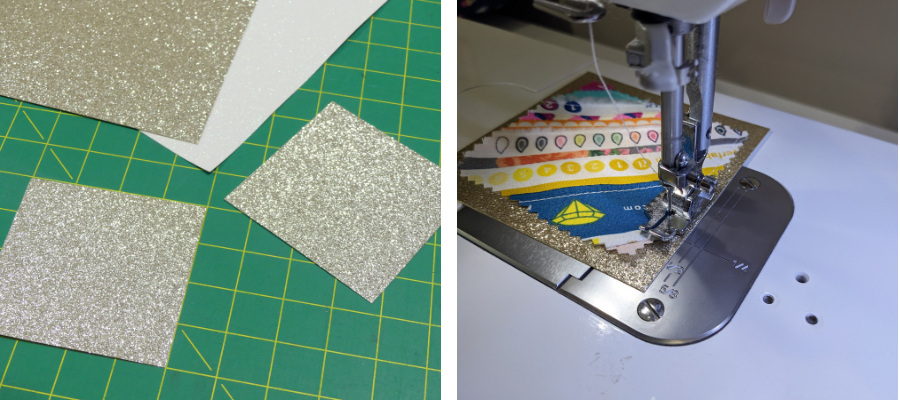
Cut a piece of card to 4″ square. Centre the fabric piece and sew down around the edges. You can use a decorative or colourful thread if you wish.
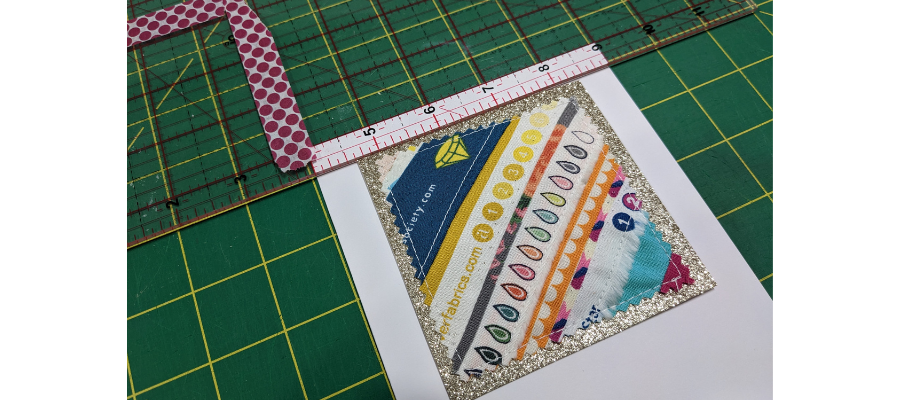
Add double-sided tape to the back of the card, making sure it reaches each corner. Peel off the backing paper and position it ½” from the top of the card and each of the sides. Press down firmly.
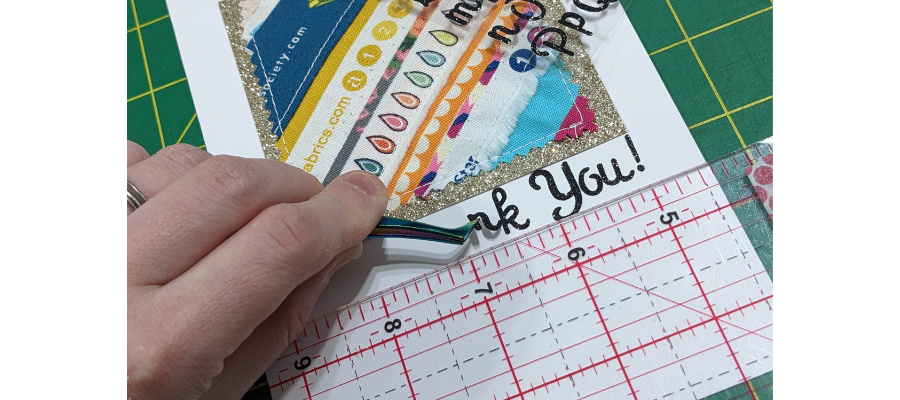
Time to add your message! To align the letter stickers with the right side of the design, work your way backward. Take into account the tallest letter before starting to place your stickers. Use a ruler to help keep the letters straight. You could hand-write this part instead, if you have lettering or calligraphy skills.
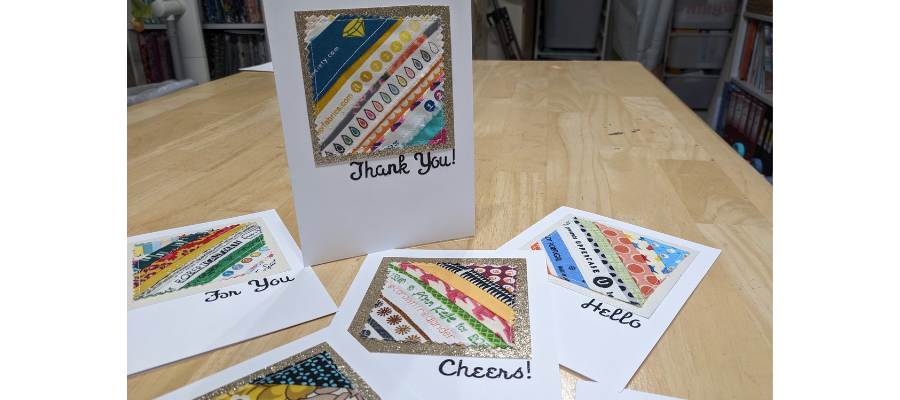
You’re done! Show us the cards you make – we’d love to see them! Please post, and tag us on Instagram or Facebook so we can celebrate your design! #TrendTexFabrics @trendtexfabrics
Looking for more tutorial and project ideas? Check some other ideas out here.
