Easter Bunny Cushion Tutorial
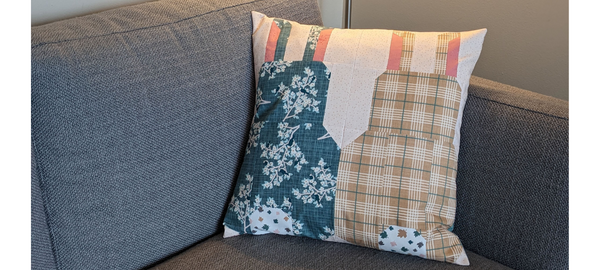
It’s easy to create a pair of bunnies on this adorable cushion, using the stitch-and-flip technique – no templates required for this Easter bunny cushion tutorial.
The fabrics used here are from the From Far and Wide collection by Kate & Birdie Co., exclusively distributed by TrendTex!
Seam allowances are ¼” unless otherwise stated.
Finished Size: 44″ x 17″ approx
Difficulty: Intermediate
Time to make: 2.5 hours
Here’s what you’ll need to make your Easter Bunny Cushion:
- Sewing machine
- Cutting tools: rotary cutter, mat and ruler
- 4 fat quarters for the front design: 1 for background, 2 for rabbit bodies and 1 for tails
- 2 fat quarters for the back
- Scrap of pink fabric measuring at least 4 ½” x 5″
- Muslin fabric; approx. 20″ square
- Fabric marker
- General sewing notions: iron, pins, etc.
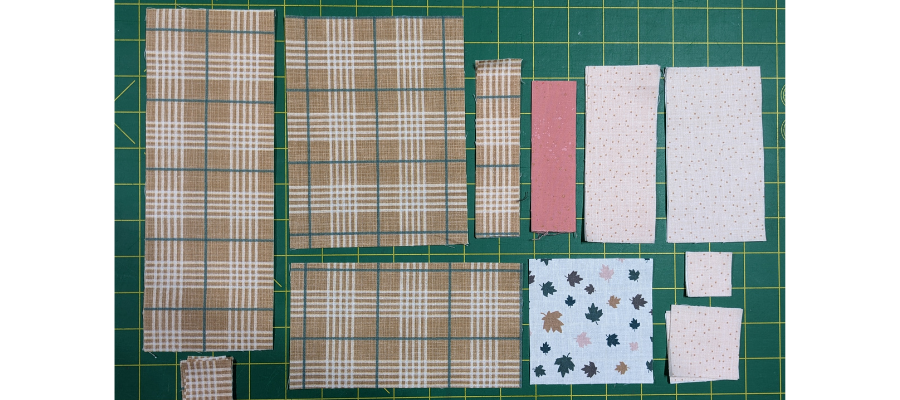
Cutting List (per block):
Background Tail
2 – 5″ x 2 ¾” pieces 1 – 3 ½” square
3 – 2″ x 5″ pieces
4 – 2″ squares
4 – 1 ¼” squares
Rabbit Body
2 – 3 ½” x 9 ½” pieces
1 – 3 ½” x 6 ½” piece
1 – 6 ½” x 5″ piece
2 – 1 ¼” x 5″ pieces
6 – 1 ¼” squares
Tail
1 – 3 ½” square
Ears (from scraps)
2 – 1 ¼” x 4 ¼” pieces
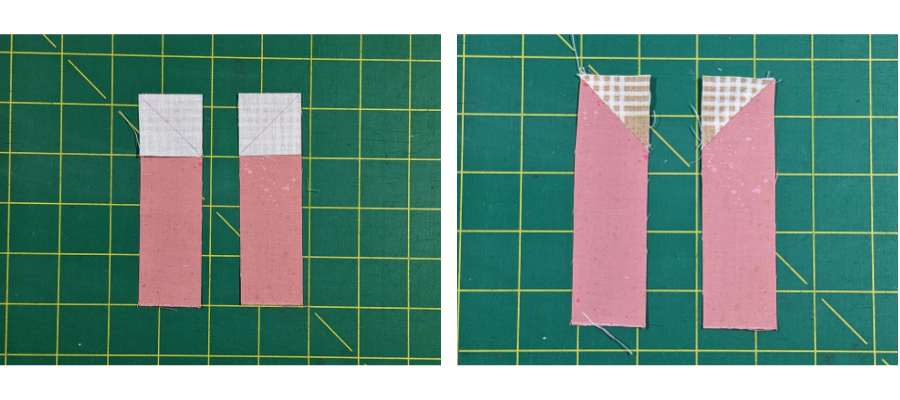
Taking the two pink ear pieces, align a 1 ¼” rabbit body square with the top of each. Draw a line diagonally on the back of both pieces from corner to corner as shown. Stitch along the marked lines. Trim excess, flip open and press.
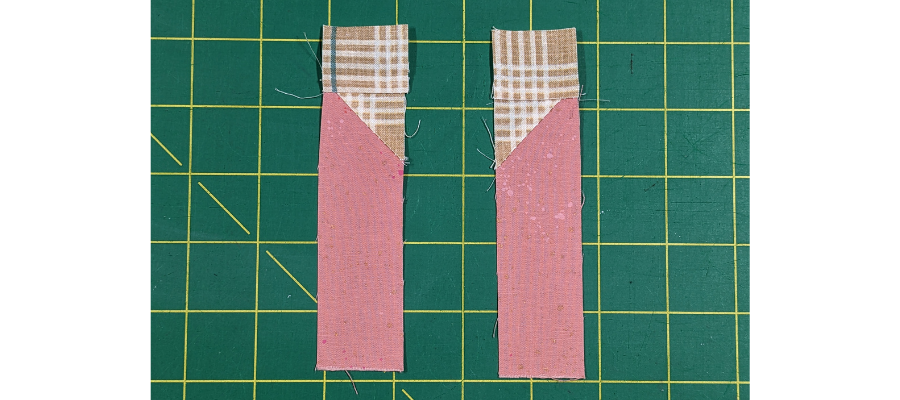
Sew a 1 ¼” rabbit body square on top of each. Press.
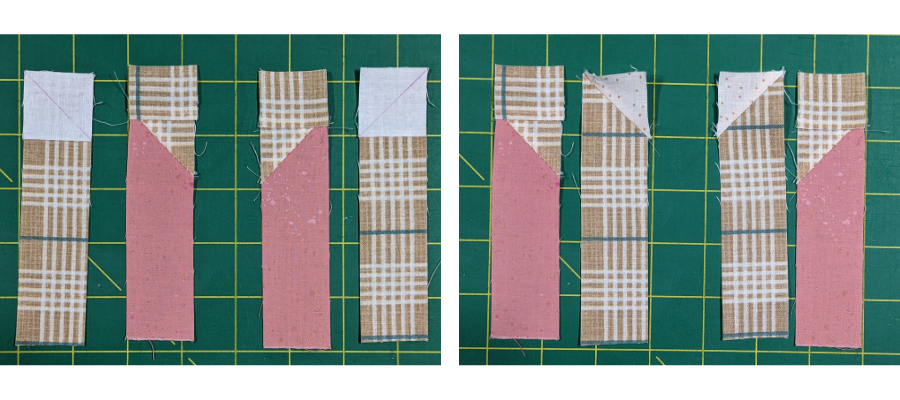
Take the rabbit-body 1 ¼” x 5″ pieces and align a background 1 ¼” square with the top of each. Mark diagonally as shown and stitch on the lines. Trim, flip open and press.
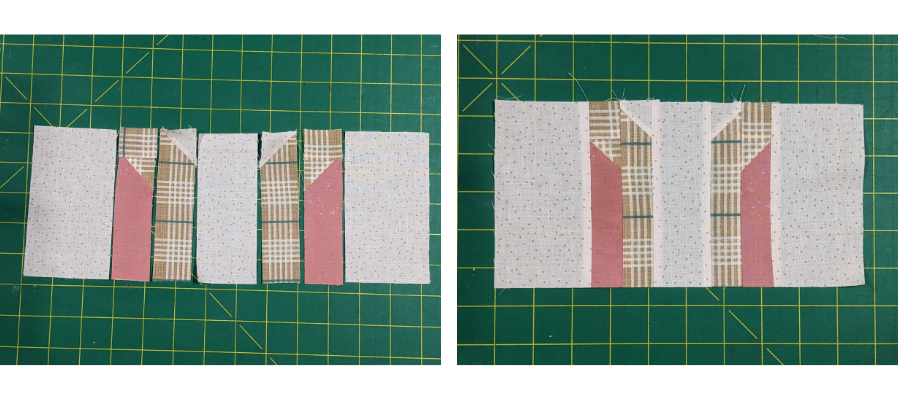
Sew the ear portion of the block together in a row as follows: background 5″ x 2 ¾”, left-facing pink ear strip, left-facing outer-ear strip, background 5″ x 2″, right-facing outer-ear strip, right-facing pink ear strip, background 5″ x 2 ¾”. Press seams well and set aside.
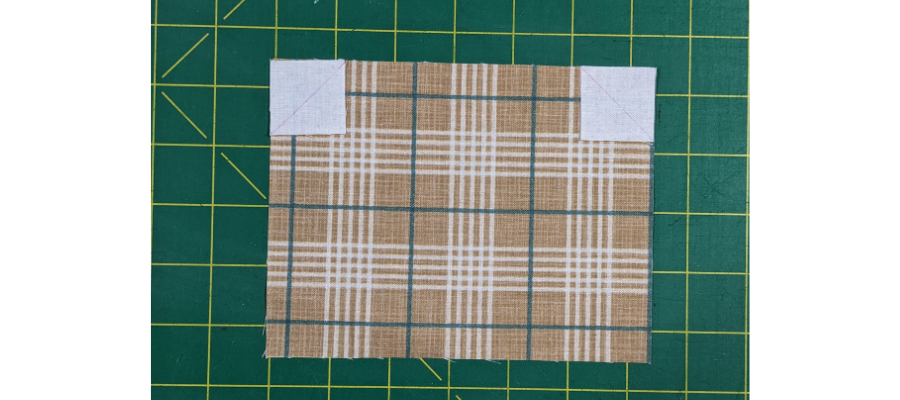
Align a background 1 ¼” square with each of the top corners of the 6 ½” x 5″ rabbit-body rectangle. Mark diagonally as shown and stitch on the lines. Trim, flip open and press.
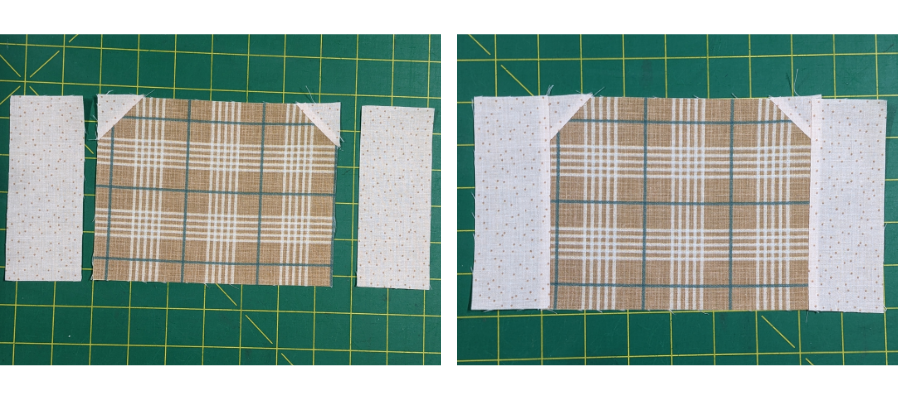
Sew a 2″ x 5″ background rectangle on either side to finish the head.
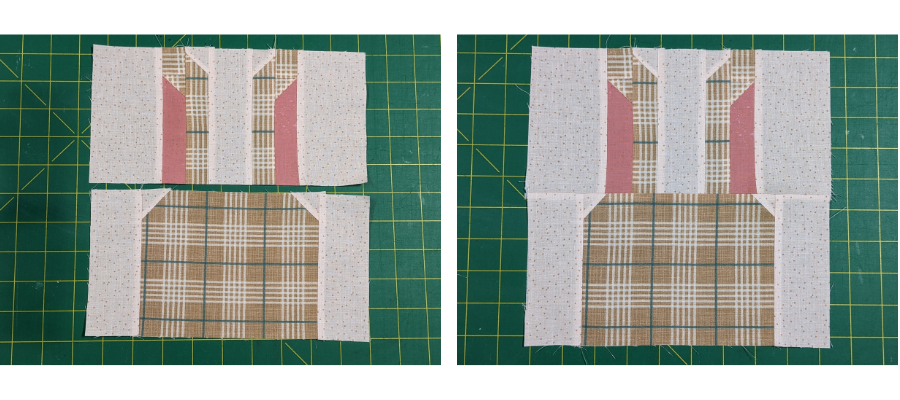
Sew the ears to the head and press.
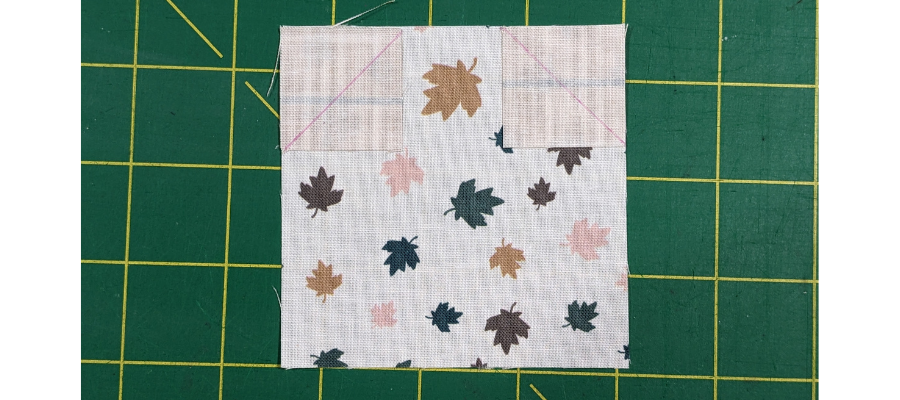
Align a rabbit-body 1 ¼” square with each of the top corners of the 3 1/2″ tail square. Mark diagonally as shown and stitch on the lines. Trim, flip open and press.
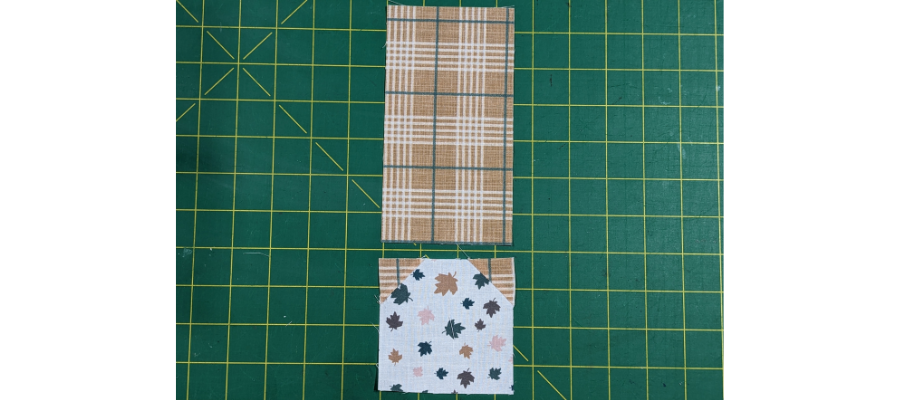
Sew the 3 ½” x 6 ½” rabbit body piece to the top of the tail.
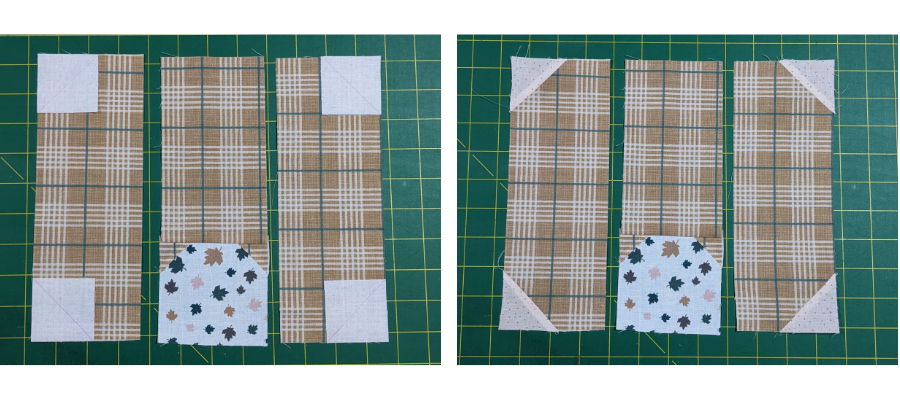
With a 3 ½” x 9 ½” rabbit-body rectangle, align a 2″ square to each of the left-side corners, mark, sew, flip and press. Repeat for the right side with the remaining pieces.
Sew either side of the tail piece and press.
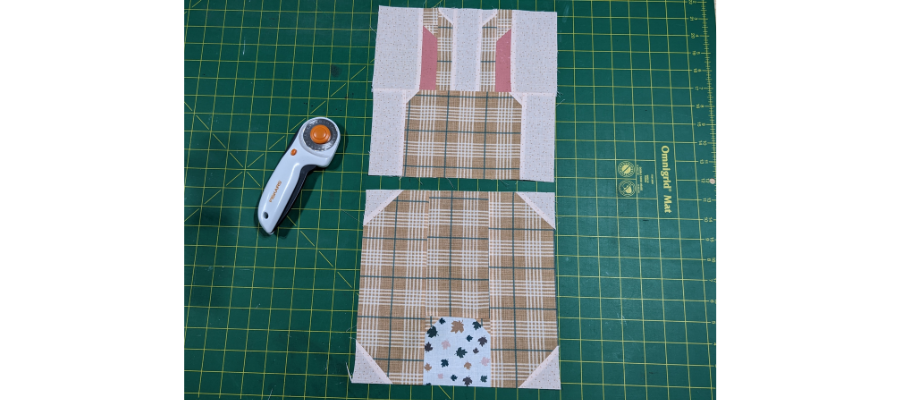
Sew the completed body section to the head.
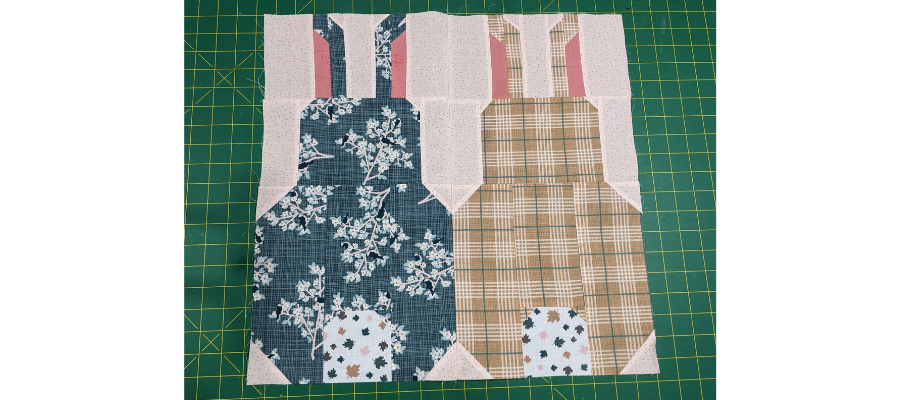
Repeat to make another rabbit block with the other rabbit-body fabric. Sew the two together and trim if needed to make a completed 18 ½” cushion top.
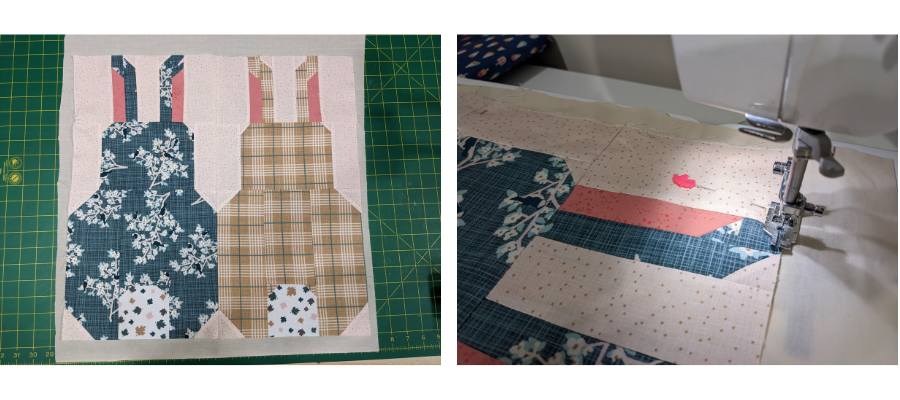
Pin to a piece of muslin with wrong sides together, and baste-stitch ⅛” from the edge all the way around.
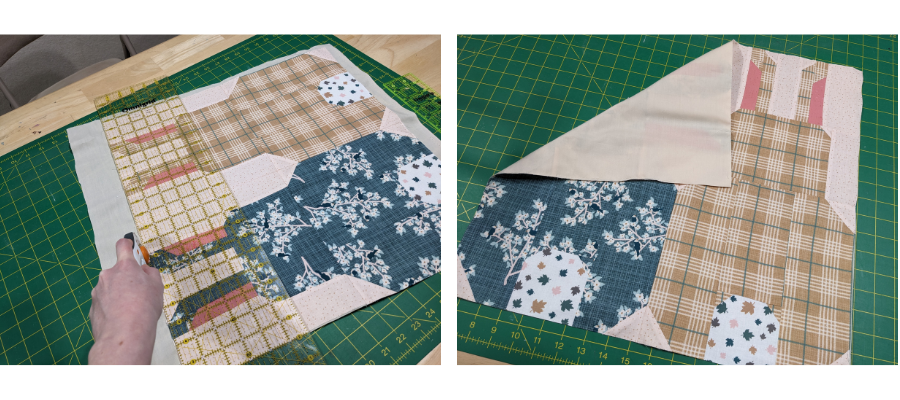
Trim the muslin flush with the edges of the bunny piece. This layer will protect your seams.
Cut the pieces for the back of the cushion. You will need a 18 ½” x 10″ piece for above the opening and a 18 ½” x 14″ piece for below. Each can be cut from a different fat quarter or from the same ½ yard of fabric if you prefer.
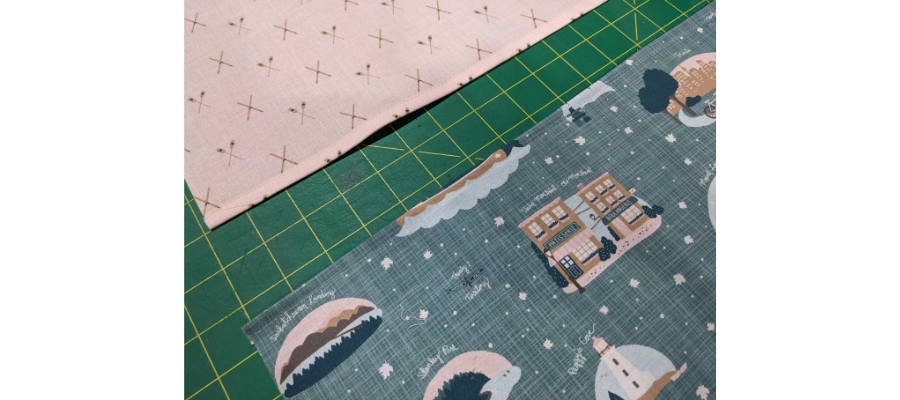
Hem the bottom of the piece above the opening by folding the seam allowance under by ¼” and then another ¼” to encase the raw edge. Stitch close to the edge of the fold. Repeat for the top edge of the piece below the opening.
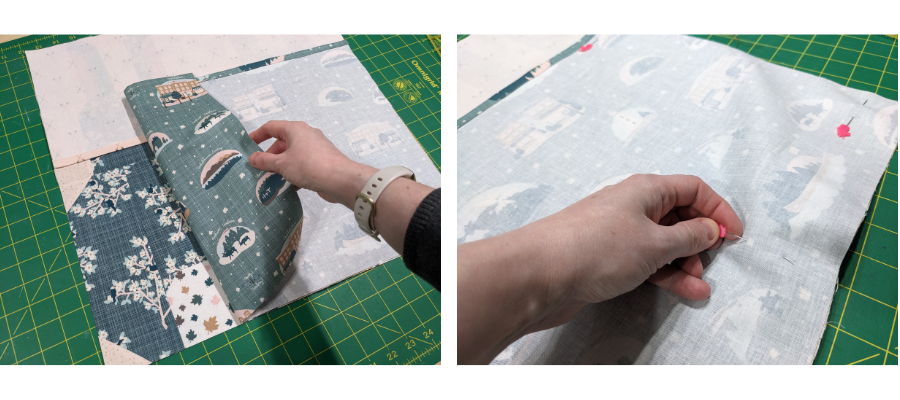
Layer right sides together as shown, with the smaller top piece laid down onto the front first, followed by the larger bottom piece, with raw edges aligning so that the hemmed edges overlap. Pin together.
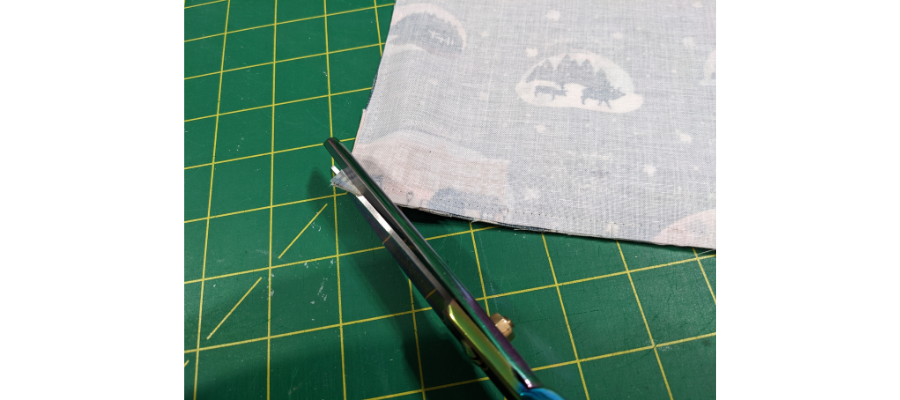
Trim the corners close to – but not through – the thread to reduce bulk. Turn right-side out and press.
You’re done your Easter Bunny Cushion!
If you made a bunny cushion for Easter, we’d love to see your creation! Please post, and tag us on Instagram or Facebook so we can celebrate your design! #TrendTexFabrics @trendtexfabrics
Looking for more tutorial and project ideas? Check some other ideas out here.
