Introduction to Furoshiki
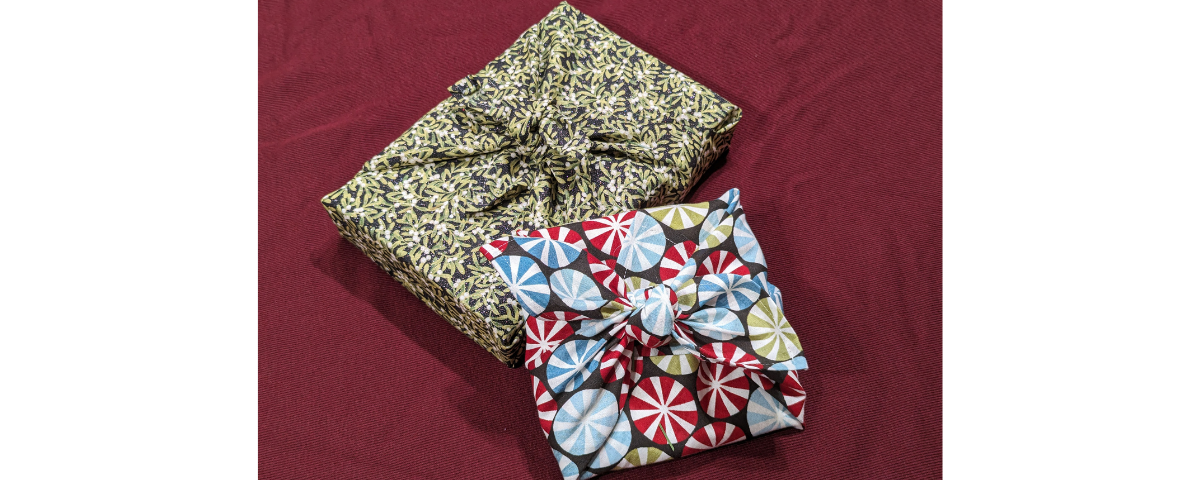
If you’re looking for an alternative to disposable gift wrap, we can help! Furoshiki is a traditional Japanese gift wrapping technique that is more than 2,000 years old and uses our favourite material – fabric!
Furoshiki is great for numerous reasons. It keeps plastic-coated wrapping and bags out of the landfill, it can be used to wrap awkward-shaped items if you have a big enough piece of fabric, and you don’t need tape, tissue paper or scissors – just fold, knot and go!
This is of course a great way to wrap a gift for a fellow quilter or sewist, too – who doesn’t like to receive bonus fabric?
You can simply wrap your gift in fabric without additional preparation if you wish, but for a reusable, finished Furoshiki cloth, the corners need to be sharp and the cloth should be hemmed. The fabrics used in our Furoshiki are from Peppermint Bark by BasicGrey and Sparkle and Shine Glitter by in-house designers, both from Moda Fabrics.
Finished Size: Varies Difficulty: Beginner Time to make: 20 Minutes
Here’s what you’ll need for Furoshiki:
- Sewing machine
- Fat quarter to a metre of quilting cotton, depending on the gift to be wrapped
- Measuring gauge or Hot Hemmer (optional)
- Fabric marker
- Spray starch (optional)
- Pattern weights (optional)
- General sewing notions: iron, rotary cutter, ruler, and cutting mat.
Cut the fabric so that the diagonal length is at least three times the length of your gift, plus an inch for hemming. For gifts that are deep, such as thick books, this can be bigger.
You can cut the fabric into a square as we have, or stick to the traditional Furoshiki style of a rectangle. A fat quarter trimmed to a square of around 19″ is a good size for a paperback.
If you’re not sure how big to cut, skip ahead to the wrapping instructions and try out your fabric on your gift before you trim and hem!
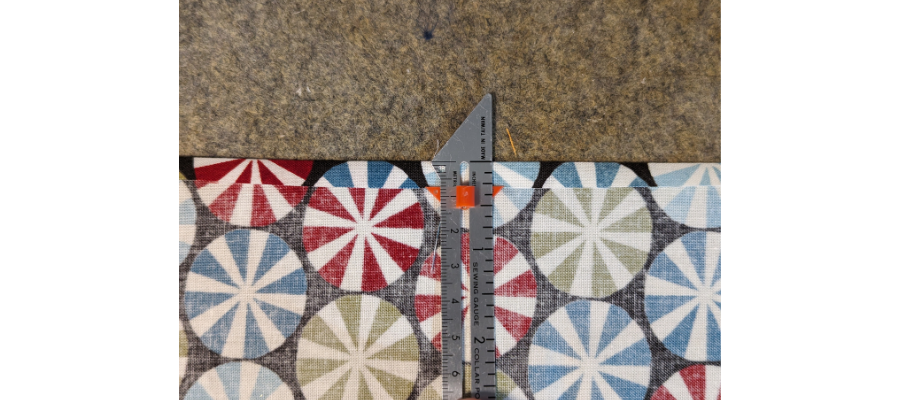
Fold ¼” over to the wrong side and press. Use starch if you need it. Repeat for the side directly opposite.
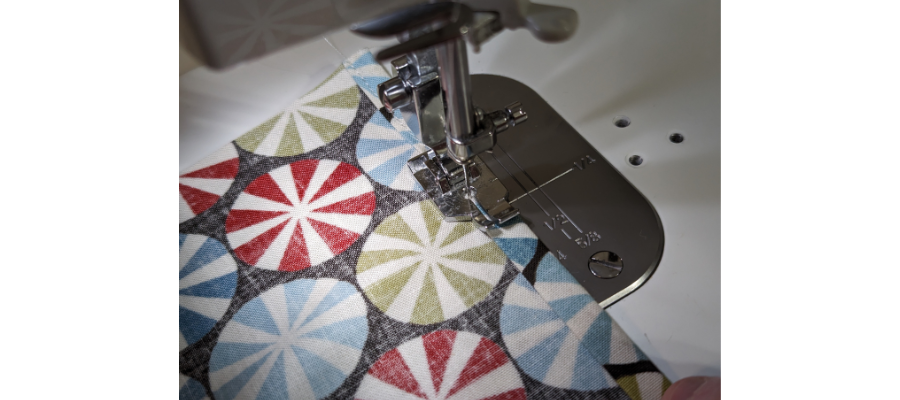
Take the fabric to the machine. Fold over again so that the raw edge is on the inside, using the first fold as a guide. Stitch close to the fold, backstitching at the beginning and end. Repeat for the other folded side.
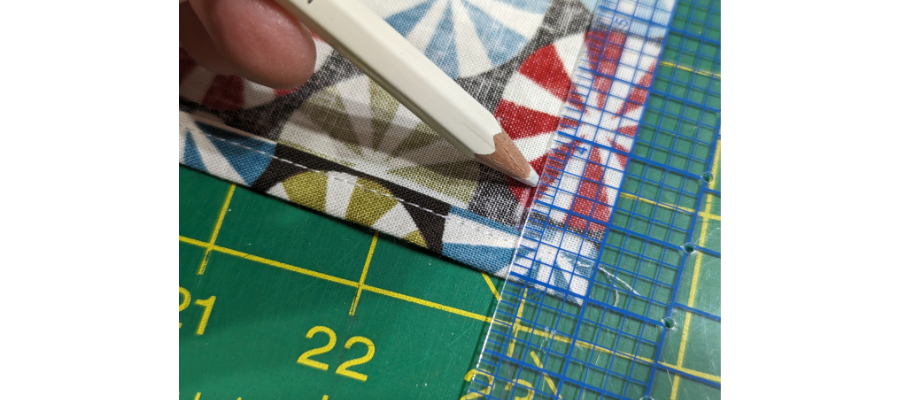
Measure ½” from the edge of one of the remaining raw edges and mark near the top and bottom. Do this on both remaining raw edges for a total of four marks.
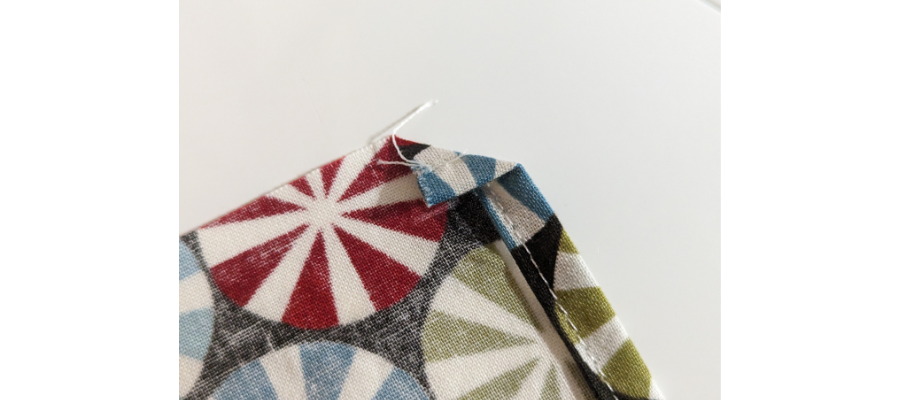
Fold a corner over to the marking, making sure that it is even. Press well. Repeat for all corners.
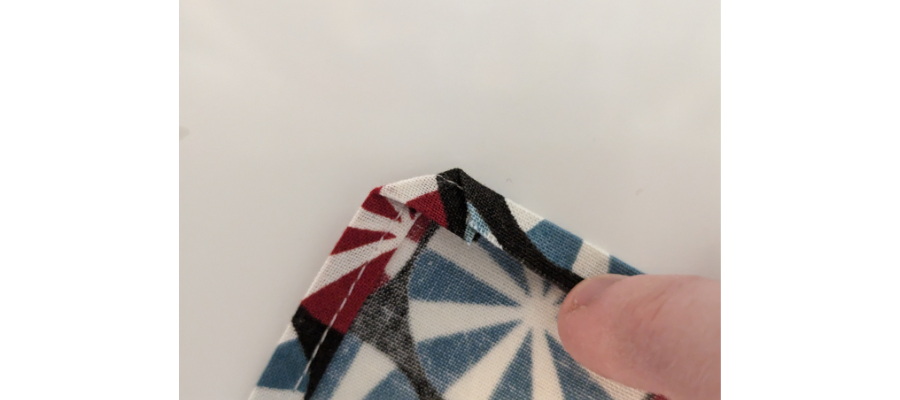
Fold the raw edge over ¼”. The edge should align with the finished corner edge. Press well.
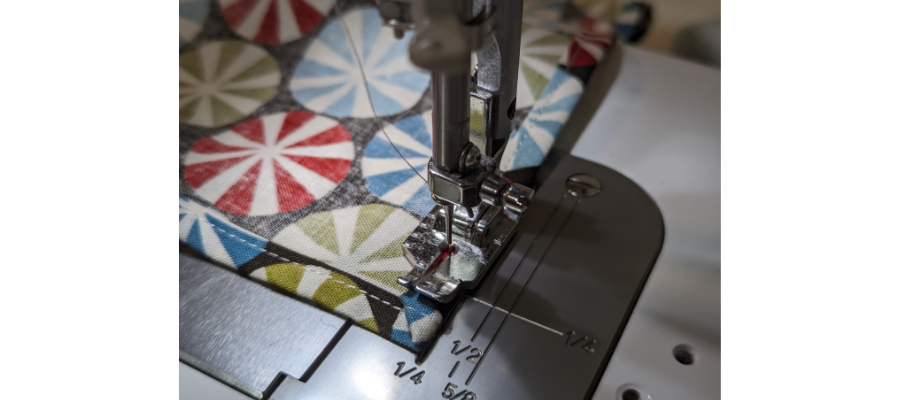
Back at the machine, fold the edge under again to encase the raw edge. The corners should now be perfectly sharp, and the first line of stitching should line up with itself on the fold. Stitch down close to the edge, back-stitching at the start and finish, and trim any loose thread.
How to wrap with Furoshiki
This wrapping method is called otsukai tsutsumi and is the most basic option. There are many more ways to wrap, for bottles, slim objects, round objects and more – you can find some of them here.
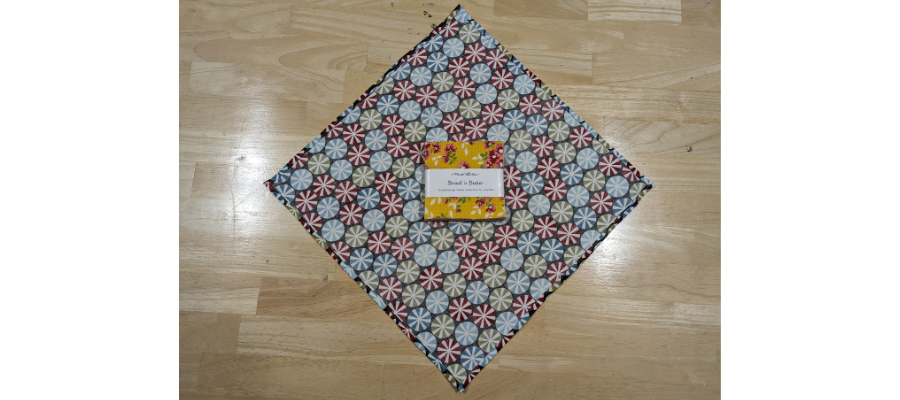
With the wrong side up, place your gift in the centre. The fabric will be diagonal so that there are points extending from the edges of your gift.
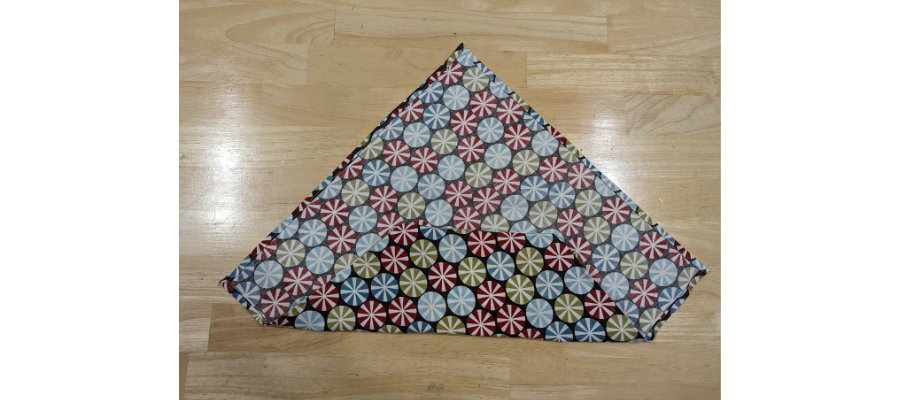
Fold the bottom over the gift and tuck excess fabric underneath.
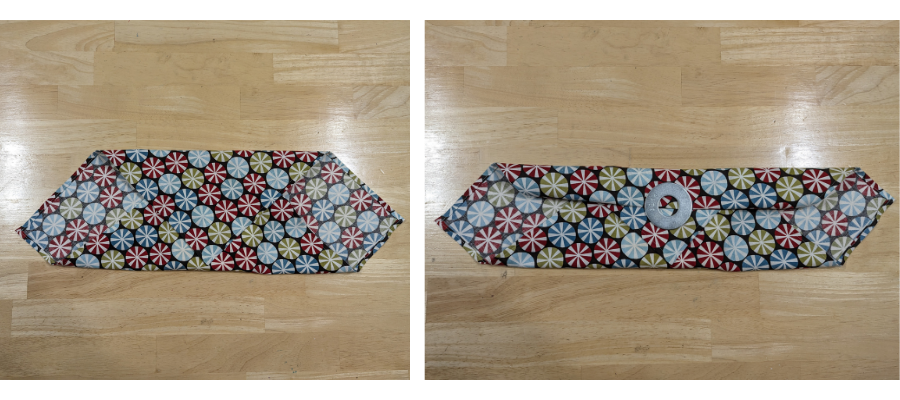
Fold the top over. If you have a lot of surplus fabric as shown, fold it so that the point meets the bottom edge of the gift, then fold the top again in the same direction so that it is snug against the gift. Pattern weights are useful here if you need to let go.
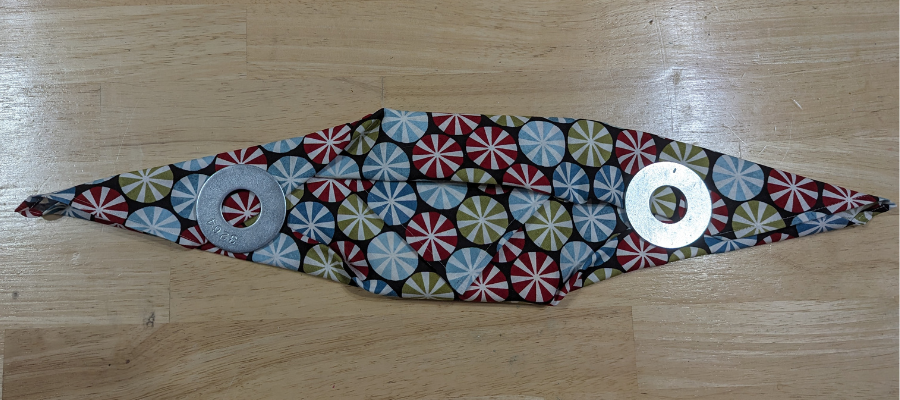
Fold in the sides a touch so that the points are sharper, to remove excess against the gift. Push the fabric against the sides to help with this, as if you are wrapping with paper.
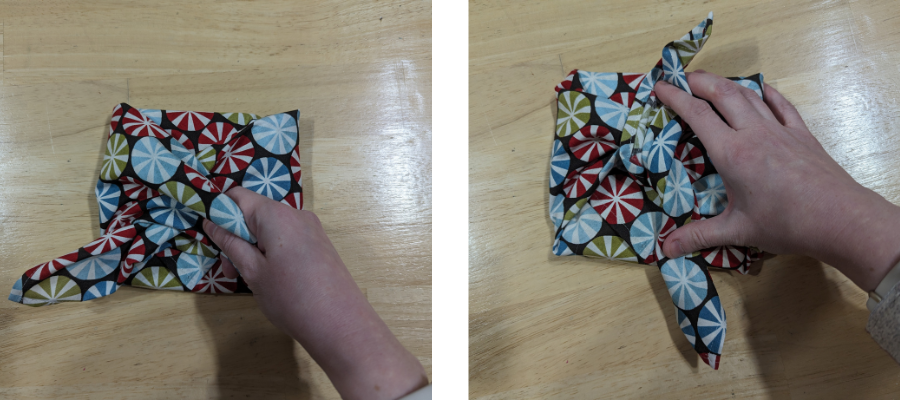
Now let’s knot the sides. Traditionally this is done left over right, to create a standard knot, by bringing in the right side, then the left side, and tying.
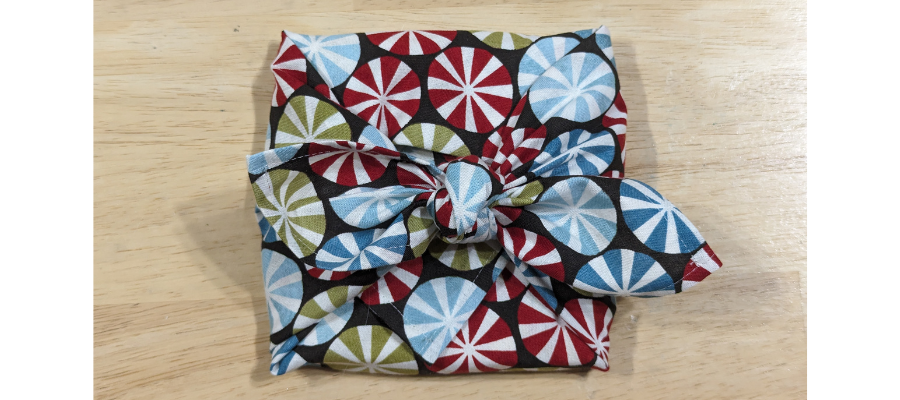
Create a double knot (or square knot) by knotting again. The tails of the knot will point in the direction they came from. You don’t have to tie really tight – after all, you don’t want it to be difficult to unwrap!
You’re done! Who will be receiving your Furoshiki-wrapped gifts this year? Let us know, and if you followed this tutorial, please post, and tag us on Instagram or Facebook so we can celebrate your design! #TrendTexFabrics @trendtexfabrics
Looking for more tutorial and project ideas? Check some other ideas out here.
