Lucky Clover Mug Rug Tutorial
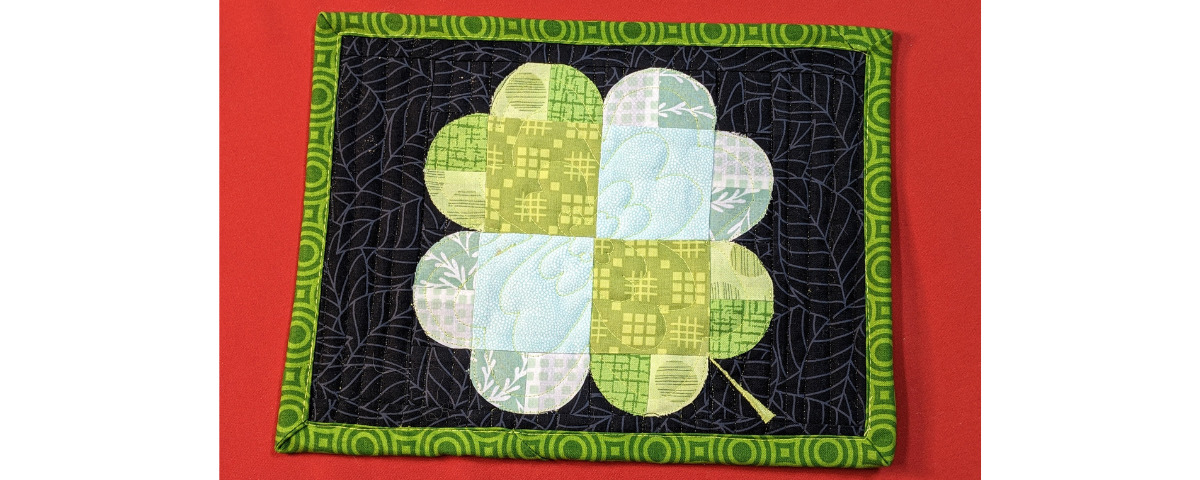
This St. Patrick’s Day, you need a mug rug for your Irish coffee, or your pint of Guinness! This oversized coaster leaves space for a little snack, too.
You don’t need the luck of the Irish to sew these tiny curves for this mug rug tutorial. Make it easy for yourself with fusible web.
Make sure you download and print the curve template at actual size HERE.
Seam allowances are ¼” unless otherwise stated.
Finished Size: 10″ x 7″
Difficulty: Intermediate
Time to make: 2.5 hours
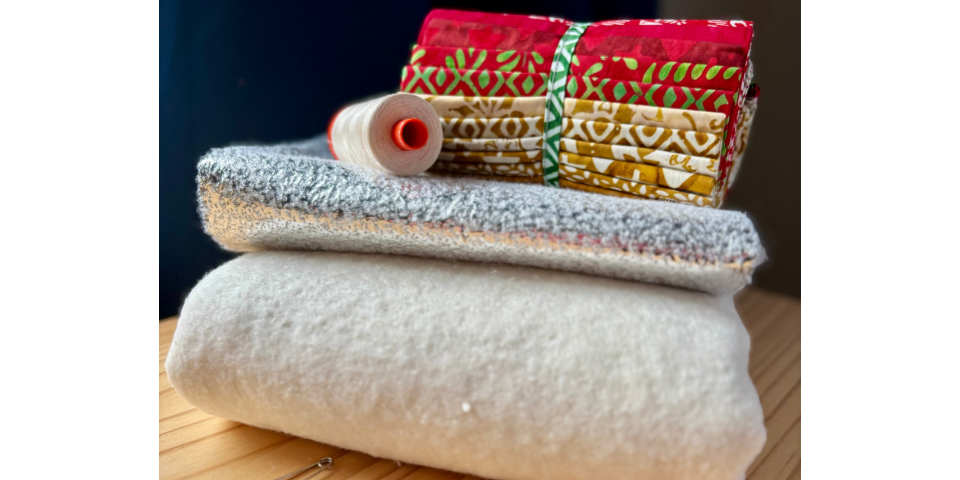
Here’s what you’ll need:
- Sewing machine
- Cutting tools: rotary cutter, mat and ruler
- Black background fabric – fat eighth (9″ x 22″)
- 6x small green fabric scraps or leftover charm squares (5″)
- Backing and binding fabric – fat quarter (18″ x 22″)
- Scrap of batting measuring at least 9″ x 12″
- 12″ square of fusible web
- Pencil
- Green thread
- Glue stick
- General sewing notions: iron, pins, hand-sewing needle, scissors
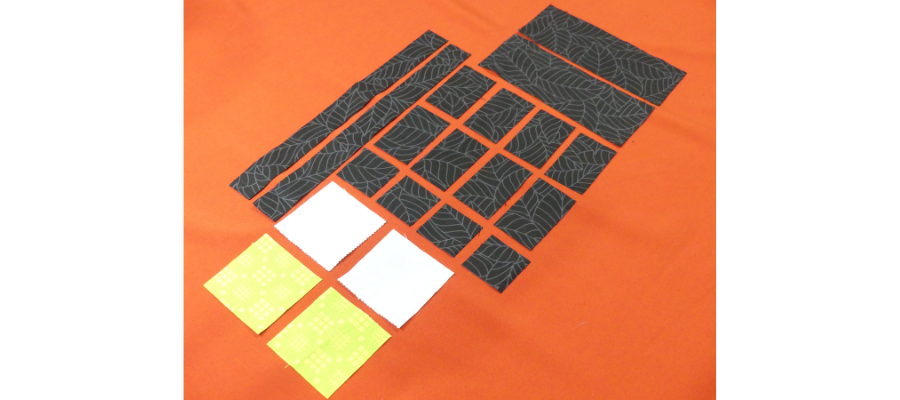
Cut out all of your regular-shape pieces. For the green elements, we chose to split the six fabric pieces into sets of three in two different shades. You will need to cut two 2 ½” squares from one fabric from each set to make a total of four.
From the background fabric, you will need four 1 ½” squares, eight 1 ½” x 2 ½” rectangles, two 10 ½” x 1″ strips and two pieces measuring 2 ½” x 6 ½”.
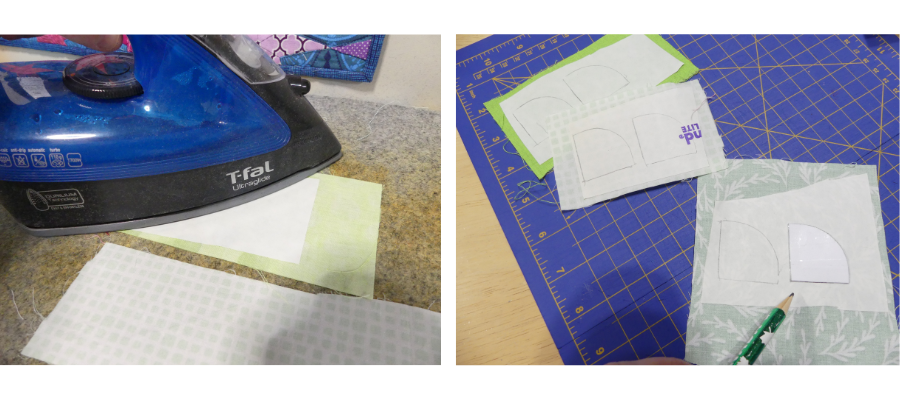

Fuse pieces of fusible web onto the reverse of the remaining green fabrics. On each one, draw and cut out four quarter-circle curves using the template.

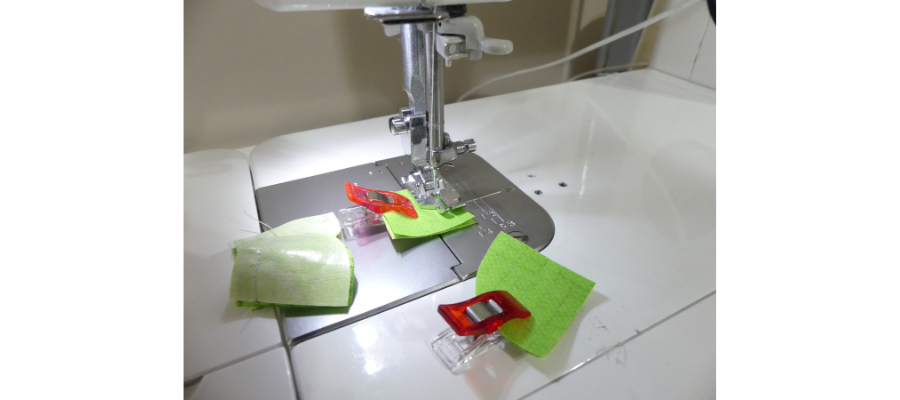
Pair up the curves into semi circles so that same colour families are together, and the left and right fabrics are the same in all pairings. Peel off the backing paper. Sew together. Some fusible web is shiny, so you can use a dot of glue in the seam allowance to help keep the pieces from shifting.
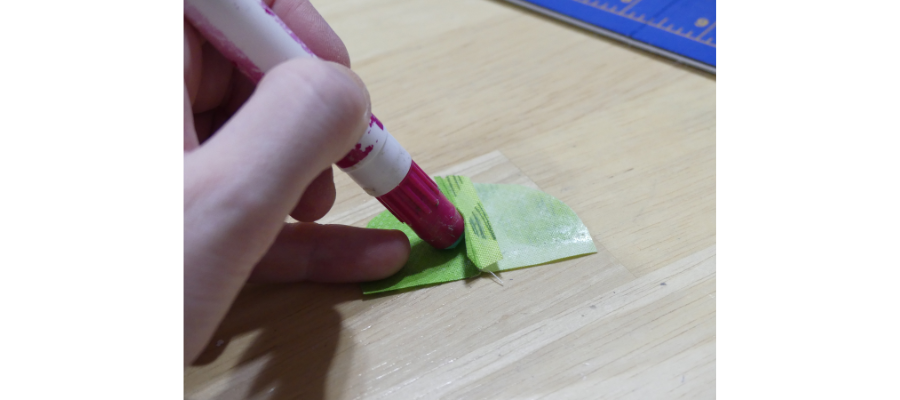
Open up the seam and finger-press, using glue to fold the seam allowances flat. Do not iron! Trim anything from the back that is visible from the front.

Take a 1 ½” x 2 ½” background-fabric rectangle, fold the short edges together and finger-press to find the centre. Use this as a guide to position the centre seam on one of the curved pieces and align the bottom of the curve with the bottom of the rectangle. Fuse. Repeat to make eight units.
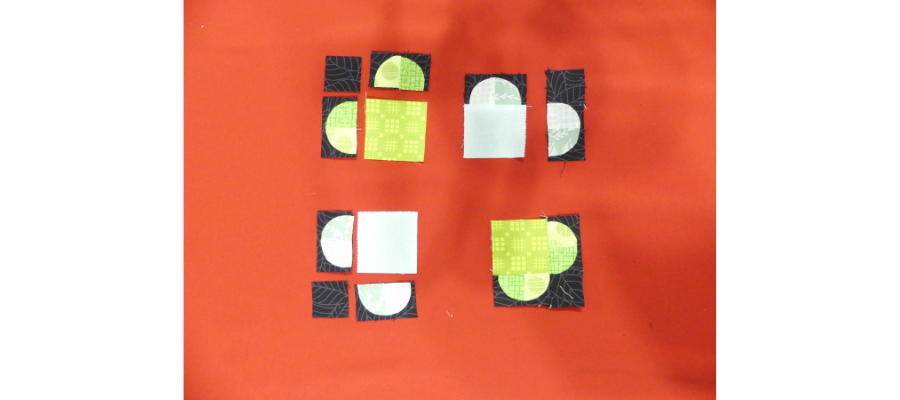
We are now ready to sew the four quadrants together as shown: sew one background 1 ½” square to the left side of a rectangle curve unit; and another curve piece to the side of a co-ordinating 2 ½” square. Press the seams opposite ways and then sew these units together to form a leaf/heart shape. Repeat to make four.
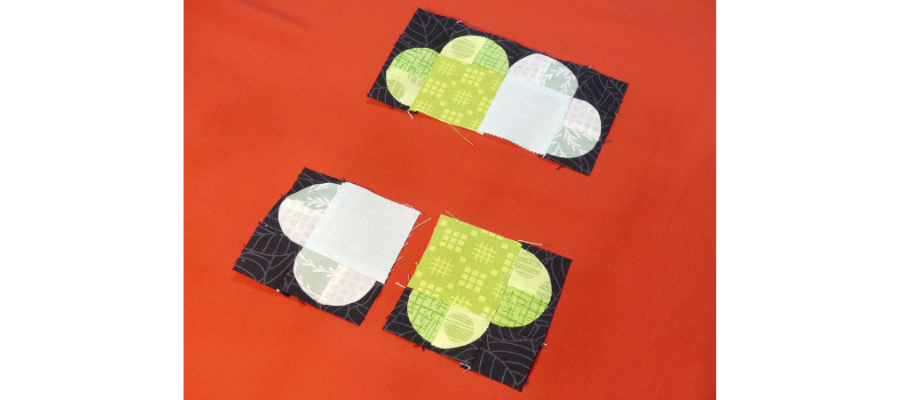
Once you have the four leaves, arrange them into a four-leaf clover with the tips in the centre. Sew the top two together and the bottom two together, making two rows. Press seams opposite ways and sew the rows together.
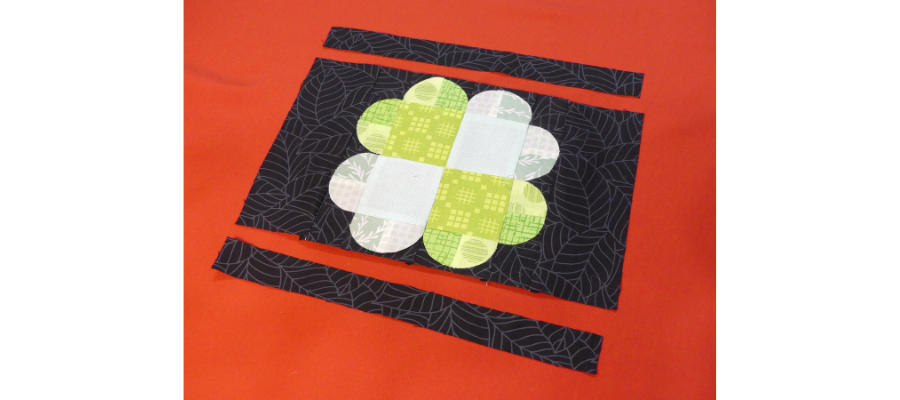
Once the centre block is complete, you can add on the remaining background fabric pieces to complete the top of the mug rug. Position the 2 ½” x 6 ½” rectangles on either side of the centre block and sew. Press seams and trim if you need to, then repeat to sew the thin strips to the top and the bottom.
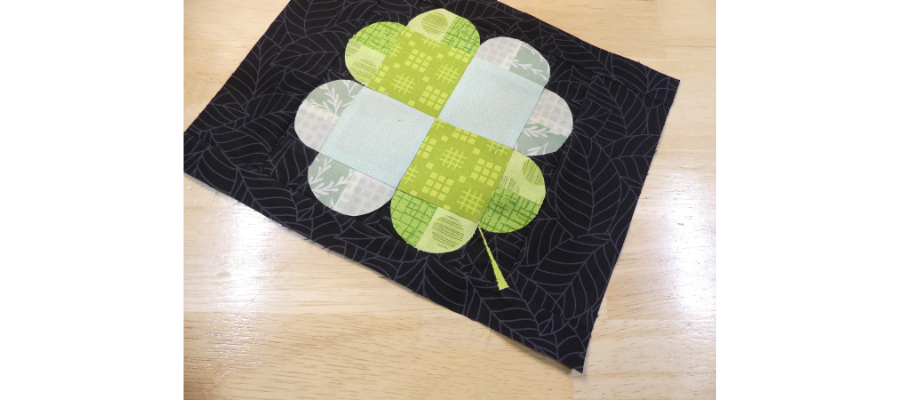
Add the stem of the clover to the bottom-right leaf. To do this, set your sewing machine up with green thread and a satin stitch – a zigzag with a short stitch length. We set ours to 0.2 mm. Start with a narrower stitch (ours was 1.5 mm) and make around 10-12 stitches. Increase by another millimetre and repeat this until you reach the desired length, finishing up somewhere around 6.5 mm wide.
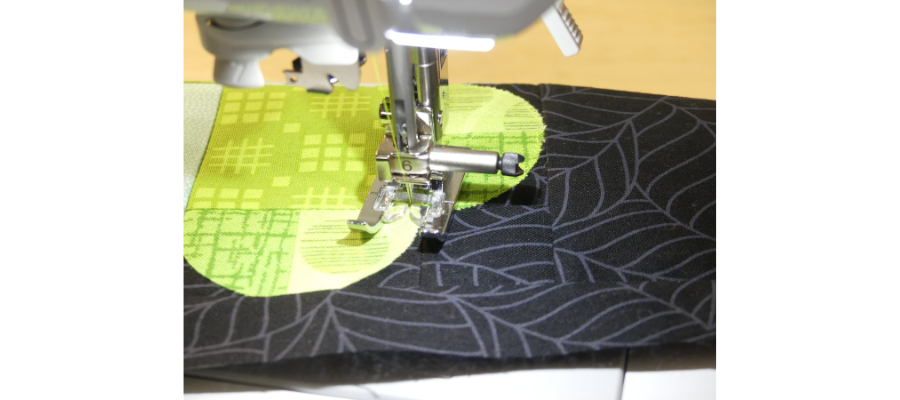
Using the same thread, sew around the clover, close to the edges of the curves, to secure them further.
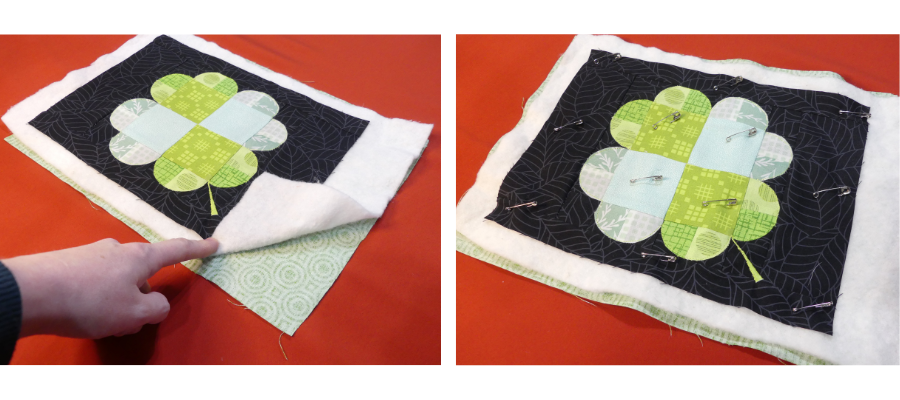
Time to make a quilt sandwich! Cut your backing fat quarter into two (11″ x 18″) and set one aside. With the other layer face down, add batting, followed by your clover piece. Pin or spray-baste the layers together.

Quilt! For ours, we echo-quilted the shape of the clover in a spiral, in green, and then added straight lines to the background.
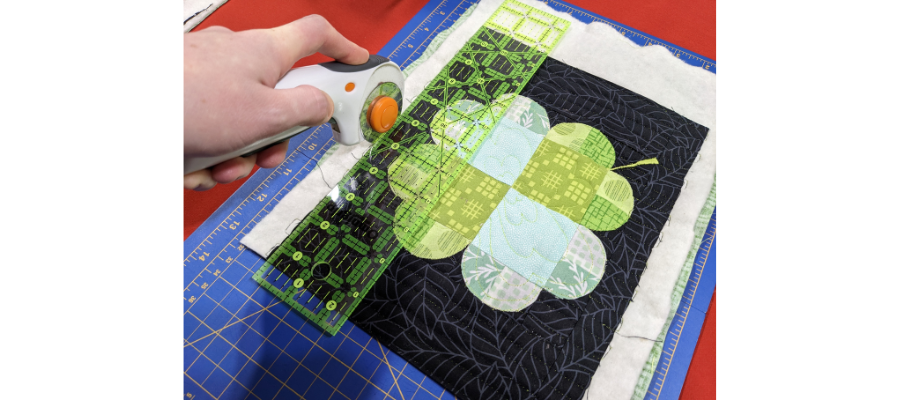
Trim down to approximately 7 ½” x 10 ½”. It may differ a little depending on how you quilted – so just make sure it’s rectangular and close to this size.
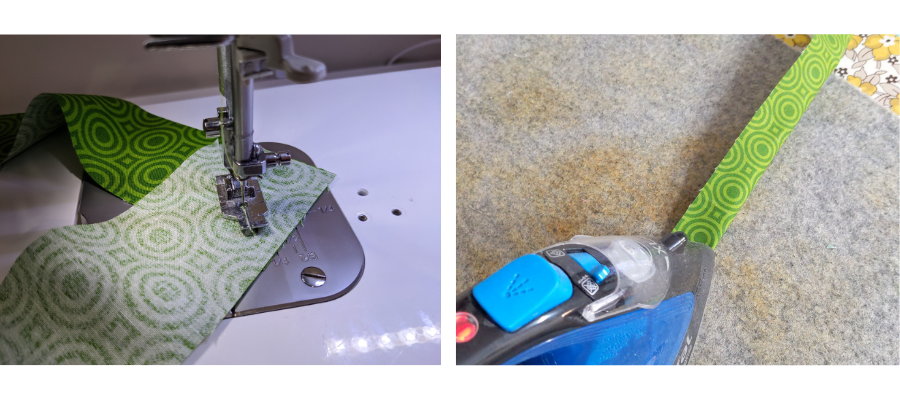
From the remaining backing fabric piece, cut three strips measuring 2 1/4″ wide and 18″ long. With right sides together, position the ends of two strips at a right angle to each other. Stitch across diagonally from outside edge to outside edge. Keep going with the rest of your strips until you have a long continuous strip.
Fold the strip in half lengthwise, wrong sides together, and press.
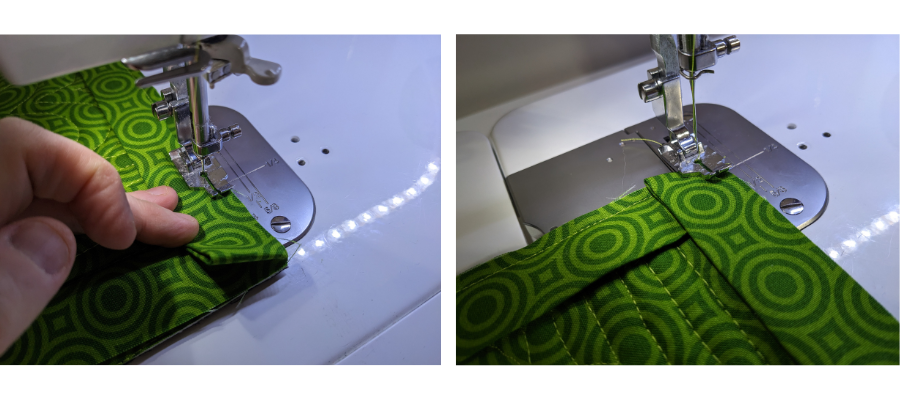
Leaving a tail of around 5″ and starting somewhere along the centre of the bottom edge, align the raw edges of the binding with the edge of the back of the panel and start to stitch down with a 1/4″ seam allowance.
When you get to a corner, stop stitching 1/4″ away and backstitch to secure. Rotate so the next edge is on the right, as if ready to be fed through the sewing machine. Fold the binding strip up so it creates a 45-degree angle from the corner point and finger-press the fold. Bring the binding back down again over this fold so that the second fold is even with the side of the quilt you just stitched, and the raw edges are aligned with the next edge of your quilt. Stitch down right from the edge.
Keep working around the edges. When you have finished mitring the last corner and are back on the starting side, stop stitching around 4″ from the place you started. Trim away the excess binding fabric so each tail is about the same length, but most importantly, so that they overlap by the width of the binding before it was pressed. We made 2 1/4″ wide binding, so the overlap measures 2 1/4″.
Open out the ends of the strips and position, with right sides together, at a 90-degree angle, as you did when you first joined the strips. The end of each strip should be flush with the side. You will likely want to pin in place. Sew diagonally from one outside edge to the other and trim off the excess.
Press this new seam and finish sewing the binding down.
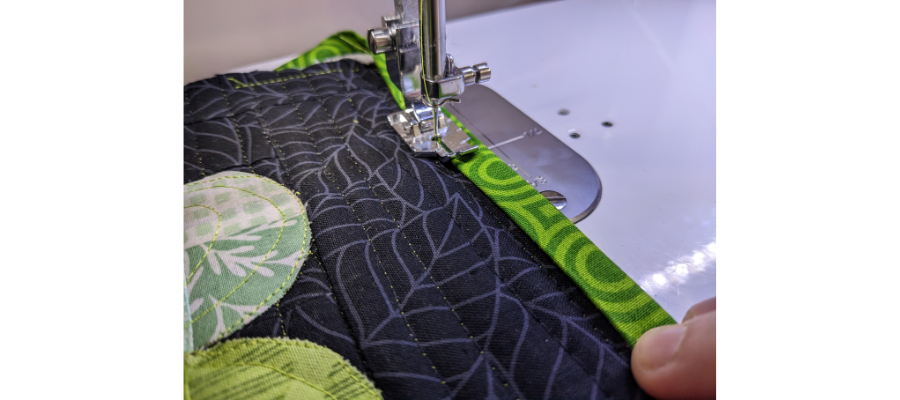
Fold the binding around to the front, just beyond the line of stitching. Pin or clip if you wish. As before, start on a straight edge, not a corner. Use a slightly longer stitch length than usual and sew directly on the binding in a matching thread, around 1/8″ from the edge.
When you get to a corner, fold the corner into a mitre so that both sides are parallel to the quilt edge. Stitch slightly into the mitre, pivot with the needle down, pin or clip and continue with the next side until finished.
Looking for more tutorial and project ideas? Check some other ideas out here.
You’re done – time to choose between an Irish coffee, an Irish cream or a Guinness. You’ve earned it! And remember: we love it when you share your creations! Please post, and tag us on Instagram or Facebook so we can see and celebrate your design! #TrendTexFabrics @trendtexfabrics
